(亲测可用)springboot+springCloud+fegin集成seata分布式事务
springboot+springCloud+fegin+seata
springboot+springCloud+fegin集成seata分布式事务
首先springboot+springCloud+fegin不在讲述,这篇重点讲一下跟seata的集成,今天刚弄好,所以在此写一篇文章记录一下详细过程。
1.官方文档http://seata.io/zh-cn/index.html(可能有人会打不开,不行就翻吧)
首先,下载一个seata-server服务,官方文档有介绍 :sh seata-server.sh(for linux and mac) or cmd seata-server.bat(for windows)
然后解压缩
下载地址:
seata-setver的下载地址
不要下载源码
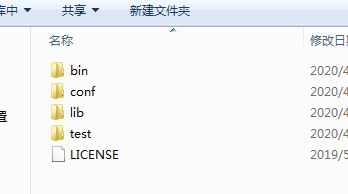
就是这种格式。
解压完成后,先做一下准备工作,建表:
CREATE TABLE IF NOT EXISTS `global_table`
(
    `xid`                       VARCHAR(128) NOT NULL,
    `transaction_id`            BIGINT,
    `status`                    TINYINT      NOT NULL,
    `application_id`            VARCHAR(32),
    `transaction_service_group` VARCHAR(32),
    `transaction_name`          VARCHAR(128),
    `timeout`                   INT,
    `begin_time`                BIGINT,
    `application_data`          VARCHAR(2000),
    `gmt_create`                DATETIME,
    `gmt_modified`              DATETIME,
    PRIMARY KEY (`xid`),
    KEY `idx_gmt_modified_status` (`gmt_modified`, `status`),
    KEY `idx_transaction_id` (`transaction_id`)
) ENGINE = InnoDB
  DEFAULT CHARSET = utf8;
-- the table to store BranchSession data
CREATE TABLE IF NOT EXISTS `branch_table`
(
    `branch_id`         BIGINT       NOT NULL,
    `xid`               VARCHAR(128) NOT NULL,
    `transaction_id`    BIGINT,
    `resource_group_id` VARCHAR(32),
    `resource_id`       VARCHAR(256),
    `branch_type`       VARCHAR(8),
    `status`            TINYINT,
    `client_id`         VARCHAR(64),
    `application_data`  VARCHAR(2000),
    `gmt_create`        DATETIME,
    `gmt_modified`      DATETIME,
    PRIMARY KEY (`branch_id`),
    KEY `idx_xid` (`xid`)
) ENGINE = InnoDB
  DEFAULT CHARSET = utf8;
-- the table to store lock data
CREATE TABLE IF NOT EXISTS `lock_table`
(
    `row_key`        VARCHAR(128) NOT NULL,
    `xid`            VARCHAR(96),
    `transaction_id` BIGINT,
    `branch_id`      BIGINT       NOT NULL,
    `resource_id`    VARCHAR(256),
    `table_name`     VARCHAR(32),
    `pk`             VARCHAR(36),
    `gmt_create`     DATETIME,
    `gmt_modified`   DATETIME,
    PRIMARY KEY (`row_key`),
    KEY `idx_branch_id` (`branch_id`)
) ENGINE = InnoDB
  DEFAULT CHARSET = utf8;
这几个表是seata要用到的表。
接下来就要修改配置文件:
\seata\conf
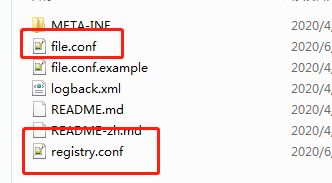
file.cong文件
## transaction log store, only used in seata-server
store {
  ## store mode: file、db
  mode = "db"

  ## file store property
  file {
    ## store location dir
    dir = "sessionStore"
    # branch session size , if exceeded first try compress lockkey, still exceeded throws exceptions
    maxBranchSessionSize = 16384
    # globe session size , if exceeded throws exceptions
    maxGlobalSessionSize = 512
    # file buffer size , if exceeded allocate new buffer
    fileWriteBufferCacheSize = 16384
    # when recover batch read size
    sessionReloadReadSize = 100
    # async, sync
    flushDiskMode = async
  }

  ## database store property
  db {
    ## the implement of javax.sql.DataSource, such as DruidDataSource(druid)/BasicDataSource(dbcp) etc.
    datasource = "druid"
    ## mysql/oracle/postgresql/h2/oceanbase etc.
    dbType = "mysql"
    driverClassName = "com.mysql.jdbc.Driver"
    url = "jdbc:mysql://127.0.0.1:3380/taotao"
    user = "root"
    password = "root"
    minConn = 5
    maxConn = 30
    globalTable = "global_table"
    branchTable = "branch_table"
    lockTable = "lock_table"
    queryLimit = 100
    maxWait = 5000
  }
}
修改了两处
- mode = "file"修改为 mode = “db”,
- url = “jdbc:mysql://127.0.0.1:3380/taotao” 换成你自己的数据库
regiester.conf
regiester.cong文件
registry {
  # file 、nacos 、eureka、redis、zk、consul、etcd3、sofa
  type = "eureka"

  nacos {
    application = "seata-server"
    serverAddr = "localhost"
    namespace = ""
    cluster = "default"
    username = ""
    password = ""
  }
  eureka {
    serviceUrl = "http://localhost:8001/eureka/"
    application = "seata-server"
    weight = "1"
  }
  redis {
    serverAddr = "localhost:6379"
    db = 0
    password = ""
    cluster = "default"
    timeout = 0
  }
  zk {
    cluster = "default"
    serverAddr = "127.0.0.1:2181"
    sessionTimeout = 6000
    connectTimeout = 2000
    username = ""
    password = ""
  }
  consul {
    cluster = "default"
    serverAddr = "127.0.0.1:8500"
  }
  etcd3 {
    cluster = "default"
    serverAddr = "http://localhost:2379"
  }
  sofa {
    serverAddr = "127.0.0.1:9603"
    application = "default"
    region = "DEFAULT_ZONE"
    datacenter = "DefaultDataCenter"
    cluster = "default"
    group = "SEATA_GROUP"
    addressWaitTime = "3000"
  }
  file {
    name = "file.conf"
  }
}

config {
  # file、nacos 、apollo、zk、consul、etcd3
  type = "file"

  nacos {
    serverAddr = "localhost"
    namespace = ""
    group = "SEATA_GROUP"
    username = ""
    password = ""
  }
  consul {
    serverAddr = "127.0.0.1:8500"
  }
  apollo {
    appId = "seata-server"
    apolloMeta = "http://192.168.1.204:8801"
    namespace = "application"
  }
  zk {
    serverAddr = "127.0.0.1:2181"
    sessionTimeout = 6000
    connectTimeout = 2000
    username = ""
    password = ""
  }
  etcd3 {
    serverAddr = "http://localhost:2379"
  }
  file {
    name = "file.conf"
  }
}
修改了三处:
1.type = "file"修改为type = “eureka”
2.eureka 的配置修改为自己的配置
eureka {
serviceUrl = “http://localhost:8001/eureka/”
application = “seata-server”
weight = “1”
}
接下来就可以启动了,启动的话可以找到bin下的seata-server.bat可以直接点击启动,但是如果报错的话可能会出现闪退的情况,所以还是建议com里用call(在找到seata的bin目录,call seata-server.bat) 启动,方便排查问题。
启动成功之后就可以去eureka注册中心查看,

已经有这个服务了。
然后下载官方demo:
下载地址
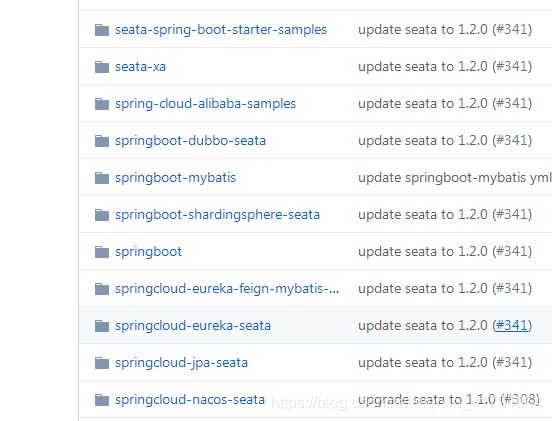
里面有各种模式的demo,大家可以自己选择。
下载下来后,先抄pom,把需要的引用添加到自己的pom里。
然后
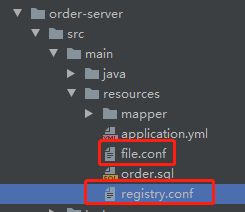
把这两个文件复制到自己的项目对应的位置下(比如说订单模块跟会库存模块)
file文件修改
1.vgroupMapping.my_test_tx_group = “seata-server”
跟你的注册名一样
2. default.grouplist = " 192.168.2.144:8091"
这是你的seata服务
接下来
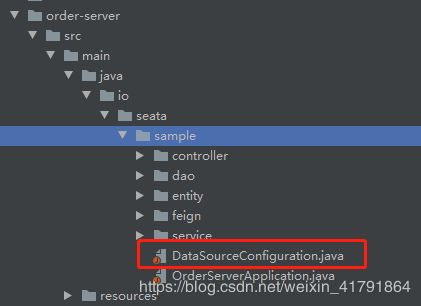
复制到你的项目里。
.getResources(“classpath*:/dao/*.xml”));记得修改一下这个配置路径
然后
@SpringBootApplication(exclude = DataSourceAutoConfiguration.class)
在@SpringBootApplication加上这个
然后yml文件再按照他的提供的在结合自己的再修改修改。
对应的方法上再加上
@GlobalTransactional(name = “/test/insert-insert”,rollbackFor = Exception.class)
客户端跟服务端都这么配,
可以了