vue-router的参数的传递、懒加载以及嵌套路由的使用
文章目录
- 1.安装一个带路由配置的项目
- 2.配置一个起步路由
- 3.修改路由配置的默认值
- 4. 了解router-link的属性
- 5. 手写代码模拟实现路由跳转
- 6. 动态路由
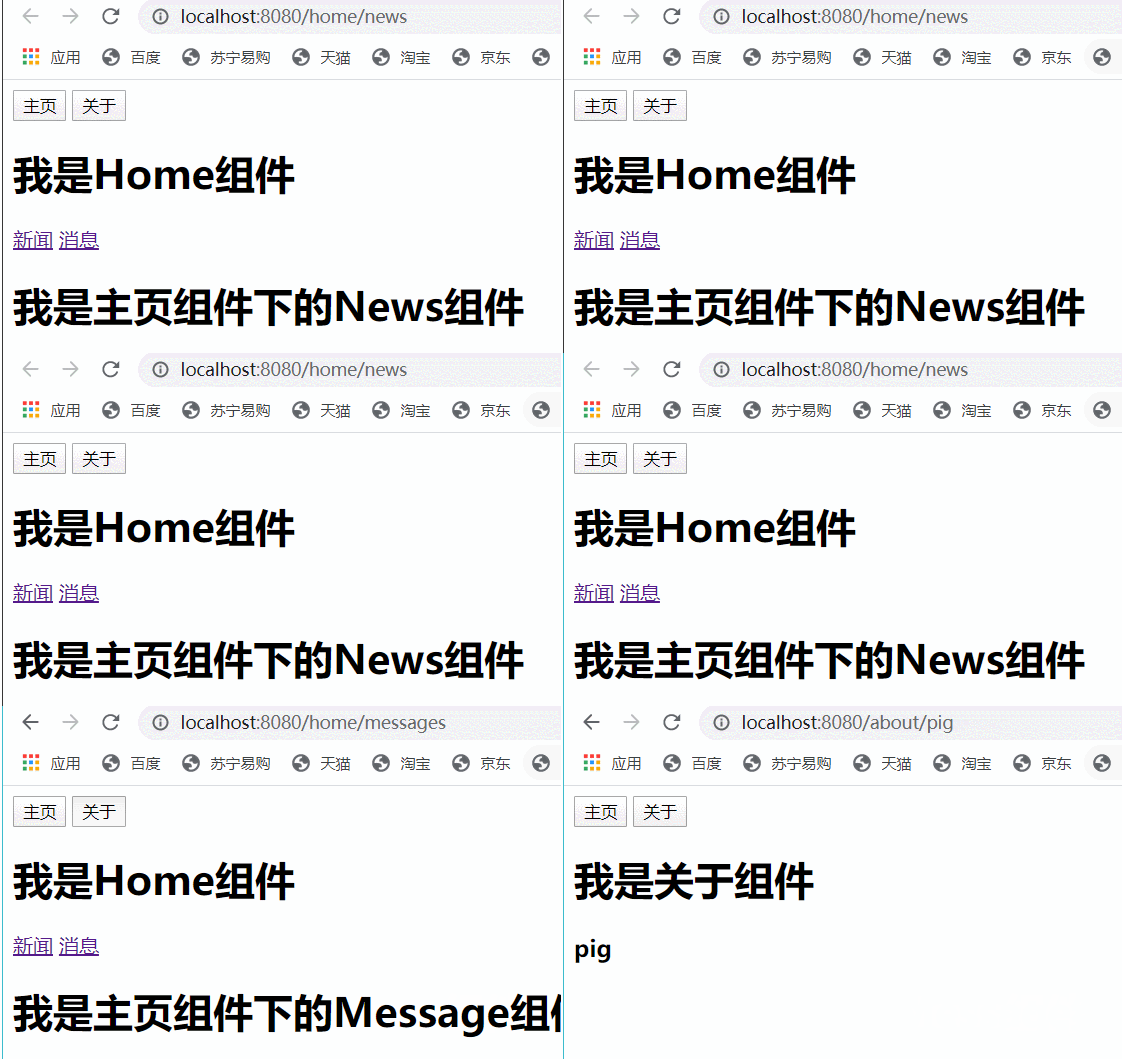
- 6.1 路由参数传递(params方式)
- 6.2 路由参数传递(query方式)
- 7.懒加载(重点)
- 8. 嵌套路由
1.安装一个带路由配置的项目
2.配置一个起步路由
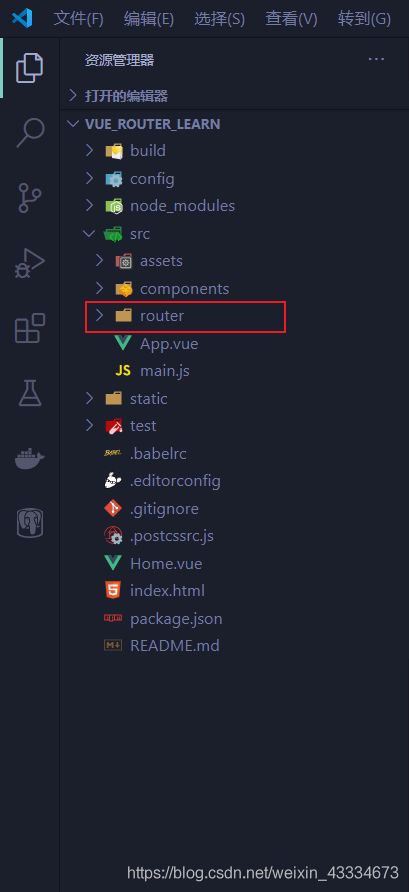
我们打开router文件夹下的index.js文件,关于路由的配置都在该文件进行配置。
a.为了完全弄懂该文件代码,我们先清空文件内容,再手写一个配置文件:
b.由于我们需要使用路由那么先在文件导入路由插件:
import VueRouter from "vue-router";
c.导入之后,插件是需要使用的,而vue提供了使用插件的方法,因此也需要导入Vue:
import Vue from "vue";

Vue.use(VueRouter);
d.使用插件创建router实例:
const router = new VueRouter({
  routes: routes
});
在创建实例中传入一些配置的options,其中routes是配置了路由映射的数组。
e.由于router实例需要用来配置在Vue实例中,因此需要导出router实例:
export default router;
f.为了实现路由跳转,我们须在components文件夹中创建两个组件:

组件内容:
//About.vue

<template>
  <h1>我是关于组件</h1>
</template>

<script>
export default {};
</script>

<style>
h1 {
  color: yellow;
}
</style>

//Home.vue
<template>
  <h1>我是Home组件</h1>
</template>

<script>
export default {};
</script>

<style>
h1 {
  color: red;
}
</style>
g.在路由配置文件中配置映射关系:
import Home from "../components/Home";
import About from "../components/About";

const routes = [
  {
    path: "/home",
    component: Home
  },
  {
    path: "/about",
    component: About
  }
];
h.路由已经配置好了,下面使用组件:
在App.vue中使用路由:
<template>
  <div id="app">
    <router-link to="/home" tag="button">主页router-link>
    <router-link to="/about" tag="button">关于router-link>
    <router-view />
  div>
template>

<script>
export default {
  name: "App",
};
script>
解释:
- < router-link > 该标签一个vue-router中已经内置的组件,默认它会渲染成一个< a >标签
- < router-view >该标签会根据当前路径,动态渲染出不同的组件,在路由切换时,切换的是它挂载的组件,其它内容不会发生改变
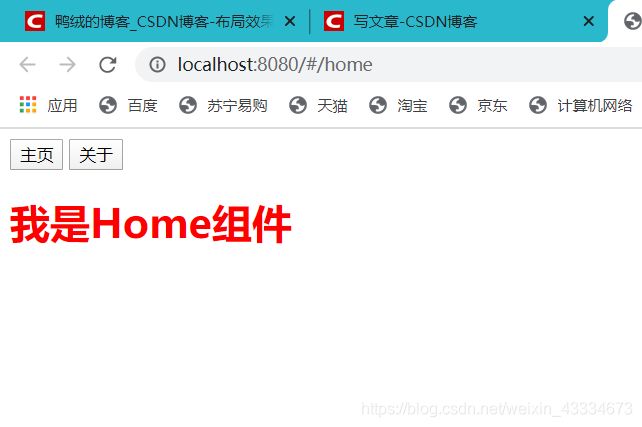
i.运行项目测试路由跳转:
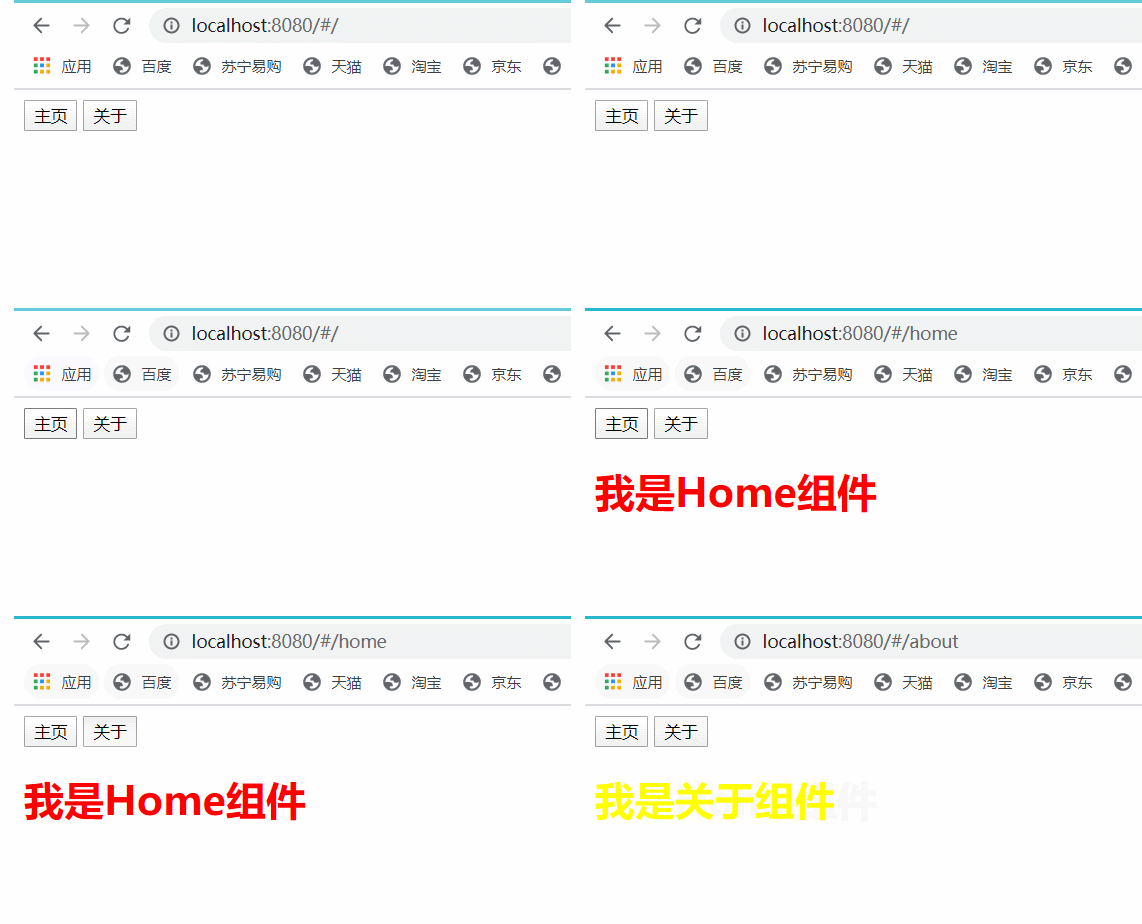
到这里,最简单的路由已经实现了。
简单小结:
- 创建路由组件
- 配置路由映射:组件与路径映射的关系
- 使用路由:< router-link >和< router-view >
3.修改路由配置的默认值
a.设置重定向

我们看看上面的图片,在我们没有点击按钮前,页面没有显示任何一个组件的内容,这显然是不合理的。我们设置路由重定向让它自动显示主页内容。
修改路由配置文件:
const routes = [
  {
    path: "",
    redirect: "/home"
  },
  {
    path: "/home",
    component: Home
  },
  {
    path: "/about",
    component: About
  }
];
这样,当我们打开http://localhost:8080/时会自动显示页面界面:
b.修改为history模式
在上面的实现中,跳转路由时,你看看请求的URL:
http://localhost:8080/#/home
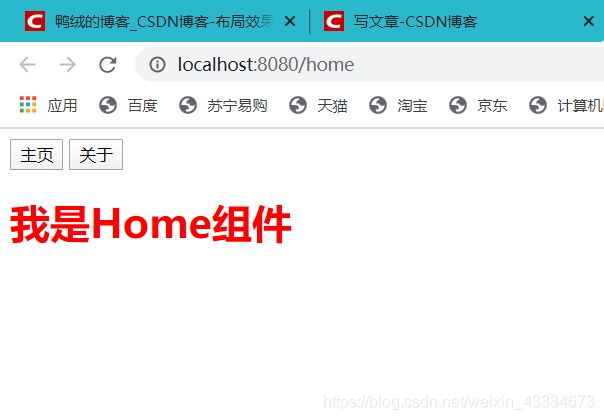
默认采用了哈希值模式。而我们更想看到的是这样的:
http://localhost:8080/home
想要实现这样的效果,需要在创建路由实例中配置options对象:
const router = new VueRouter({
  // VueRouter的options
  routes: routes,
  mode: "history"
});
设置模式为HTML5的history模式。
4. 了解router-link的属性
- to:用于指定跳转的路径。
- tag:可以指定router-link之后渲染成什么标签,比如上面实例渲染成了一个按钮。
- replace: replace不会留下history记录,即在浏览器按返回键不能返回上一页。
- linkActiveClass: 当router-link对应的路由匹配成功时,会自动给当前元素设置一个router-link-active的class,在创建路由实例中可以使用active-class属性来修改这个默认类名。
下面看看router-link-active:

看上面动图右边的elements,可以看到,当选中哪个路由,哪个路由标签就会被添加上router-link-active类。
我们可以利用这个类来设置一些css。比如,选中哪个标签,哪个标签就显示出不一样的样式:
在用到router-link标签的App.vue的css样式添加router-link-active样式:
<template>
  <div id="app">
    <router-link to="/home" tag="button">主页</router-link>
    <router-link to="/about" tag="button">关于</router-link>
    <router-view />
  </div>
</template>

<script>
export default {
  name: "App",
};
</script>

<style>
.router-link-active {
  background-color: blueviolet;
  outline: none;
}
</style>
5. 手写代码模拟实现路由跳转
<template>
  <div id="app">
    <button @click="homeClick">首页</button>
    <button @click="aboutClick">关于</button>
    <router-view />
  </div>
</template>

<script>
export default {
  name: "App",
  methods: {
    homeClick() {
      this.$router.push("/home");
    },
    aboutClick() {
      this.$router.push("/about");
    },
  },
};
</script>

<style>
</style>
在函数中使用$router来实现路由跳转。
6. 动态路由
在某些情况下,一个页面的path路径可能是不确定的,比如我们进入用户界面时,希望是如下的路径:
- /user/aaa或/user/bbb
- 除了有前面的user之外,后面还跟上了用户的id
- 这种path和Component的匹配关系,我们称之为动态路由(也是路由传递数据的一种方式)
- 修改路由的映射关系(用About组件举例):
const routes = [
  {
    path: "",
    redirect: "/home"
  },
  {
    path: "/home",
    component: Home
  },
  {
    path: "/about/:id",
    component: About
  }
];
不确定的路径使用“:”。“:”号后面的名称是随意的,但是这个名称也可有用的,下面会讲到。
- 写死的id:
<template>
  <div id="app">
    <router-link to="/home" tag="button">主页router-link>
    <router-link to="/about/me" tag="button">关于router-link>
    <router-view />
  div>
template>

<script>
export default {
  name: "App",
};
script>

<style>
style>
在about的router-link中,后面的id设置成me。则每次跳转都是me,那这样也就不是动态的了。
3. 动态获取id:
<template>
  <div id="app">
    <router-link to="/home" tag="button">主页router-link>
    <router-link v-bind:to="'/about/'+userid" tag="button">关于router-link>
    <router-view />
  div>
template>

<script>
export default {
  name: "App",
  data: function () {
    return {
      userid: "pig",
    };
  },
};
script>

<style>
style>
我们使用v-bind来动态绑定to属性,使用字符串拼接出跳转路由,userid是在js中定义的数据,我在这里的userid还是写死了,实际上我们这里的id通常是从浏览器cookie中读取的数据,cookie中的id是什么,则userid就被赋什么值,这样在router-link就可以动态的跳转到不同的路径了。
6.1 路由参数传递(params方式)
params类型:
- 配置路由格式:/router/:id(任意变量名)
- 传递的方式:在path后面跟上对应的值。
- 传递后形成的路径:/router/123或/router/abc
这里使用 < router-link v-bind:to="’/about/’+userid" tag=“button”> 实现路由跳转,实际就已经通过params向About.vue传递了userid,我们只需在About.vue中获取即可。
使用$route来获取参数:
<template>
  <div>
    <h1>我是关于组件h1>
    <h3>{{userid}}h3>
  div>
template>

<script>
export default {
  data: function () {
    return {
      userid: this.$route.params.id,
    };
  },
};
script>

<style>
h1 {
  color: yellow;
}
style>
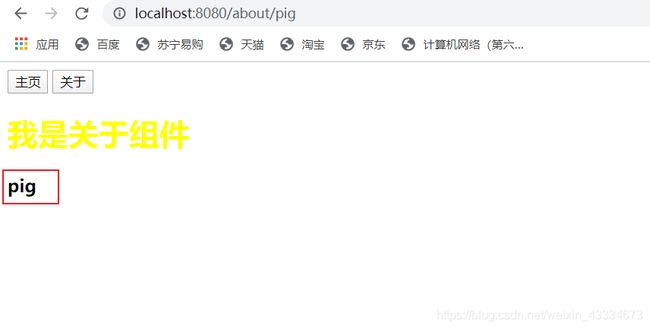
我们通过$route获得了App.vue中router-link跳转路由中的参数。
注意:$router与$route是两个不同的东西
- $router是我们在router文件夹下的index.js文件中的创建的router实例。
- $route是当前处于活跃状态的router(即$route等于当前被选中的router-link)
为什么这里使用的是id呢?这里是根据你在配置路由文件的变量名决定的:
  {
    path: "/about/:id",
    component: About
  }
我们这里配置为id,所以获取时,也需用这个变量名获取。
6.2 路由参数传递(query方式)
query类型:
- 配置路由格式:/router,即最原始的配置
- 传递的方式:对象中使用query的key作为传递方式
- 传递后的路径:/router?id=123或/router?id=abc
为了方便起见,我这里就直接修改about组件的路由:
<template>
  <div id="app">
    <router-link to="/home" tag="button">主页</router-link>
    <router-link v-bind:to="{path:'/about',query:{name:'baby',age:18}}" tag="button">关于</router-link>
    <router-view />
  </div>
</template>

<script>
export default {
  name: "App",
};
</script>

<style>
</style>
仔细看看跳转about的路由。
同时在路由映射文件中将about映射改为最原始格式:
 {
    path: "/about",
    component: About
  }
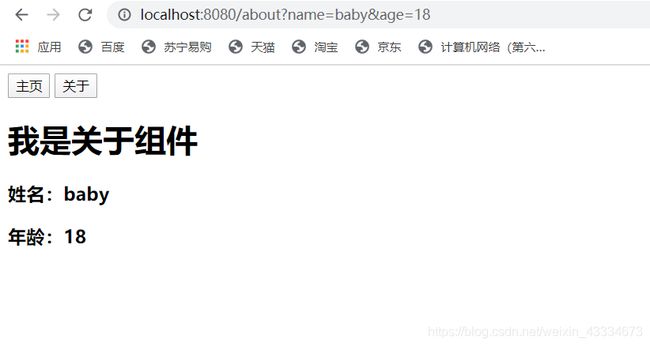
修改后,运行项目:

那我们如何在About.vue获取路由中的参数呢?
同样是利用$route来获取:
<template>
  <div>
    <h1>我是关于组件</h1>
    <h3>姓名:{{name}}</h3>
    <h3>年龄:{{age}}</h3>
  </div>
</template>

<script>
export default {
  data: function () {
    return {
      name: this.$route.query.name,
      age: this.$route.query.age,
    };
  },
};
</script>

<style>
</style>
7.懒加载(重点)
为什么需要路由懒加载:
当打包构建应用时,JS包会变得非常大,如果我们一次就请求那么大的JS包可能会造成短暂的页面空白,这对用户体验非常不好。
如果我们能把不同路由下对应的组件分割成不同的代码块,然后当路由被访问时才加载对应的组件,这样就更加高效。
我们利用上面的实例进行打包:
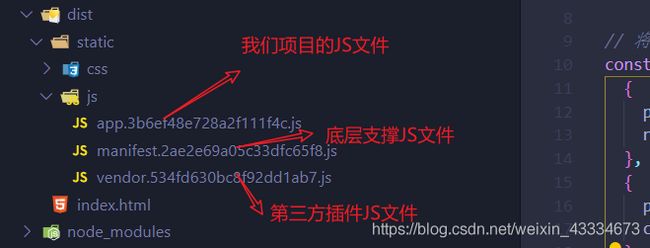
我们实例中有两个组件都被打包进一个app.js中了,假设一个项目有非常多的组件,那么这个js文件将会非常大。
下面我们就使用路由懒加载:
修改路由配置文件
import VueRouter from "vue-router";
import Vue from "vue";

const Home = () => import("../components/Home");
const About = () => import("../components/About");
// 1.使用Vue.use()来是使用vue-router插件
Vue.use(VueRouter);

// 将router映射关系写在routes数组里面
const routes = [
  {
    path: "",
    redirect: "/home"
  },
  {
    path: "/home",
    component: Home
  },
  {
    path: "/about/:id",
    component: About
  }
];
// 2.创建VueRouter对象
const router = new VueRouter({
  // VueRouter的options
  routes: routes,
  mode: "history"
});

// 3.应VueRouter需要传入Vue实例中使用,所以这里需要导出VueRouter实例
export default router;
其实就是将import Home form"…“改用const Home = () => import(”…/components/Home");加载组件,这样就实现了路由懒加载。
8. 嵌套路由
嵌套路由是一个常见的功能:
- 比如在home页面中,我们希望通过/home/news和/home/message访问一些内容。
- 一个路径映射一个组件,访问这两个路径也会分别渲染两个组件。
实现嵌套路由有两个步骤:
- 创建对应的子组件,并在路由映射中配置对应的子路由。
- 在组件内部使用< router-view >标签。
步骤一:现在在已有的主页组件下,创建homeNews和homeMessage组件,用来实现嵌套路由:
homeNew组件:
<template>
  <h1>我是主页组件下的News组件</h1>
</template>

<script>
export default {};
</script>

<style>
</style>
homeMessage组件:
<template>
  <h1>我是主页组件下的Message组件</h1>
</template>

<script>
export default {};
</script>

<style>
</style>
步骤二:配置路由映射关系
const HomeNews = () => import("../components/homeNews");
const HomeMessages = () => import("../components/homeMessage");

{
    path: "/home",
    component: Home,
    children: [
      {
        path: "",
        redirect: "news"
      },
      {
        path: "news", //子组件路径前面不能加“/”
        component: HomeNews
      },
      {
        path: "messages", //子组件路径前面不能加“/”
        component: HomeMessages
      }
    ]
  },
由于是在主页组件实现嵌套路由,那么就在home的映射中,利用children属性来实现路由嵌套。设置默认重定向到news组件。
步骤三:在主页组件的模板上利用子组件
<template>
  <div>
    <h1>我是Home组件h1>
    <router-link to="/home/news">新闻router-link>
    <router-link to="/home/messages">消息router-link>
    <router-view>router-view>
  div>
template>

<script>
export default {};
script>

<style>
h1 {
  color: red;
}
style>
