css实现多种边框及多边形发光效果练习
.shadow {
    width: 200px;
    height: 40px;
    border-radius: 20px;
    background-color: #ffa500;
    box-shadow: 0 5px 0 0 #ff4500;
  }
二、边框四角特殊效果
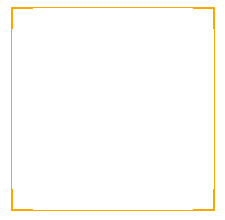
方法一:利用伪元素:before,:after
/*less样式*/
.corners {
    position: relative;
    width: 200px;
    height: 200px;
    border: 2px solid #ffa500;
    &:before{
      content: '';
      position: absolute;
      bottom: -1px;
      top: -1px;
      left: 20px;
      right: 20px;
      border-bottom: 1px solid #fff;
      border-top: 1px solid #fff;
    }
    &:after{
      content: '';
      position: absolute;
      left: -1px;
      right: -1px;
      top: 20px;
      bottom:20px;
      border-left: 1px solid #fff;
      border-right: 1px solid #fff;
    }
  }
如果要在div里写文字,添加适当的padding,:before、:after中的border-color改成对应的背景色;通过改变left、right、top、bottom以及border-width可以分别实现以下效果:


方法二:利用线性渐变以及背景定位

.border {
    width: 200px;
    height: 200px;
    border: 1px solid #ffa500;
    background: linear-gradient(#ffa500, #ffa500) left top,
    linear-gradient(#ffa500, #ffa500) left top,
    linear-gradient(#ffa500, #ffa500) right top,
    linear-gradient(#ffa500, #ffa500) right top,
    linear-gradient(#ffa500, #ffa500) left bottom,
    linear-gradient(#ffa500, #ffa500) left bottom,
    linear-gradient(#ffa500, #ffa500) right bottom,
    linear-gradient(#ffa500, #ffa500) right bottom;
    background-repeat: no-repeat;
    background-size: 1px 20px, 20px 1px;
  }
知识点:
1、linear-gradient() 函数用于创建一个线性渐变的 “图像”
linear-gradient(angle, color-stop1, color-stop2, …):
取值如下:
angle:用角度值制定渐变的方向或顺时针角度
to left:从右到左,相当于:270deg
to right:从右到左,相当于:90deg
to top:从右到左,相当于:0deg
to bottom:从右到左,相当于:180deg,这是默认值,可不写
color-stop:用于制定渐变的起止颜色
color:指定颜色
length:用长度值制定起止色位置,不允许负值
percentage:用百分比制定起止位置
background-image: linear-gradient(135deg,#fff 30%, #0ae 31%,#0ae 66%, #fff 80%)
background-image: linear-gradient(顺时针角度, 开始颜色 结束位置, 中间颜色1 开始位置,中间颜色1 结束位置,结束颜色 开始位置)
如果数字不是连续的,他们之间存在数值差,那么数值差的之间的两种颜色默认就是渐变效果。如果最后一个颜色没有规定位置,那么渐变结束位置就是100%。
2、background:设置多个背景图像(并指定他们的位置)
background:bg-color bg-image position/bg-size bg-repeat bg-origin bg-clip bg-attachment initial|inherit;
background 的简写属性不是按照规定的顺序来书写的,可以根据自己的喜好自定义属性的书写顺序。
background-position:设置背景图像的起始位置。
取值:

background-size:设置背景图片大小;
background-size: 1px 20px;第一个值指定图片的宽度,第二个值指定图片的高度;
background-size: 1px 20px, 20px 1px;逗号分隔的多个值:设置多重背景;
3、多背景写法
多个背景图片用逗号隔开,每个背景图片都是以层的形式显示,越靠前的图片层级越高。
每一个背景图片的写法都和以前单个背景图片的写法是一样的。可以指定图片的平铺方式,位置等等。
background-size个数如果比background少,那么重复background-size的设置。
其他效果展示:
1、四角颜色不一样
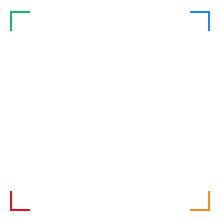
.border{
    width: 200px;
    height: 200px;
    background: linear-gradient(#07c160, #07c160) left top,
    linear-gradient(#07c160, #07c160) left top,
    linear-gradient(#1989fa, #1989fa) right top,
    linear-gradient(#1989fa, #1989fa) right top,
    linear-gradient(#ee0a24, #ee0a24) left bottom,
    linear-gradient(#ee0a24, #ee0a24) left bottom,
    linear-gradient(#ff8917, #ff8917) right bottom,
    linear-gradient(#ff8917, #ff8917) right bottom;
    background-repeat: no-repeat;
    background-size: 2px 20px, 20px 2px;
  }
.cut {
   width: 200px;
   height: 200px;
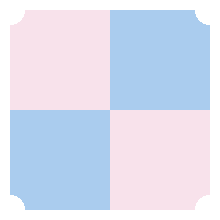
   background: linear-gradient(135deg, transparent 15px, #F8E2EB 0) top left,
   linear-gradient(-135deg, transparent 15px, #ace 0) top right,
   linear-gradient(-45deg, transparent 15px, #F8E2EB 0) bottom right,
   linear-gradient(45deg, transparent 15px, #ace 0) bottom left;
   background-size: 50% 50%; /*每个块在水平和垂直方向上都占元素尺寸的50%*/
   background-repeat: no-repeat;
}
.round {
   width: 200px;
   height: 200px;
   background: radial-gradient(circle at top left, transparent 15px, #F8E2EB 0) top left,
   radial-gradient(circle at top right, transparent 15px, #ace 0) top right,
   radial-gradient(circle at bottom right, transparent 15px, #F8E2EB 0) bottom right,
   radial-gradient(circle at bottom left, transparent 15px, #ace 0) bottom left;
   background-size: 50% 50%;
   background-repeat: no-repeat;
}
.s-corner {
   width: 200px;
   height: 200px;
   box-shadow: 0px 0px 10px #00bfff;
   background: linear-gradient(#00bfff,#00bfff) left top,
   linear-gradient(#00bfff,#00bfff) left bottom,
   linear-gradient(#00bfff,#00bfff) right top,
   linear-gradient(#00bfff,#00bfff) right bottom;
   background-size: 4px 4px;
   background-repeat: no-repeat;
}
三、多重边框效果
通过box-shadow可实现多重边框效果。
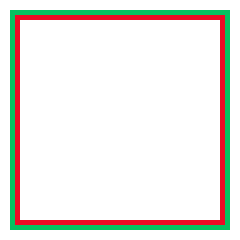
1、box-shadow
.box{
   width: 200px;
   height: 200px;
   box-shadow: 0px 0px 0px 5px #ee0a24, 0px 0px 0px 10px #07c160;
}
2、outline
.box{
   width: 200px;
   height: 200px;
   border: 5px solid #ee0a24;
   outline: 5px solid #07c160;
}
此种方式还可设置为虚线等样式,兼容性好,不过只能实现双层边框,而且outline没有圆角效果。
四、内发光效果
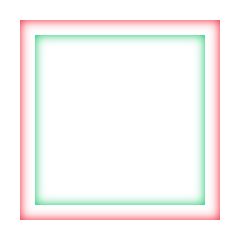
.light {
   width: 200px;
   height: 200px;
   box-shadow: 0px 0px 10px #ee0a24 inset, 0px 0px 0px 15px #fff inset, 0px 0px 10px 15px #07c160 inset;
}
.six {
   width: 200px;
   height: 70px;
   position: relative;
   border-radius: 1px;
   filter: drop-shadow(0 0 6px #07c160);/*滤镜投影,实现阴影效果*/
   background: #00bfff;
}
.six:before {
   content: '';
   position: absolute;
   width: 30px;
   height: 63px;
   border-radius: 2px;
   transform-origin: top right; /*旋转原点*/
   transform: rotate(-25deg);
   left: -30px; /*跟宽度一致*/
   top: 0;
   background: #00bfff;
}
.six:after {
   content: '';
   position: absolute;
   width: 30px;
   height: 63px;
   border-radius: 2px;
   transform-origin: left bottom;
   transform: rotate(-25deg);
   right: -30px;
   bottom: 0;
   background: #00bfff;
}
如果要添加文字,需要在内部添加div或者span,设置position:relative;z-index:10;
因为这个形状不是标准的,所以伪元素的宽、高、旋转角度得重新计算,无法直接套用。


