Angular 4入门教程系列:8:Tour Of Heroes之前后端服务
![]()
这篇文章我们将会重点学习一下Angular的HttpModule和In-Memory Web API的使用方法。
学习时间
大概5-10分钟。
事前准备
需要事前安装模块angular-in-memory-web-api才能保证此部分学习能够正常进行。因为这个系列中我们使用的是node的官方镜像,这个过程中我们使用了yarn进行处理包的依赖,所以接下来的部分我们将继续使用yarn进行安装。
方式1:
yarn add angular-in-memory-web-api
这样将会自动进行安装并把信息保存到package.json中
/workspace/HelloAngular # yarn add angular-in-memory-web-api
yarn add v1.2.0
[1/4] Resolving packages...
[2/4] Fetching packages...
info fsevents@1.1.2: The platform "linux" is incompatible with this module.
info "[email protected]" is an optional dependency and failed compatibility check. Excluding it from installation.
[3/4] Linking dependencies...
[4/4] Building fresh packages...
success Saved 1 new dependency.
└─ angular-in-memory-web-api@0.3.1
Done in 51.71s.
/workspace/HelloAngular #
方式2:
修改package.json,然后使用yarn install
方式3:
使用npm install方式的开发者可以使用npm install angular-in-memory-web-api,并根据情况决定是否-g安装
注意:使用官方教程的时候angular-in-memory-web-api的最新版本0.5.1似乎有问题,使用0.3.1没有任何问题。没有细究具体原因。不然有可能因为其无法正常动作导致数据取不到,最终页面提示没有slice属性,其原因是因为没有取到数据而已。
InMemoryDataService
到目前为止,我们使用的是一个Hero的全局数组来模拟数据,接下来我们使用InMemoryDbService来进行模拟,所做的内容也非常类似,我们在createDb中创建一个数组,而这些数组保存的普通Json数据的格式,而非直接的对象。
/workspace/HelloAngular/src/app # cat in-memory-data.service.ts
import { InMemoryDbService } from 'angular-in-memory-web-api';
export class InMemoryDataService implements InMemoryDbService {
  createDb() {
    const heroes = [
      { id: 0,  name: 'Zero' },
      { id: 11, name: 'Mr. Nice' },
      { id: 12, name: 'Narco' },
      { id: 13, name: 'Bombasto' },
      { id: 14, name: 'Celeritas' },
      { id: 15, name: 'Magneta' },
      { id: 16, name: 'RubberMan' },
      { id: 17, name: 'Dynama' },
      { id: 18, name: 'Dr IQ' },
      { id: 19, name: 'Magma' },
      { id: 20, name: 'Tornado' }
    ];
    return {heroes};
  }
}
/workspace/HelloAngular/src/app #
使用方法:
注意此处的使用方式,在getHeroes中使用http模块的功能,虽然是模拟,但是跟实际的前后端开发,通过接口取到后端提供的json数据的实际方式,同前面的例子相比已经发生了天渊之别。
/workspace/HelloAngular/src/app # cat hero.service.ts
import { Injectable } from '@angular/core';
import { Http       } from '@angular/http';

import 'rxjs/add/operator/toPromise';
import { Hero } from './hero';

@Injectable()
export class HeroService {
  private heroesUrl = 'api/heroes';

  constructor(private http: Http) {}

  getHeroes(): Promise {
    return this.http.get(this.heroesUrl)
             .toPromise()
             .then(response => response.json().data as Hero[])
             .catch(this.handleError);
  }

  private handleError(error: any): Promise {
    console.error('An error occurred', error); // for demo purposes only
    return Promise.reject(error.message || error);
  }

  getHero(id: number): Promise {
    return this.getHeroes()
             .then(heroes => heroes.find(hero => hero.id === id));
  }
}
/workspace/HelloAngular/src/app #
引入根模块
/workspace/HelloAngular/src/app # cat app.module.ts
import { BrowserModule } from '@angular/platform-browser';
import { NgModule } from '@angular/core';
import { FormsModule } from '@angular/forms';
import { HttpModule }  from '@angular/http';
import { InMemoryWebApiModule } from 'angular-in-memory-web-api';
import { InMemoryDataService }  from './in-memory-data.service';

import { AppComponent } from './app.component';
import { HeroDetailComponent } from './hero-detail.component'
import { HeroService } from './hero.service';
import { HeroesComponent } from './heroes.component';
import { DashboardComponent } from './dashboard.component';
import { AppRoutingModule } from './app-routing.module';


@NgModule({
  declarations: [
    AppComponent,
    HeroDetailComponent,
    HeroesComponent,
    DashboardComponent
  ],
  imports: [
    BrowserModule,
    FormsModule,
    HttpModule,
    InMemoryWebApiModule.forRoot(InMemoryDataService),
    AppRoutingModule
  ],
  providers: [HeroService],
  bootstrap: [AppComponent]
})

export class AppModule { }
/workspace/HelloAngular/src/app #
Http get
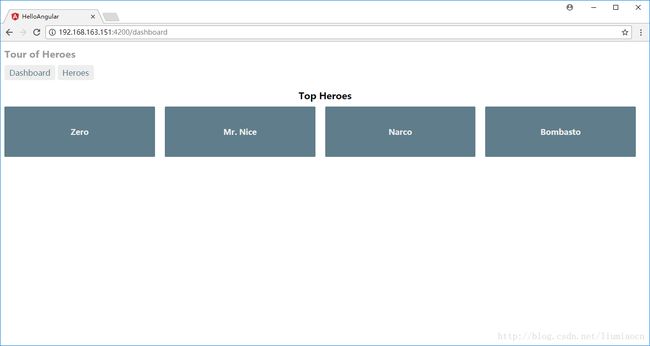
实际上我们使用HTTP的get来取到并显示信息,具体页面信息如下:

Http put
现在的页面修改了信息之后,如果按back的按钮则不能像像之前那样能够得到保存,因为之前保存在全局数组里面,自然可以。而是用http的put方法则可以实现保存的功能,简单来说,需要做如下几件事情:
- * 在hero-detail的模板中添加一个保存的按钮 *
- * 在添加的按钮中调用 hero的service的update方法 *
- * 在update方法中使用http模块的put进行信息的保存 *
hero-detail.component.ts
/workspace/HelloAngular/src/app # cat hero-detail.component.ts
import { Component, Input } from '@angular/core';
import { OnInit } from '@angular/core';
import { ActivatedRoute, ParamMap } from '@angular/router';
import { Location } from '@angular/common';
import 'rxjs/add/operator/switchMap';
import { Hero } from './hero';
import { HeroService } from './hero.service';
@Component({
selector: 'hero-detail',
template: `
"hero">
<h2>{{hero.name}} details!h2>
<div><label>id: label>{{hero.id}}div>
<div>
<label>name: label>
<input [(ngModel)]="hero.name" placeholder="name"/>
div>
<button (click)="goBack()">Backbutton>
<button (click)="save()">Savebutton>
div>
`
})
export class HeroDetailComponent implements OnInit {
@Input() hero: Hero;
constructor(
private heroService: HeroService,
private route: ActivatedRoute,
private location: Location
) {
}
ngOnInit(): void {
this.route.paramMap
.switchMap((params: ParamMap) => this.heroService.getHero(+params.get('id')))
.subscribe(hero => this.hero = hero);
}
goBack(): void {
this.location.back();
}
save(): void {
this.heroService.update(this.hero)
.then(() => this.goBack());
}
}
/workspace/HelloAngular/src/app #
hero.service.ts
/workspace/HelloAngular/src/app # cat hero.service.ts
import { Injectable } from '@angular/core';
import { Http } from '@angular/http';
import { Headers } from '@angular/http';
import 'rxjs/add/operator/toPromise';
import { Hero } from './hero';
@Injectable()
export class HeroService {
private heroesUrl = 'api/heroes';
private headers = new Headers({'Content-Type': 'application/json'});
constructor(private http: Http) {}
getHeroes(): Promise {
return this.http.get(this.heroesUrl)
.toPromise()
.then(response => response.json().data as Hero[])
.catch(this.handleError);
}
private handleError(error: any): Promise {
console.error('An error occurred', error); // for demo purposes only
return Promise.reject(error.message || error);
}
getHero(id: number): Promise {
return this.getHeroes()
.then(heroes => heroes.find(hero => hero.id === id));
}
update(hero: Hero): Promise {
const url = `${this.heroesUrl}/${hero.id}`;
return this.http
.put(url, JSON.stringify(hero), {headers: this.headers})
.toPromise()
.then(() => hero)
.catch(this.handleError);
}
}
/workspace/HelloAngular/src/app #
结果确认
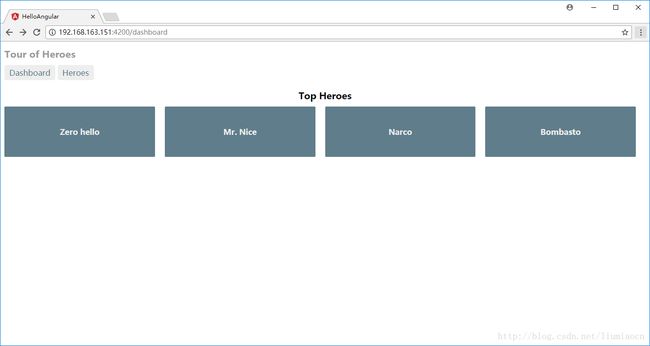
修改英雄信息:

点击save按钮后,同样是goBack,但是信息被保存了下来

Http post
使用http post以便进行添加Hero,需要做如下几件事情:
- * 在hero模板中添加用于添加hero的按钮 *
- * 在添加的按钮中调用 hero的service的create方法 *
- * 在create方法中使用http模块的post进行信息的添加 *
heroes.component.html
/workspace/HelloAngular/src/app # cat heroes.component.html
<h1>{{title}}h1>
<div>
<label>Hero name:label> <input #heroName />
<button (click)="add(heroName.value); heroName.value=''">
Add
button>
div>
<h2>My Heroesh2>
<ul class="heroes">
<li *ngFor="let hero of heroes" [class.selected]="hero === selectedHero" (click)="onSelect(hero)">
<span class="badge">{{hero.id}}span> {{hero.name}}
li>
ul>
<div *ngIf="selectedHero">
<h2>
{{selectedHero.name | uppercase}} is my hero
h2>
<button (click)="gotoDetail()">View Detailsbutton>
div>
/workspace/HelloAngular/src/app #
heroes.component.ts
/workspace/HelloAngular/src/app # cat heroes.component.ts
import { Component } from '@angular/core';
import { OnInit } from '@angular/core';
import { Router } from '@angular/router';
import { Hero } from './hero';
import { HeroService } from './hero.service';
@Component({
selector: 'my-heroes',
templateUrl: './heroes.component.html',
styleUrls: ['./heroes.component.css'],
providers: []
})
export class HeroesComponent implements OnInit {
title = 'Tour of Heroes';
selectedHero: Hero;
heroes: Hero[];
onSelect(hero: Hero): void {
this.selectedHero = hero;
}
ngOnInit(): void{
this.heroService.getHeroes().then(heroes => this.heroes = heroes);
}
constructor(
private router: Router,
private heroService: HeroService) {
}
gotoDetail(): void {
this.router.navigate(['/detail', this.selectedHero.id]);
}
add(name: string): void {
name = name.trim();
if (!name) { return; }
this.heroService.create(name)
.then(hero => {
this.heroes.push(hero);
this.selectedHero = null;
});
}
}
/workspace/HelloAngular/src/app #
hero.service.ts
/workspace/HelloAngular/src/app # cat hero.service.ts
import { Injectable } from '@angular/core';
import { Http } from '@angular/http';
import { Headers } from '@angular/http';
import 'rxjs/add/operator/toPromise';
import { Hero } from './hero';
@Injectable()
export class HeroService {
private heroesUrl = 'api/heroes';
private headers = new Headers({'Content-Type': 'application/json'});
constructor(private http: Http) {}
getHeroes(): Promise {
return this.http.get(this.heroesUrl)
.toPromise()
.then(response => response.json().data as Hero[])
.catch(this.handleError);
}
private handleError(error: any): Promise {
console.error('An error occurred', error); // for demo purposes only
return Promise.reject(error.message || error);
}
getHero(id: number): Promise {
return this.getHeroes()
.then(heroes => heroes.find(hero => hero.id === id));
}
update(hero: Hero): Promise {
const url = `${this.heroesUrl}/${hero.id}`;
return this.http
.put(url, JSON.stringify(hero), {headers: this.headers})
.toPromise()
.then(() => hero)
.catch(this.handleError);
}
create(name: string): Promise<Hero> {
return this.http
.post(this.heroesUrl, JSON.stringify({name: name}), {headers: this.headers})
.toPromise()
.then(res => res.json().data as Hero)
.catch(this.handleError);
}
}
/workspace/HelloAngular/src/app #
结果确认
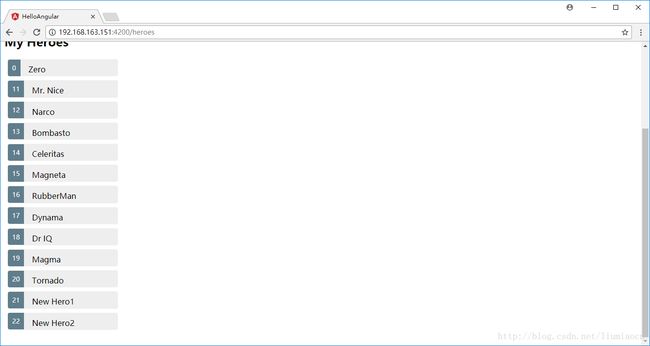
用新加的add按钮和输入框添加两个英雄New Hero1和New Hero2

可以确认已经实时的添加到列表中了

Http delete
使用http delete以便进行删除Hero,需要做如下几件事情:
- * 在heroes模板中添加用于删除hero的按钮 *
- * 在添加的按钮中调用 hero的service的delete方法 *
- * 在delete方法中使用http模块的delete进行信息的删除*
heroes.component.html
/workspace/HelloAngular/src/app # cat heroes.component.html
<h1>{{title}}h1>
<div>
<label>Hero name:label> <input #heroName />
<button (click)="add(heroName.value); heroName.value=''">
Add
button>
div>
<h2>My Heroesh2>
<ul class="heroes">
<li *ngFor="let hero of heroes" [class.selected]="hero === selectedHero" (click)="onSelect(hero)">
<span class="badge">{{hero.id}}span> {{hero.name}}
<button class="delete"
(click)="delete(hero); $event.stopPropagation()">xbutton>
li>
ul>
<div *ngIf="selectedHero">
<h2>
{{selectedHero.name | uppercase}} is my hero
h2>
<button (click)="gotoDetail()">View Detailsbutton>
div>
/workspace/HelloAngular/src/app #
heroes.component.ts
/workspace/HelloAngular/src/app # cat heroes.component.ts
import { Component } from '@angular/core';
import { OnInit } from '@angular/core';
import { Router } from '@angular/router';
import { Hero } from './hero';
import { HeroService } from './hero.service';
@Component({
selector: 'my-heroes',
templateUrl: './heroes.component.html',
styleUrls: ['./heroes.component.css'],
providers: []
})
export class HeroesComponent implements OnInit {
title = 'Tour of Heroes';
selectedHero: Hero;
heroes: Hero[];
onSelect(hero: Hero): void {
this.selectedHero = hero;
}
ngOnInit(): void{
this.heroService.getHeroes().then(heroes => this.heroes = heroes);
}
constructor(
private router: Router,
private heroService: HeroService) {
}
gotoDetail(): void {
this.router.navigate(['/detail', this.selectedHero.id]);
}
add(name: string): void {
name = name.trim();
if (!name) { return; }
this.heroService.create(name)
.then(hero => {
this.heroes.push(hero);
this.selectedHero = null;
});
}
delete(hero: Hero): void {
this.heroService
.delete(hero.id)
.then(() => {
this.heroes = this.heroes.filter(h => h !== hero);
if (this.selectedHero === hero) { this.selectedHero = null; }
});
}
}
/workspace/HelloAngular/src/app #
hero.service.ts
/workspace/HelloAngular/src/app # cat hero.service.ts
import { Injectable } from '@angular/core';
import { Http } from '@angular/http';
import { Headers } from '@angular/http';
import 'rxjs/add/operator/toPromise';
import { Hero } from './hero';
@Injectable()
export class HeroService {
private heroesUrl = 'api/heroes';
private headers = new Headers({'Content-Type': 'application/json'});
constructor(private http: Http) {}
getHeroes(): Promise {
return this.http.get(this.heroesUrl)
.toPromise()
.then(response => response.json().data as Hero[])
.catch(this.handleError);
}
private handleError(error: any): Promise {
console.error('An error occurred', error); // for demo purposes only
return Promise.reject(error.message || error);
}
getHero(id: number): Promise {
return this.getHeroes()
.then(heroes => heroes.find(hero => hero.id === id));
}
update(hero: Hero): Promise {
const url = `${this.heroesUrl}/${hero.id}`;
return this.http
.put(url, JSON.stringify(hero), {headers: this.headers})
.toPromise()
.then(() => hero)
.catch(this.handleError);
}
create(name: string): Promise<Hero> {
return this.http
.post(this.heroesUrl, JSON.stringify({name: name}), {headers: this.headers})
.toPromise()
.then(res => res.json().data as Hero)
.catch(this.handleError);
}
delete(id: number): Promise<void> {
const url = `${this.heroesUrl}/${id}`;
return this.http.delete(url, {headers: this.headers})
.toPromise()
.then(() => null)
.catch(this.handleError);
}
}
/workspace/HelloAngular/src/app #
结果确认
Hero列表的显示页面中,每个英雄都有一个可删除的按钮

删除直到只剩4个

现在按钮对的不齐,修改CSS让它们对准一点,添加如下代码到heroes.component.css中
button.delete {
float:right;
margin-top: 2px;
margin-right: .8em;
background-color: gray !important;
color:white;
}
总结
通过学习使用angular-in-memory-web-api,可以学习到如何做一个模拟的后端,在实际的项目中完全可以模拟后端无法进行联调测试的情况,具有很好的实际意义。
