尊重版权,转载请注明出处
本文来自:江清清的技术专栏-翻译组(http://www.lcode.org)
翻译计划项目:https://github.com/jiangqqlmj/js-coach-cn
开源项目地址:https://github.com/cnjon/react-native-datetime
项目介绍
该组件进行封装一个时间日期选择器,同时适配Android、iOS双平台,该组件基于@remobile/react-native-datetime-picker进行开发而来
刚创建的React Native技术交流3群(496508742)欢迎各位大牛,React Native技术爱好者加入交流!
配置安装
|
1
|
npm install react-native-datetime --save
|
1.1.iOS环境配置
上面步骤完成之后,直接前台写js代码即可
1.2.Android环境配置
在android/setting.gradle文件中如下配置
|
1
2
3
|
...
include
':react-native-datetime'
project(
':react-native-datetime'
).projectDir =
new
File(rootProject.projectDir,
'../node_modules/react-native-datetime/android'
)
|
在android/app/build.gradle文件中如下配置
|
1
2
3
4
5
|
...
dependencies {
...
compile project(
':react-native-datetime'
)
}
|
在MainActivity.java中进行注册模块
①.React Native>=0.18开始
|
1
2
3
4
5
6
7
8
9
10
11
12
13
14
15
16
|
import com.keyee.datetime.*;
// <--- import
public class MainActivity extends ReactActivity {
......
/**
* A list of packages used by the app. If the app uses additional views
* or modules besides the default ones, add more packages here.
*/
@Override
protected List
return
Arrays.
new
RCTDateTimePickerPackage(
this
),
// <------ add here
new
MainReactPackage());
}
}
|
①.React Native<=0.17版本
|
1
2
3
4
5
6
7
8
9
10
11
12
13
14
15
16
17
18
19
20
21
22
23
24
25
26
|
import com.keyee.datetime.*;
// <--- import
public class MainActivity extends Activity implements DefaultHardwareBackBtnHandler {
......
@Override
protected void onCreate(Bundle savedInstanceState) {
super
.onCreate(savedInstanceState);
mReactRootView =
new
ReactRootView(
this
);
mReactInstanceManager = ReactInstanceManager.builder()
.setApplication(getApplication())
.setBundleAssetName(
"index.android.bundle"
)
.setJSMainModuleName(
"index.android"
)
.addPackage(
new
MainReactPackage())
.addPackage(
new
RCTDateTimePickerPackage(
this
))
// <------ add here
.setUseDeveloperSupport(BuildConfig.DEBUG)
.setInitialLifecycleState(LifecycleState.RESUMED)
.build();
mReactRootView.startReactApplication(mReactInstanceManager,
"ExampleRN"
,
null
);
setContentView(mReactRootView);
}
......
}
|
运行截图
ios运行效果
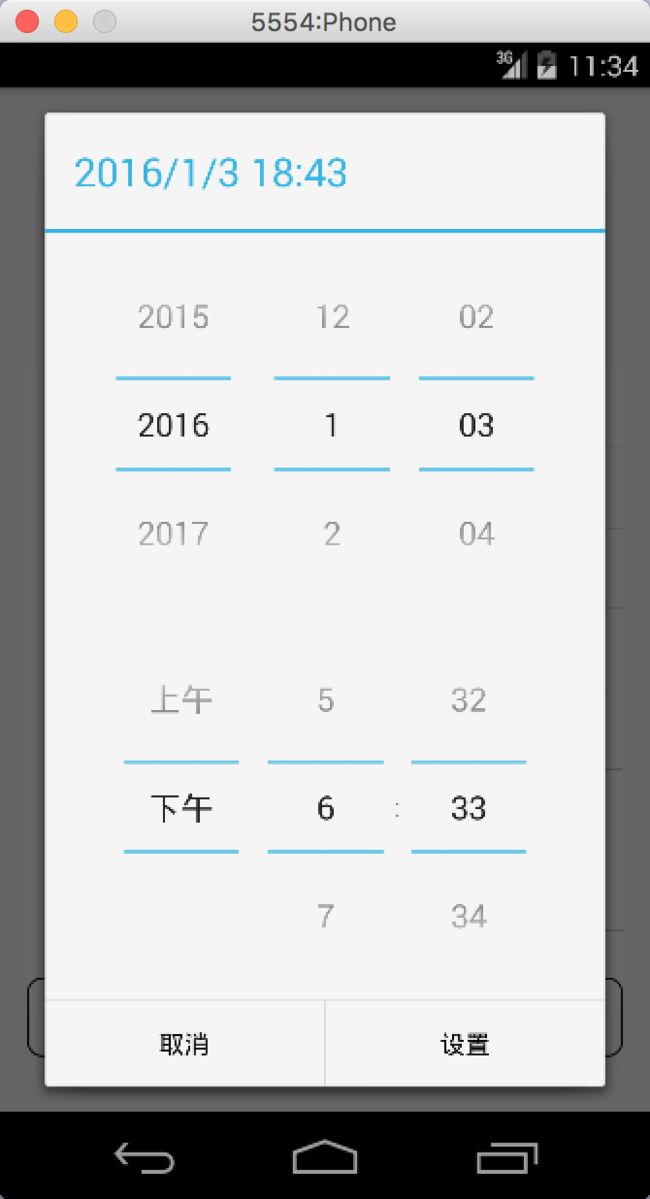
android运行效果
使用方法
|
1
2
3
4
5
|
this
.picker=picker}}/>
...
this
.picker.showDatePicker(...)
this
.picker.showTimePicker(...)
this
.picker.showDateTimePicker(...)
|
在ios平台上面使用,需要确保当前DataTimePicker视图在顶部
使用实例
|
1
2
3
4
5
6
7
8
9
10
11
12
13
14
15
16
17
18
19
20
21
22
23
24
25
26
27
28
29
30
31
32
33
34
35
36
37
38
39
40
41
42
43
44
45
46
47
48
49
50
51
52
53
54
55
56
57
58
59
60
61
62
|
'use strict'
;
var
React = require(
'react-native'
);
var
{
StyleSheet,
TouchableOpacity,
View,
Text,
} = React;
var
DateTimePicker = require(
'react-native-datetime'
);
var
Button = require(
'@remobile/react-native-simple-button'
);
module.exports = React.createClass({
getInitialState() {
return
{
date:
new
Date(),
}
},
showDatePicker() {
var
date =
this
.state.date;
this
.picker.showDatePicker(date, (d)=>{
this
.setState({date:d});
});
},
showTimePicker() {
var
date =
this
.state.date;
this
.picker.showTimePicker(date, (d)=>{
this
.setState({date:d});
});
},
showDateTimePicker() {
var
date =
this
.state.date;
this
.picker.showDateTimePicker(date, (d)=>{
this
.setState({date:d});
});
},
render() {
return
(
{
this
.state.date.toString()}
this
.picker=picker}}/>
);
},
});
var
styles = StyleSheet.create({
container: {
flex: 1,
justifyContent:
'center'
,
paddingTop:20,
},
});
|
方法介绍
showDatePicker(date, callback(date))
showTimePicker(date, callback(date))
showDateTimePicker(date, callback(date))
属性介绍
cancelText (default: Cancel)
okText (default: Ok

