Swift-获取本地所有图片并选取(Photos、PHAsset、CollectionView)
2017年5月11更新
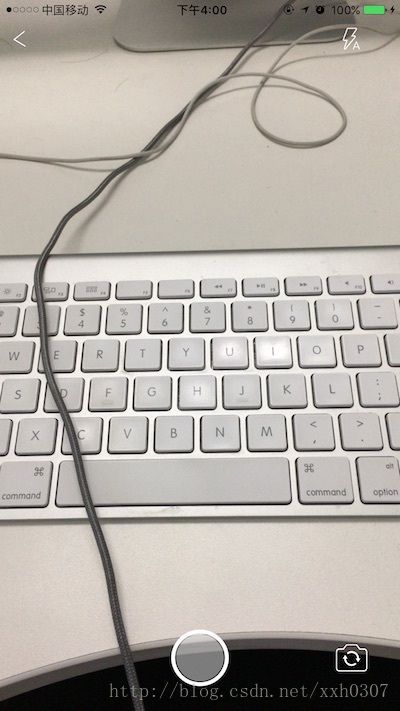
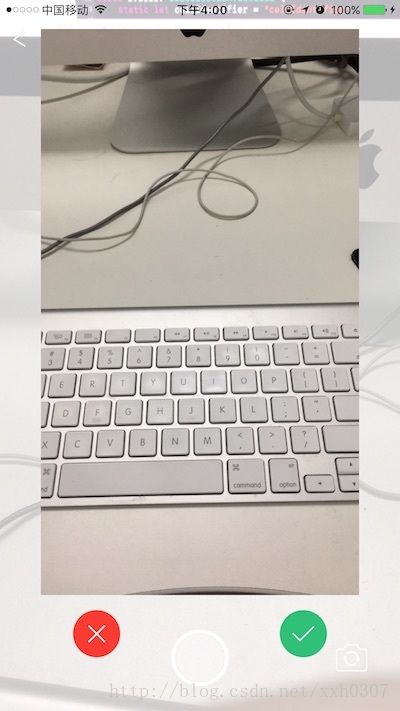
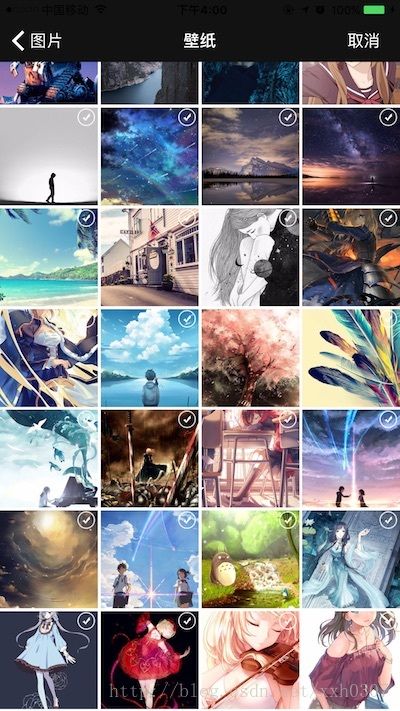
添加了拍照,也就是现在是拍照、相册两个选项了。为了自己在项目中更方便的调用,也简单的封装了一个方法。
HsuPhotosManager.swift文件
/// 添加图片
///
/// - Parameters:
///   - phtotsCount: 几张
///   - showCamera: 是否相机
///   - showAlbum: 是否相册
///   - _completeHandler: 回调
func takePhotos(_ photosCount: Int, _ showCamera: Bool, _ showAlbum: Bool, _ completeHandler: @escaping ([Data?]) -> Void)
2017年4月6日更新
前面的前面
最尴尬的莫过于自己参考自己写的东西并且还是过时不能用的。今天使用 Swift3.1 重新封装了选择系统相册的功能,参考了苹果 simple code 。
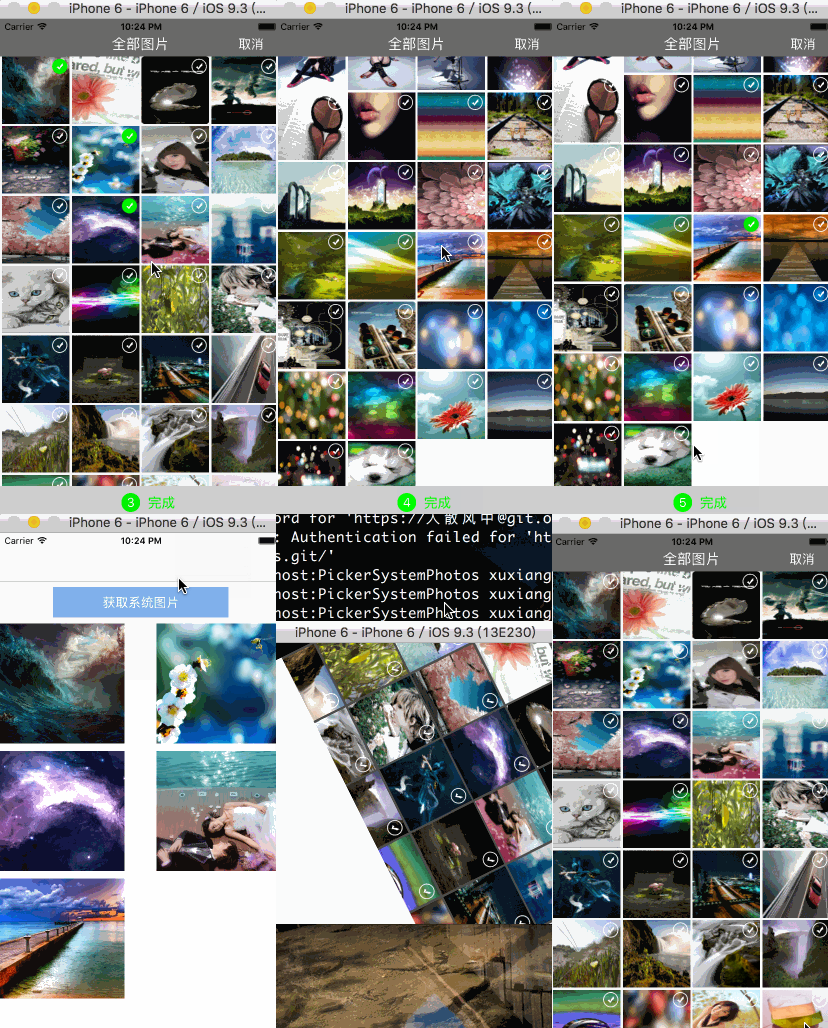
效果:
项目地址
项目介绍:
待更新 。。。
前言
毕竟刚开始接触Swift语言,很多写的地方可能多有不规范,并且也许不少知识点都是一知半解的状态,但是现在的精力和能力如果点点都要理得通,毕竟自己从中得到一些体会,也希望能帮助一些刚刚入门的小伙伴。
首先,第一次写这个的时候,源于一次偶尔看到 苹果官方Photos的SimpleCode ,我用OC写的demo其实就是抽取了这个code一部分的内容,效果如下:
当然今天这个并不是重点,现在我用Swift重写了一遍,一共也就200多行代码吧。主要涉及PHAsset、CollectionView的代码布局和故事版布局。
全部代码逐步实现选取图片
首先说一下大致规划,所有图片页面,即AllPhotosViewController 我用的纯代码,为了方便扔到项目中同事拿来直接用,选择图片后带回来展示我用故事版Storyboard画的collectionView。
创建一个空的项目工程,并在首页放置一个按钮,用于跳转到下一页,如下图和代码示例:
//  按钮事件,点击选择系统相册
@IBAction func clickedAction(sender: UIButton) {
    //  跳转页面
    let photosVC = BBAllPhotosViewController()
    presentViewController(photosVC, animated: true, completion: nil)
}
给第二个页面添加基本的控件
给第二个页面添加控件,headerView,包括标题和右侧返回按钮。bottomView,包括完成按钮和已选择图片数量,默认初始是不显示的,当选择图片的时候会显示。这里不会对语法有过多的讲解,毕竟细节说的话太多,我在代码中也添加了一些注释。另外,这么多代码其实每一句有技术含量的代码,都是一些无脑代码创建控件,此时充分体现storyboard是多么的节约代码。
import UIKit

class BBAllPhotosViewController: UIViewController {

 //  屏幕宽高
    private var KSCREEN_HEIGHT =  UIScreen.mainScreen().bounds.size.height
    private var KSCREEN_WIDTH =  UIScreen.mainScreen().bounds.size.width

    //  头视图,显示标题和取消按钮
    private let headerView = UIView()
    //  默认头视图高度
    private var defaultHeight: CGFloat = 50

    //  底部视图,UIButton,点击完成
    private let completedButton = UIButton()
    //  已选择图片数量
    private let countLable = UILabel()

    override func viewDidLoad() {
    super.viewDidLoad()
    view.backgroundColor = .whiteColor()

    //  添加顶部、底部视图
    addHeadViewAndBottomView()
    }

    //  MARK:- 添加headerView-标题、取消 , 添加底部视图,包括完成按钮和选择数量
    private func addHeadViewAndBottomView() {
    //  headerView
    headerView.frame = CGRectMake(0, 0, KSCREEN_WIDTH, defaultHeight)
    headerView.backgroundColor = UIColor.init(colorLiteralRed: 0, green: 0, blue: 0, alpha: 0.6)
    view.addSubview(headerView)

    //  添加返回按钮
    let backButton = UIButton()
    backButton.frame = CGRectMake(0, 0, 60, 30)
    backButton.setTitle("取消", forState: .Normal)
    backButton.setTitleColor(UIColor.whiteColor(), forState: .Normal)
    backButton.center = CGPointMake(KSCREEN_WIDTH - 40, defaultHeight / 1.5)
    backButton.titleLabel?.font = UIFont.systemFontOfSize(17)
    //  注意这里给按钮添加点击方法的写法
    backButton.addTarget(self, action:#selector(BBAllPhotosViewController.dismissAction),
                         forControlEvents: .TouchUpInside)
    headerView.addSubview(backButton)

    //  标题
    let titleLable = UILabel(frame: CGRectMake(0, 0, KSCREEN_WIDTH / 2, defaultHeight))
    titleLable.text = "全部图片"
    titleLable.textColor = UIColor.whiteColor()
    titleLable.font = UIFont.systemFontOfSize(19)
    titleLable.textAlignment = .Center
    titleLable.center = CGPointMake(KSCREEN_WIDTH / 2, defaultHeight / 1.5)
    headerView.addSubview(titleLable)

    //  底部View,点击选择完成
    completedButton.frame = CGRectMake(0, KSCREEN_HEIGHT, KSCREEN_WIDTH, 44)
    completedButton.backgroundColor = UIColor.init(white: 0.8, alpha: 1)
    view .addSubview(completedButton)

    //  完成按钮
    let overLabel = UILabel(frame: CGRectMake(KSCREEN_WIDTH / 2 + 10, 0, 40, 44))
    overLabel.text = "完成"
    overLabel.textColor = UIColor.greenColor()
    overLabel.font = UIFont.systemFontOfSize(18)
    completedButton .addSubview(overLabel)

    //  已选择图片数量
    countLable.frame = CGRectMake(KSCREEN_WIDTH / 2 - 25, 10, 24, 24)
    countLable.backgroundColor = UIColor.greenColor()
    countLable.textColor = UIColor.whiteColor()
    countLable.layer.masksToBounds = true
    countLable.layer.cornerRadius = countLable.bounds.size.height / 2
    countLable.textAlignment = .Center
    countLable.font = UIFont.systemFontOfSize(16)
    completedButton .addSubview(countLable)
    }

    //  取消选择,返回上一页
    func dismissAction() {
    self .dismissViewControllerAnimated(true, completion: nil)
        }
    }
获取系统全部图片
这里就要说一点东西了。首先iOS8之后,苹果开放了一个新的包Photos,更方便我们获取系统的所有图片,但是取到图片的时候,这些图片本身并不是image类型的,而是PHAsset单元。PHAsset类型的数据单元内包括拍照时间、经纬度、修改时间等具体信息,这个就不扩展了,毕竟挺多的一部分。其实我更喜欢把说明放到注释里,这样的话看代码的时候就可以清晰的知道代码具体什么作用。至少我看别人技术博客的时候就希望可以有个详细的注释。也许不知道什么是PHAsset,但是并不会影响读代码。代码中会有大量的注释。注意对比前文代码查看修改内容。由上往下,先引入Photos包,并且引入需要实现的协议。
 import UIKit
 import Photos
         class BBAllPhotosViewController: UIViewController , PHPhotoLibraryChangeObserver{
在 viewDidLoad方法中,添加获取所有图片的方法。
     override func viewDidLoad() {
        super.viewDidLoad()
        view.backgroundColor = .whiteColor()

        //  添加顶部、底部视图
        addHeadViewAndBottomView()

        //  获取全部图片
        getAllPhotos()
    }
最后,实现获取图片的方法以及第一次获取图片时的观察者方法。我这里做了最简单的处理,就是第一次进入的时候再次获取图片。其实这个方法只会执行一次,再次运行程序就不会执行这个方法了,所以我认为这么写也没什么大的问题。
//  MARK:- 获取全部图片
    private func getAllPhotos() {
    //  注意点!!-这里必须注册通知,不然第一次运行程序时获取不到图片,以后运行会正常显示。体验方式:每次运行项目时修改一下 Bundle Identifier,就可以看到效果。
    PHPhotoLibrary.sharedPhotoLibrary().registerChangeObserver(self)
    //  获取所有系统图片信息集合体
    let allOptions = PHFetchOptions()
    //  对内部元素排序,按照时间由远到近排序
    allOptions.sortDescriptors = [NSSortDescriptor.init(key: "creationDate", ascending: true)]
    //  将元素集合拆解开,此时 allResults 内部是一个个的PHAsset单元
    let allResults = PHAsset.fetchAssetsWithOptions(allOptions)
    print(allResults.count)
    }
    //  PHPhotoLibraryChangeObserver  第一次获取相册信息,这个方法只会进入一次
    func photoLibraryDidChange(changeInstance: PHChange) {
    getAllPhotos()
    }
因为我们获取到信息后执行了 print 打印方法,所以程序到现在运行时控制台会有数量输出的,如果没有,那就是前面某个小步骤出问题了。
设置容器 CollectionView
这里我用了纯代码布局,主要用了collectionView的两个dataSource协议方法,代码里有具体的注释。先测试能不能正常显示。同时,自定义一个cell用来展示数据。其实大多数使用CollectionView的时候都要自定义cell,毕竟原生的展示太简单了些。目前所有的代码都是在 BBAllPhotosViewController.swift 文件中操作的。
- 添加collectionView协议 UICollectionViewDelegateFlowLayout, UICollectionViewDataSource,同时添加必要的全局属性,注意与上面代码的对比。
// 载体 private var myCollectionView: UICollectionView! // collectionView 布局 private let flowLayout = UICollectionViewFlowLayout() // collectionviewcell 复用标识 private let cellIdentifier = "myCell" // 数据源 private var photosArray = PHFetchResult() // 已选图片数组,数据类型是 PHAsset private var seletedPhotosArray = [PHAsset]() // MARK:- lifeCycle override func viewDidLoad() { super.viewDidLoad() view.backgroundColor = .whiteColor() // 添加顶部、底部视图 addHeadViewAndBottomView() // 添加collectionView createCollectionView() // 获取全部图片 getAllPhotos() }- collectionView相关的代码,主要就是展示方面的。还有目前需要的两个协议方法。
// MARK:- 创建 CollectionView 并实现协议方法 delegate / dataSource private func createCollectionView() { // 竖屏时每行显示4张图片 let shape: CGFloat = 5 let cellWidth: CGFloat = (KSCREEN_WIDTH - 5 * shape) / 4 flowLayout.sectionInset = UIEdgeInsetsMake(0, shape, 0, shape) flowLayout.itemSize = CGSizeMake(cellWidth, cellWidth) flowLayout.minimumLineSpacing = shape flowLayout.minimumInteritemSpacing = shape // collectionView myCollectionView = UICollectionView(frame: CGRectMake(0, defaultHeight, KSCREEN_WIDTH, KSCREEN_HEIGHT - defaultHeight), collectionViewLayout: flowLayout) myCollectionView.backgroundColor = .whiteColor() // 添加协议方法 myCollectionView.delegate = self myCollectionView.dataSource = self // 设置 cell myCollectionView.registerClass(MyCollectionViewCell.self, forCellWithReuseIdentifier: cellIdentifier) view.addSubview(myCollectionView) } // collectionView delegate func collectionView(collectionView: UICollectionView, numberOfItemsInSection section: Int) -> Int { return 100 } func collectionView(collectionView: UICollectionView, cellForItemAtIndexPath indexPath: NSIndexPath) -> UICollectionViewCell { let cell = collectionView.dequeueReusableCellWithReuseIdentifier(cellIdentifier, forIndexPath: indexPath) as! MyCollectionViewCell return cell }- 自定义cell,cell有两个控件,一个是图片用于展示,还有一个展示是否被选择的控件。有一个choose属性,判断cell是否被选择,并添加属性监测,保证和是否被选择标识同步。在 BBAllPhotosViewController.swift 文件添加这个类。
//  MARK:- CollectionViewCell
class MyCollectionViewCell: UICollectionViewCell {

let selectButton = UIButton()
let imageView = UIImageView()
//  cell 是否被选择
var isChoose = false {
    didSet {
        selectButton.selected = isChoose
    }
}

override init(frame: CGRect) {
    super.init(frame: frame)

//  展示图片
    imageView.frame = contentView.bounds
    imageView.contentMode = .ScaleToFill
    imageView.clipsToBounds = true
    contentView.addSubview(imageView)
    imageView.backgroundColor = .cyanColor()

//  展示图片选择图标
    selectButton.frame = CGRectMake(contentView.bounds.size.width * 3 / 4 - 2, 2, contentView.bounds.size.width / 4 , contentView.bounds.size.width / 4)
    selectButton.setBackgroundImage(UIImage.init(named: "iw_unselected"), forState: .Normal)
    selectButton.setBackgroundImage(UIImage.init(named: "iw_selected"), forState: .Selected)
    imageView.addSubview(selectButton)
}

required init?(coder aDecoder: NSCoder) {
    fatalError("init(coder:) has not been implemented")
}
}
此时应该是能看到一丢丢的效果了,下一步替换数据后就好看多了。
替换数据,展示选择效果。把获取到的所有图片数据赋值给数据源数组,并刷新collectionView,同时添加选择效果。看代码看代码,写文字太累。
//  collectionView dateSource
func collectionView(collectionView: UICollectionView, numberOfItemsInSection section: Int) -> Int {
    return photosArray.count
}

func collectionView(collectionView: UICollectionView, cellForItemAtIndexPath indexPath: NSIndexPath) -> UICollectionViewCell {
let cell = collectionView.dequeueReusableCellWithReuseIdentifier(cellIdentifier, forIndexPath: indexPath) as! MyCollectionViewCell
//  展示图片
PHCachingImageManager.defaultManager().requestImageForAsset(photosArray[indexPath.row] as! PHAsset, targetSize: CGSizeZero, contentMode: .AspectFit, options: nil) { (result: UIImage?, dictionry: Dictionary?) in
        cell.imageView.image = result ?? UIImage.init(named: "iw_none")
    }
    return cell
}

//  collectionView delegate
   //  collectionView delegate
func collectionView(collectionView: UICollectionView, didSelectItemAtIndexPath indexPath: NSIndexPath) {
    let currentCell = collectionView.cellForItemAtIndexPath(indexPath) as! MyCollectionViewCell
    currentCell.isChoose = !currentCell.isChoose
    seletedPhotosArray.append(photosArray[indexPath.row] as! PHAsset)
    completedButtonShow()
}
这里我要说一个我自己也没搞明白的东西,就是官方API接口获取图片的方法
PHCachingImageManager.defaultManager().requestImageForAsset(<#T##asset: PHAsset##PHAsset#>, targetSize: <#T##CGSize#>, contentMode: <#T##PHImageContentMode#>, options: <#T##PHImageRequestOptions?#>, resultHandler: <#T##(UIImage?, [NSObject : AnyObject]?) -> Void#>)这个方法中targetSize是我至今没有搞明白的地方,当初OC写的时候不明白,现在还不是太明白。我在Stack Overflow找到一个答案说是如果图片真实大小小于自己限定的,就会取真实的,如果大于targetSize,则以targetSize为准。但是我在测试的时候出现了问题。这个方法内部会执行两次,第一次是返回一个(60,40)的缩略图,同时如果targetSize设置为CGSizeZero就会只执行一次,并且即使手机有几千张图片,内存消耗也稳定在13M左右。我尝试设置targetSize为CGSizeMake(800, 600),发现很多返回照片的大小远远高于这个值,200多张照片就把程序搞崩了~~以后自己搞明白的话再来补充吧。建议自己写代码的时候在这里多试几次,同事打印输出返回图片的详细信息。
选择图片后动态展示选择数量:
//  MARK:- 展示和点击完成按钮
func completedButtonShow() {
    var originY: CGFloat

  if seletedPhotosArray.count > 0 {
        originY = KSCREEN_HEIGHT - 44
        flowLayout.sectionInset.bottom = 44
    } else {
        originY = KSCREEN_HEIGHT
        flowLayout.sectionInset.bottom = 0
    }

    UIView.animateWithDuration(0.2) {
        self.completedButton.frame.origin.y = originY
        self.countLable.text = String(self.seletedPhotosArray.count)

        //  仿射变换
        UIView.animateWithDuration(0.2, animations: {
            self.countLable.transform = CGAffineTransformMakeScale(0.35, 0.35)
            self.countLable.transform = CGAffineTransformScale(self.countLable.transform, 3, 3)
        })
    }
}
看看现在的效果吧,同时也会发现新的问题。
问题就是由于cell自身的复用,导致选择的标识重复出现。个人感觉处理这个问题是我在这个练习中比较大的一个收获。说一下思路,创建一个数组,数量和数据源数组的count保持一致。里面都是一些0、1标识,其实0代表未选择,1代表选择。根据一一对应的关系,保证每次点击的cell都是唯一的。整个代码中共有2个地方使用这个数组,分别是return cell 方法中和didSelectItemAtIndexPath方法。具体的代码看下面的全部代码展示部分吧。
//  MARK: - 获取全部图片
private func getAllPhotos() {
    //  注册通知,保证第一次进入后显示照片
    PHPhotoLibrary.sharedPhotoLibrary().registerChangeObserver(self)

    let allOptions = PHFetchOptions()
    allOptions.sortDescriptors = [NSSortDescriptor.init(key: "creationDate", ascending: true)]
    let allPhotosResult = PHAsset.fetchAssetsWithOptions(allOptions)
    photosResult = allPhotosResult

    //  每个图片设置一个初始标识
    for _ in 0 ..< allPhotosResult.count {
        divideArray.append(0)
    }
}
从前一个页面传入选择图片的数量,数量大于9时,选择数为9,数量小于1时,选择数为1。
添加横竖屏支持。其实就是屏幕旋转时会调用方法 willAnimateRotationToInterfaceOrientation ,这个在代码中有详细的介绍。
定义一个闭包,将选取的图片带回到上一个页面。更多关于闭包的内容,参考 闭包常用知识分析 。
展示带回的图片。其实就是粗略的用故事版拖了一个collectionView。
补充一点,刚发现,我提交的示例代码有个小细节没有处理。正常情况,选择图片时,应该就像我们微信选择图片一样,进去就是显示最下面的图片,然后向上滑动去选择。其实实现这个很简单,collectionView 提供了系统方法。在 viewWillAppear 方法中添加如下代码即可实现:
 //  页面出现时
override func viewWillAppear(animated: Bool) {
    super.viewWillAppear(true)

    let indexPath = NSIndexPath(forItem: photosArray.count - 1, inSection: 0)
    myCollectionView.scrollToItemAtIndexPath(indexPath, atScrollPosition: .Bottom, animated: false)
}
OC、Swift的 demo 都在这里 。


