Docker构建Nginx+Tomcat镜像(实现动静分离)
Docker能干什么?
Docker是一个用于开发,交付和运行应用程序的开放平台。Docker使您能够将应用程序与基础架构分开,从而可以快速交付软件。借助Docker,您可以以与管理应用程序相同的方式来管理基础架构。通过利用Docker的方法来快速交付,测试和部署代码,您可以大大减少编写代码和在生产环境中运行代码之间的延迟。
简单来说,Docker的主要目标是“Build,Ship and Run Any App,Anywhere”,也就是通过对应用组件的封装、分发、部署、运行等生命周期的管理,使用户的APP(可以是一个WEB应用或数据库应用等等)及其运行环境能够做到“一次封装,到处运行”。也即实现了跨平台、跨服务器。只需要一次配置好环境,换到别的机子上就可以一键部署好,大大简化了操作。
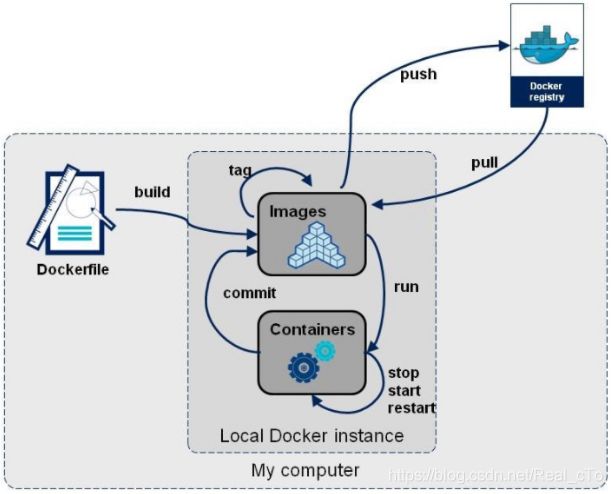
而Dockerfile就是用来构建Docker镜像的构建文件,是由一系列命令和参数构成的脚本。整个docker的组成与构建架构如下图:
docker安装
Docker 可以运行在 CentOS 系统和Ubuntu上,要求系统为64位、系统内核版本为 3.10 以上。
下面是两个docker一键安装脚本:
(1)在能连接互联网状态下
vim install_docker.sh
#!/bin/bash
#author     real
#mail       [email protected]
#function   install docker at centos and ubuntu
#date       2019-11-30
#使用方法根据系统而定: bash install_docker centos 或者 bash install_docker ubuntu
######################################################################################
case $1 in
centos)
   rpm -qi wget epel-release || yum install wget epel-release -y
   cd /etc/yum.repos.d/
   mkdir bak
   mv ./Cent* bak/

   wget -O /etc/yum.repos.d/CentOS-Base.repo http://mirrors.aliyun.com/repo/Centos-7.repo
   yum clean all && yum repolist &> /dev/null
   yum install -y yum-utils device-mapper-persistent-data lvm2
   yum-config-manager --add-repo http://mirrors.aliyun.com/docker-ce/linux/centos/docker-ce.repo
   yum makecache fast
   yum -y install docker-ce &> /dev/null
   if [ echo $? -ne 0 ];then
       yum install container-selinux
       yum -y install docker-ce &> /dev/null
   fi
   touch /etc/docker/daemon.json
   sudo cat > /etc/docker/daemon.json <<-'EOF'
{
  "registry-mirrors": ["https://w16p1bdc.mirror.aliyuncs.com"]
}
EOF
   sudo systemctl daemon-reload
   sudo systemctl restart docker
   docker version

   ;;
ubuntu)
   sudo apt-get update
   sudo apt-get -y install apt-transport-https ca-certificates curl software-properties-common
   curl -fsSL http://mirrors.aliyun.com/docker-ce/linux/ubuntu/gpg | sudo apt-key add -
   sudo add-apt-repository "deb [arch=amd64] http://mirrors.aliyun.com/docker-ce/linux/ubuntu $(lsb_release -cs) stable"
   sudo apt-get -y update
   sudo apt-get -y install docker-ce
   sudo mkdir -p /etc/docker
   sudo tee /etc/docker/daemon.json <<-'EOF'
{
  "registry-mirrors": ["https://w16p1bdc.mirror.aliyuncs.com"]
}
EOF
   sudo systemctl daemon-reload
   sudo systemctl restart docker
   ;;
*)
   echo "Usage: $(basename $0) centos|ubuntu"
   exit 1
   ;;
esac
(2)在无法连接互联网状态下:
#需要提前下载好docker二进制安装包,并且和此安装脚本放置在同一目录下,如下结构:
#/data
#├── binary_docker.sh
#├── docker-18.09.9.tgz

vim binary_docker.sh
#!/bin/sh
#!/bin/bash
#author     real
#mail       [email protected]
#function   binary install docker at centos and ubuntu
#date       2019-12-01
#使用方法: bash binary_docker.sh docker-18.09.9.tgz
usage(){
	  echo "Usage: $0 FILE_NAME_DOCKER_CE_TAR_GZ"
	  echo "       $0 docker-18.09.9.tgz"
	  echo "Get docker-ce binary from: https://download.docker.com/linux/static/stable/x86_64/"
	  echo "eg: wget https://download.docker.com/linux/static/stable/x86_64/docker-18.09.9.tgz"
      echo ""
	  }
	  if [ -f /etc/centos-release];then
	      SYSTEMDDIR=/usr/lib/systemd/system
	  else
	      SYSTEMDDIR=/lib/systemd/system
	  fi
	  SERVICEFILE=docker.service
	  DOCKERDIR=/usr/bin
	  DOCKERBIN=docker
	  SERVICENAME=docker

	  if [ $# -ne 1 ]; then
		    usage
		      exit 1
	      else
		        FILETARGZ="$1"
		fi

		if [ ! -f ${FILETARGZ} ]; then
			  echo "Docker binary tgz files does not exist, please check it"
			  echo "Get docker-ce binary from: https://download.docker.com/linux/static/stable/x86_64/"
			  echo "eg: wget https://download.docker.com/linux/static/stable/x86_64/docker-18.09.9.tgz"
			  exit 1
			fi

			echo "##unzip : tar xvpf ${FILETARGZ}"
			tar xvpf ${FILETARGZ}
			echo

			echo "##binary : ${DOCKERBIN} copy to ${DOCKERDIR}"
			cp -p ${DOCKERBIN}/* ${DOCKERDIR} >/dev/null 2>&1
			which ${DOCKERBIN}

			echo "##systemd service: ${SERVICEFILE}"
			echo "##docker.service: create docker systemd file"
			cat >${SYSTEMDDIR}/${SERVICEFILE} <<EOF
[Unit]
Description=Docker Application Container Engine
Documentation=http://docs.docker.com
After=network.target docker.socket
[Service]
Type=notify
EnvironmentFile=-/run/flannel/docker
WorkingDirectory=/usr/local/bin
ExecStart=/usr/bin/dockerd \
                -H tcp://0.0.0.0:4243 \
                -H unix:///var/run/docker.sock \
                --selinux-enabled=false \
                --log-opt max-size=1g
ExecReload=/bin/kill -s HUP $MAINPID
# Having non-zero Limit*s causes performance problems due to accounting overhead
# in the kernel. We recommend using cgroups to do container-local accounting.
LimitNOFILE=infinity
LimitNPROC=infinity
LimitCORE=infinity
# Uncomment TasksMax if your systemd version supports it.
# Only systemd 226 and above support this version.
#TasksMax=infinity
TimeoutStartSec=0
# set delegate yes so that systemd does not reset the cgroups of docker containers
Delegate=yes
# kill only the docker process, not all processes in the cgroup
KillMode=process
Restart=on-failure
[Install]
WantedBy=multi-user.target
EOF

echo ""

sudo mkdir -p /etc/docker
sudo tee /etc/docker/daemon.json <<-'EOF'
{
  "registry-mirrors": ["https://w16p1bdc.mirror.aliyuncs.com"]
}
EOF

systemctl daemon-reload
echo "##Service status: ${SERVICENAME}"
systemctl status ${SERVICENAME}
echo "##Service restart: ${SERVICENAME}"
systemctl restart ${SERVICENAME}
echo "##Service status: ${SERVICENAME}"
systemctl status ${SERVICENAME}

echo "##Service enabled: ${SERVICENAME}"
systemctl enable ${SERVICENAME}

echo "## docker version"
docker version
准备nginx、jdk、tomcat安装程序与配置文件
要构建上述环境,需要准备好tomcat和jdk安装包,nginx可以通过在线yum安装或者源码编译安装,我这里选择源码编译安装,下面是具体需要准备的文件结构:
#首先找一个你认为合适的地方,创建一个自定义目录:
mkdir dockerfile
#下载好nginx、jdk和tomcat安装包,版本自选
[root@docker data]# ll dockerfile/
-rw-r--r-- 1 root root   9711748 Dec  1 07:17 apache-tomcat-8.5.42.tar.gz
-rw-r--r-- 1 root root 194151339 Dec  1 07:17 jdk-8u231-linux-x64.tar.gz
-rw-r--r-- 1 root root   1032630 Dec  1 22:30 nginx-1.16.1.tar.gz

#要实现动静分离,需要更改nginx的配置文件,这里我提前准备好nginx配置文件,通过Dockerfile把它写入镜像

user  nginx nginx;
worker_processes  1;
events {
    worker_connections  1024;
}
http {
    include       mime.types;
    default_type  application/octet-stream;
    sendfile        on;
    keepalive_timeout  65;
    server_tokens off;
    server {
        listen       80;
        server_name  localhost;
        location / {
            root   html;
            index  index.html index.htm;
        }
        location ~* \.(jsp|png|css)$ {
           proxy_pass http://127.0.0.1:8080;     #jsp|png|css等文件转发给8080端口的tomcat处理
        }
        error_page   500 502 503 504  /50x.html;
        location = /50x.html {
            root   html;
        }
     }
include /apps/nginx/conf/conf.d/*.conf;
}

[root@docker dockerfile]# ll
-rw-r--r-- 1 root root   9711748 Dec  1 07:17 apache-tomcat-8.5.42.tar.gz
-rw-r--r-- 1 root root 194151339 Dec  1 07:17 jdk-8u231-linux-x64.tar.gz
-rw-r--r-- 1 root root      3062 Dec  2  2019 nginx.conf
-rw-r--r-- 1 root root   1032630 Dec  1 22:30 nginx-1.16.1.tar.gz
编写Dockfile代码
vim Dockerfile       //文件名用Dockerfile在docker build不需要指定具体文件,docker会默认找Dockerfile执行构建
FROM centos
MAINTAINER    real.com>

ADD nginx-1.16.1.tar.gz /usr/local/
WORKDIR /usr/local/nginx-1.16.1
#th-pcre安装nginx并复制启动脚本
RUN dnf install -y gcc make pcre-devel openssl-devel zlib-devel
RUN ./configure  --prefix=/apps/nginx  --with-pcre --with-http_gzip_static_module --with-http_stub_status_module
RUN make && make install
ADD start.sh /start.sh
RUN chmod 775 /start.sh

#修改Nginx配置文件,以非daemon方式启动,不然nginx无法前台运行
COPY nginx.conf /apps/nginx/conf/
RUN echo "daemon off;">>/apps/nginx/conf/nginx.conf
RUN ln -sv /apps/nginx/sbin/nginx /usr/sbin/nginx
RUN mkdir /apps/nginx/conf/conf.d
RUN useradd -r -s /sbin/nologin nginx

#把java与tomcat添加到容器中
ADD jdk-8u231-linux-x64.tar.gz /usr/local/
ADD apache-tomcat-8.5.42.tar.gz /usr/local/

#配置java与tomcat环境变量
ENV JAVA_HOME /usr/local/jdk1.8.0_231
ENV CLASSPATH $JAVA_HOME/lib/dt.jar:$JAVA_HOME/lib/tools.jar
ENV CATALINA_HOME /usr/local/apache-tomcat-8.5.42
ENV CATALINA_BASE /usr/local/apache-tomcat-8.5.42
ENV PATH $PATH:$JAVA_HOME/bin:$CATALINA_HOME/lib:$CATALINA_HOME/bin

#容器运行时监听的端口
EXPOSE 80 8080 443
CMD echo "nginx and tomcat service create success-------------ok"
#启动时运行tomcat
CMD /start.sh

#编写服务启动脚本:
vim start.sh
/usr/local/apache-tomcat-8.5.42/bin/startup.sh &
/usr/sbin/nginx

#(1)容器中运行多个守护进程时,前面的进程要用后台方式运行(或添加 &),否则后面的服务无法启动
#(2)容器中最后一个守护进程一定要用前台方式运行,否则start.sh退出,容器退出,所有的服务就白启动了

#最终目录结构:
[root@ldocker dockerfile]# ll
total 199104
-rw-r--r-- 1 root root   9711748 Dec  1 07:17 apache-tomcat-8.5.42.tar.gz
-rw-r--r-- 1 root root      1039 Dec  1 07:34 Dockerfile
-rw-r--r-- 1 root root 194151339 Dec  1 07:17 jdk-8u231-linux-x64.tar.gz
-rw-r--r-- 1 root root      3062 Dec  2  2019 nginx.conf
-rw-r--r-- 1 root root       205 Dec  2  2019 start.sh
镜像构建
确保在创建的dockerfile目录下执行构建:docker build -t nginx_tomcat1.1
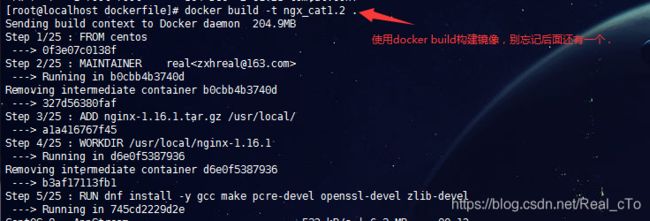
构建成功返回显示:
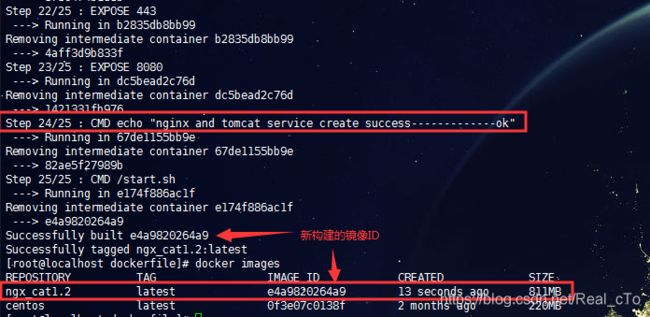
运行镜像生成容器测试
[root@localhost dockerfile]# docker run -itd -p 80:80 -p 8080:8080 --name myweb1.0 ngx_cat1.2   //运行镜像,-itd:交互式后台运行,-p 端口映射,-name:自定义容器名
c2cdd262d71c2af1ccb73ed8c8fb90e7febd146bb20cce453691fbde3a06ce55           //成功启动容器的返回ID
[root@localhost dockerfile]# docker ps
CONTAINER ID        IMAGE               COMMAND                  CREATED             STATUS              PORTS                                                 NAMES
c2cdd262d71c        ngx_cat1.2          "/bin/sh -c /start.sh"   4 minutes ago       Up 4 minutes        0.0.0.0:80->80/tcp, 0.0.0.0:8080->8080/tcp, 443/tcp   myweb1.0
准备动静分离运行镜像环境
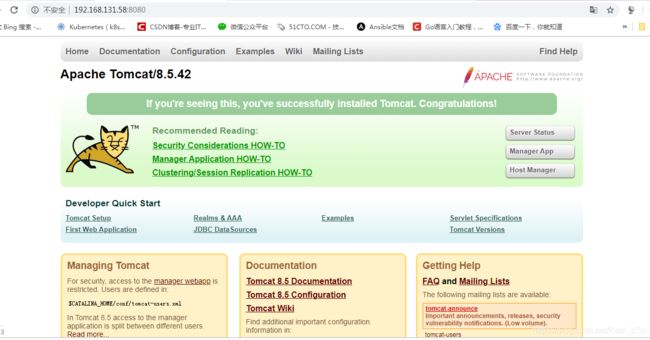
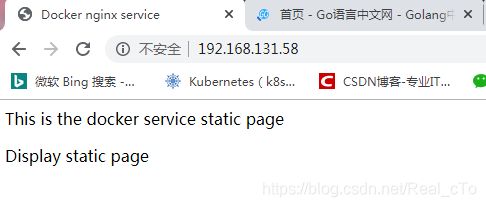
通过上面的简单测试,我们确认以构建的容器没有错误,而且80端口和8080端口都可以正常打开,下面我们再运行一个容器,通过把服务端的主要文件夹挂载到宿主机的目录下,实现在宿主机直接部署以打包好的项目:

#创建挂载容器目录,方便日后在宿主机直接部署项目,而不必每次进入到容器里更改,而且容器一旦重启或停止,所有的更改将会丢失,所以把数据
#文件挂载到本机是必要的
[root@docker data]# mkdir -p /data/DockerProject/tomcat/webapps    //tomcat动态页面目录
[root@docker data]# mkdir -p /data/DockerProject/tomcat/tomcatlogs    //tomcat日志目录
[root@ldocker data]# mkdir -p /data/DockerProject/nginx/html    //nginx静态页面目录
[root@dockert data]# tree DockerProject/
DockerProject/
├── nginx
│   ├── html
└── tomcat
    ├── tomcatlogs
    └── webapps

#重新构建
[root@localhost dockerfile]#docker run -it -d -p 80:80  -v /data/DockerProject/tomcat/webapps:/usr/local/apache-tomcat-8.5.42/webapps \
> -v /data/DockerProject/tomcat/tomcatlogs:/usr/local/apache-tomcat-8.5.42/logs \
> -v /data/DockerProject/nginx/html:/apps/nginx/html --privileged=true ngx_cat1.2

#注意此处构建我知映射了nginx服务端的80端口,tomcat的8080端口没有对外映射,通过容器内的nginx转发到tomcat实现动静分离
[root@localhost data]# cd /data/DockerProject/nginx/html/
[root@localhost html]# vim index.html     //简单写一个html文件用于区分动静态页面
<html>

<head>
<title>Docker nginx service</title>
</head>

<body>
<p>The is docker nginx static server</p>
<p>Display static page</p>
</body>

</html>

[root@localhost data]# cd /data/DockerProject/tomcat/webapps/
[root@localhost webapps]# mkdir test
[root@localhost webapps]# vim test/test.jsp
<html>
    <head>
           <title> Tomcat jsp file</title>
    </head>
    <body>
           <%
                  out.println("This is Docker tomcat jsp file");
                  out.println("Dynamic pages");
           %>
    </body>
 </html>

#准备好动静态文件,然后再在浏览器端测试

