SpringSecurity (2) UserDetailsService
文章目录
- 引入依赖
- application.yml
- UserDetailsService
- loadUserByUsername
- Authentication
- 实现 UserDetailsService
- AuthenticationProvider
- 实现 AuthenticationProvider
- SecurityConfig
- 测试
- 总结
本文主要介绍如何利用 UserDetailsService 接口从数据库中获取用户信息, 并通过实现 AuthenticationProvider 接口编写自己的校验逻辑, 从而完成 SpringSecurity 身份校验.
(本文只是 UserDetailsService 的入门, 更详细的, 关于相关底层接口的说明请看下一篇: SpringSecurity (3) SpringBoot + JWT 实现身份认证和权限验证)
引入依赖
第一步还是引入依赖, 由于我们要从数据库获取用户信息, 所以需要引入 mysql 和 mybatis 两个依赖:
<dependencies>
    <dependency>
        <groupId>org.springframework.bootgroupId>
        <artifactId>spring-boot-starter-webartifactId>
    dependency>

    <dependency>
        <groupId>org.springframework.bootgroupId>
        <artifactId>spring-boot-starter-securityartifactId>
    dependency>

    <dependency>
        <groupId>org.projectlombokgroupId>
        <artifactId>lombokartifactId>
    dependency>

    <dependency>
        <groupId>mysqlgroupId>
        <artifactId>mysql-connector-javaartifactId>
    dependency>

    <dependency>
        <groupId>org.mybatis.spring.bootgroupId>
        <artifactId>mybatis-spring-boot-starterartifactId>
    dependency>
dependencies>
application.yml
server:
  port: 18901
  servlet:
    context-path: /user-detail-service

spring:
  application:
    name: user-detail-service
  datasource:
    url: -url>
    password: >
    username: root
    driver-class-name: com.mysql.cj.jdbc.Driver

logging:
  level:
    cn.caplike.spring.security.user.detail.service: debug
UserDetailsService
UserDetailsService 是加载用户指定数据的核心接口.
loadUserByUsername
UserDetailsService 只有 loadUserByUsername 一个接口方法, 用于通过用户名获取用户数据. 返回 UserDetails 对象, 表示用户的核心信息 (用户名, 用户密码, 权限等信息).
Authentication
一旦请求被 AuthenticationManager.authenticate(Authentication) 方法处理了, Authentication 就标示为一个认证请求的 Token. 当信息被认证了, Authentication 会被线程安全的 SecurityContext 持有, 后者可以通过 SecurityContextHolder 获取. 本文中我们会用到 Authentication 其中之一: UsernamePasswordAuthenticationToken (被设计成用于描述用户名和密码的简单实现).
实现 UserDetailsService
@Service
public class UserDetailsServiceImpl implements UserDetailsService {
private AuthenticationMapper authenticationMapper;
@Override
public UserDetails loadUserByUsername(String name) throws UsernameNotFoundException {
// 根据用户名查询数据库,查到对应的用户
MyUser myUser = authenticationMapper.loadUserByUsername(name);
// ... 做一些异常处理,没有找到用户之类的
if (myUser == null) {
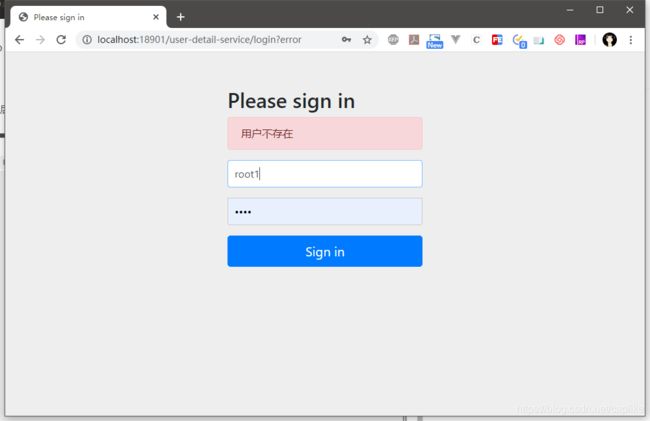
throw new UsernameNotFoundException("用户不存在");
}
// 根据用户ID,查询用户的角色
List<Role> roles = authenticationMapper.findRoleByUserId(myUser.getId());
// 添加角色
List<GrantedAuthority> authorities = new ArrayList<>();
for (Role role : roles) {
authorities.add(new SimpleGrantedAuthority(role.getName()));
}
// 构建 Security 的 User 对象
return new User(myUser.getName(), myUser.getPassword(), authorities);
}
@Autowired
public void setAuthenticationMapper(AuthenticationMapper authenticationMapper) {
this.authenticationMapper = authenticationMapper;
}
}
AuthenticationProvider
定义了用于处理认证逻辑的接口标准, 我们可以实现这个类以便实现自己的认证逻辑.
这个接口方法之一的: Authentication authenticate(Authentication authentication) throws AuthenticationException; 与 AuthenticationManager.authenticate(Authentication) 的执行效果相同;
而另外一个接口方法 supports 返回一个布尔值, true 表示当前的 AuthenticationProvider 实现类支持这个 Authentication 的实现类的认证逻辑.
实现 AuthenticationProvider
@Component
public class MyAuthenticationProvider implements AuthenticationProvider {
// ~ Instance Fields
// -----------------------------------------------------------------------------------------------------------------
private UserDetailsServiceImpl userDetailsServiceImpl;
private BCryptPasswordEncoder bCryptPasswordEncoder;
// ~ Override Methods
// -----------------------------------------------------------------------------------------------------------------
@Override
public Authentication authenticate(Authentication authentication) throws AuthenticationException {
// 获取用户输入的用户名和密码
final String username = authentication.getName();
final String password = authentication.getCredentials().toString();
// 获取封装用户信息的对象
UserDetails userDetails = userDetailsServiceImpl.loadUserByUsername(username);
// 进行密码的比对
boolean flag = bCryptPasswordEncoder.matches(password, userDetails.getPassword());
// 校验通过
if (flag) {
// 将权限信息也封装进去
return new UsernamePasswordAuthenticationToken(userDetails, password, userDetails.getAuthorities());
}
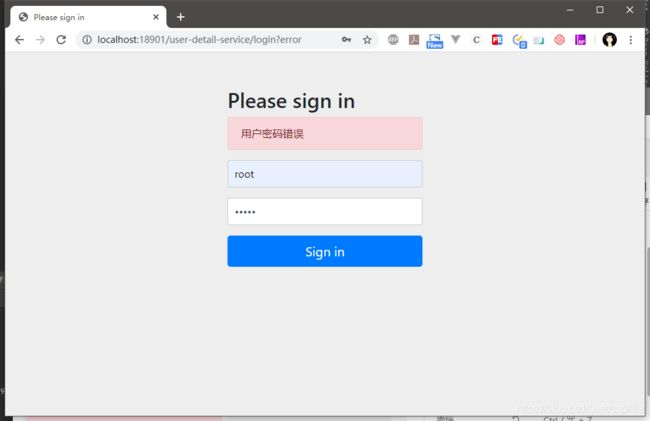
throw new AuthenticationException("用户密码错误") {
};
}
@Override
public boolean supports(Class<?> aClass) {
return true;
}
// ~ Autowired
// -----------------------------------------------------------------------------------------------------------------
@Autowired
public void setBCryptPasswordEncoder(BCryptPasswordEncoder bCryptPasswordEncoder) {
this.bCryptPasswordEncoder = bCryptPasswordEncoder;
}
@Autowired
public void setUserDetailsServiceImpl(UserDetailsServiceImpl userDetailsServiceImpl) {
this.userDetailsServiceImpl = userDetailsServiceImpl;
}
}
SecurityConfig
在 WebSecurityConfigurerAdapter 的实现 - 配置类中指明启用我们自定义的 AuthenticationProvider:
@Configuration
public class SecurityConfig extends WebSecurityConfigurerAdapter {

    private MyAuthenticationProvider myAuthenticationProvider;

    @Override
    protected void configure(AuthenticationManagerBuilder auth) {
        // 配置自定义的校验器
        auth.authenticationProvider(myAuthenticationProvider);
    }

    // ~ Bean
    // -----------------------------------------------------------------------------------------------------------------

    @Bean
    public BCryptPasswordEncoder bCryptPasswordEncoder() {
        return new BCryptPasswordEncoder();
    }

    // ~ Autowired
    // -----------------------------------------------------------------------------------------------------------------

    @Autowired
    public void setMyAuthenticationProvider(MyAuthenticationProvider myAuthenticationProvider) {
        this.myAuthenticationProvider = myAuthenticationProvider;
    }
}
通过查阅 WebSecurityConfigurerAdapter 源代码我们知道, HttpSecurity 默认是启用了 httpBasic 和 formLogin 的,

所以在本 demo 中我们不用覆盖这个方法.
测试
最后测试一下, 启动服务, 访问: /user-detail-service/hello
输入错误的用户名或者密码, 可以看到如下提示:
输入正确的用户凭证:

控制台输出 Authentication:
org.springframework.security.authentication.UsernamePasswordAuthenticationToken@bf69059c: Principal: org.springframework.security.core.userdetails.User@3580e2: Username: root; Password: [PROTECTED]; Enabled: true; AccountNonExpired: true; credentialsNonExpired: true; AccountNonLocked: true; Granted Authorities: ROLE_ADMIN; Credentials: [PROTECTED]; Authenticated: true; Details: org.springframework.security.web.authentication.WebAuthenticationDetails@ffff4c9c: RemoteIpAddress: 0:0:0:0:0:0:0:1; SessionId: BD2B7247AD19909D6241E6721D74E3F5; Granted Authorities: ROLE_ADMIN
总结
本篇介绍了结合 UserDetailsService 与 AuthenticationProvider 实现从数据库获取用户信息完成自定义的认证逻辑.
下一篇, 介绍 Spring Security 与 Json Web Token 结合, 实现认证和鉴权.