项目理解(三):邮箱注册登录、拦截器与页面访问
目录
1、基本配置:
2、注册(邮箱验证)
3、登录:
4、页面访问显示登录信息
5、账号设置
6、保障用户数据安全性
1、基本配置:
pom文件导入包:
AOP\thymeleaf\web\devtools\test\mysql-connector-java\spring-boot-starter-mail\mybatis-spring-boot-starter\commons-lang3\kaptcha\fastjson
配置工具类:

数据库表:


2、注册(邮箱验证)
- 访问注册页面:点击顶部区域的链接,打开注册页面;
- 提交注册数据:
通过表单提交数据;服务端验证账号是否已存在、邮箱是否已注册;服务端发送激活邮箱; - 激活注册账号:
点击邮件中的链接,访问服务端的激活服务:
点击激活链接,处理情形:1激活成功 2激活码不对 3点击了多次重复激活;在util中定义一个常量类来表示激活状态;
知识扩展:邮件发送的一般流程:1、发信⼈在⽤户代理上编辑邮件,并写清楚收件⼈的邮箱地址;2、⽤户代理根据发信⼈编辑的信息,⽣成⼀封符合邮件格式的邮件;3、⽤户代理把邮件发送到发信⼈的邮件服务器上,邮件服务器上⾯有⼀个缓冲队列,发送到邮件服务器上⾯的邮件都会加⼊到缓冲队列中,等待邮件服务器上的 SMTP 客户端进⾏发送;4、发信⼈的邮件服务器使⽤ SMTP 协议把这封邮件发送到收件⼈的邮件服务器上;5、收件⼈的邮件服务器收到邮件后,把这封邮件放到收件⼈在这个服务器上的信箱中;6、收件⼈使⽤⽤户代理来收取邮件,⾸先⽤户代理使⽤ POP 3 协议来连接收件⼈所在的邮件服务器,身份验证成功后,⽤户代理就可以把邮件服务器上⾯的收件⼈邮箱⾥⾯的邮件读取出来,并展示给收件⼈
Spring邮箱设置:
启用客户端SMTP服务
1、Spring Email 导入 jar 包
2、邮箱参数配置
3、使用 JavaMailSender 发送邮件
4、模板引擎:使用 Thymeleaf 发送 HTML 邮件
#配置文件中:
# MailProperties
spring.mail.host=smtp.163.com
spring.mail.port=465
spring.mail.username=*********@163.com
spring.mail.password=*****
spring.mail.protocol=smtps
spring.mail.properties.mail.smtp.ssl.enable=true
@Component
public class MailClient {
private static final Logger logger = LoggerFactory.getLogger(MailClient.class);
@Autowired
private JavaMailSender mailSender;
@Value("${spring.mail.username}")
private String from;
public void sendMail(String to, String subject, String content) {
try {
MimeMessage message = mailSender.createMimeMessage();
MimeMessageHelper helper = new MimeMessageHelper(message);
helper.setFrom(from);
helper.setTo(to);
helper.setSubject(subject);
helper.setText(content, true);
mailSender.send(helper.getMimeMessage());
} catch (MessagingException e) {
logger.error("发送邮件失败:" + e.getMessage());
}
}
}Sever层:register:
       //==========注册的业务逻辑处理=============================
    public Map register(User user) {
        Map map = new HashMap<>();

        // 空值处理
        if (user == null) {
            throw new IllegalArgumentException("参数不能为空!");
        }
        if (StringUtils.isBlank(user.getUsername())) {
            map.put("usernameMsg", "账号不能为空!");
            return map;
        }
        if (StringUtils.isBlank(user.getPassword())) {
            map.put("passwordMsg", "密码不能为空!");
            return map;
        }
        if (StringUtils.isBlank(user.getEmail())) {
            map.put("emailMsg", "邮箱不能为空!");
            return map;
        }

        // 验证账号
        User u = userMapper.selectByName(user.getUsername());
        if (u != null) {
            map.put("usernameMsg", "该账号已存在!");
            return map;
        }

        // 验证邮箱
        u = userMapper.selectByEmail(user.getEmail());
        if (u != null) {
            map.put("emailMsg", "该邮箱已被注册!");
            return map;
        }

        // 注册用户
        user.setSalt(CommunityUtil.generateUUID().substring(0, 5));
        user.setPassword(CommunityUtil.md5(user.getPassword() + user.getSalt()));
        user.setType(0);
        user.setStatus(0);
        user.setActivationCode(CommunityUtil.generateUUID());
        user.setHeaderUrl(String.format("http://images.nowcoder.com/head/%dt.png", new Random().nextInt(1000)));
        user.setCreateTime(new Date());
        userMapper.insertUser(user);

        // 激活邮件
        Context context = new Context();
        context.setVariable("email", user.getEmail());
        // http://localhost:8080/community/activation/101/code
        String url = domain + contextPath + "/activation/" + user.getId() + "/" + user.getActivationCode();
        context.setVariable("url", url);
        String content = templateEngine.process("/mail/activation", context);
        mailClient.sendMail(user.getEmail(), "激活账号", content);

        return map;
    }
注意:激活邮件路径设置为:http://localhost:8080/community/activation/101/code 使用了激活码
Sever层:activation:
    //==========激活的业务逻辑处理=============================
    public int activation(int userId, String code) {
        User user = userMapper.selectById(userId);
        if (user.getStatus() == 1) {
            return ACTIVATION_REPEAT;
        } else if (user.getActivationCode().equals(code)) {
            userMapper.updateStatus(userId, 1);
            return ACTIVATION_SUCCESS;
        } else {
            return ACTIVATION_FAILURE;
        }
    }
Controller层:
    @RequestMapping(path = "/register", method = RequestMethod.GET)
    public String getRegisterPage() {
        return "/site/register";
    }

    @RequestMapping(path = "/register", method = RequestMethod.POST)
    public String register(Model model, User user) {
        //只要页面上传输的值与User的属性相匹配,spring mvc就会自动把值注入给User对象
        Map map = userService.register(user);
        if (map == null || map.isEmpty()) {
            model.addAttribute("msg", "注册成功,我们已经向您的邮箱发送了一封激活邮件,请尽快激活!");
            model.addAttribute("target", "/index");
            return "/site/operate-result";
        } else {
            model.addAttribute("usernameMsg", map.get("usernameMsg"));
            model.addAttribute("passwordMsg", map.get("passwordMsg"));
            model.addAttribute("emailMsg", map.get("emailMsg"));
            return "/site/register";
        }
    }

    //===========================激活链接,进行账号激活============================
    // http://localhost:8080/community/activation/101/code
    @RequestMapping(path = "/activation/{userId}/{code}", method = RequestMethod.GET)
    public String activation(Model model, @PathVariable("userId") int userId, @PathVariable("code") String code) {
        int result = userService.activation(userId, code);
        if (result == ACTIVATION_SUCCESS) {
            model.addAttribute("msg", "激活成功,您的账号已经可以正常使用了!");
            model.addAttribute("target", "/login");
        } else if (result == ACTIVATION_REPEAT) {
            model.addAttribute("msg", "无效操作,该账号已经激活过了!");
            model.addAttribute("target", "/index");
        } else {
            model.addAttribute("msg", "激活失败,您提供的激活码不正确!");
            model.addAttribute("target", "/index");
        }
        return "/site/operate-result";
    }
登录工具:生成验证码:使用Kaptcha:
1、导入 jar 包
2、编写 Kaptcha 配置类
3、生成随机字符、生成图片
@Configuration
public class KaptchaConfig {
//生成验证码的工具配置类(由于Spring没有为kaptcha提供自动配置)
    @Bean//此Bean将会被Spring容器所管理,装配
    public Producer kaptchaProducer() {
        Properties properties = new Properties();
        properties.setProperty("kaptcha.image.width", "100");
        properties.setProperty("kaptcha.image.height", "40");
        properties.setProperty("kaptcha.textproducer.font.size", "32");
        properties.setProperty("kaptcha.textproducer.font.color", "0,0,0");
        properties.setProperty("kaptcha.textproducer.char.string", "0123456789ABCDEFGHIJKLMNOPQRSTUVWXYAZ");
        properties.setProperty("kaptcha.textproducer.char.length", "4");
        properties.setProperty("kaptcha.noise.impl", "com.google.code.kaptcha.impl.NoNoise");

        DefaultKaptcha kaptcha = new DefaultKaptcha();
        Config config = new Config(properties);
        kaptcha.setConfig(config);
        return kaptcha;
    }
}
//=============路径kaptcha传入到login.html登录页面中了===================
@RequestMapping(path = "/kaptcha", method = RequestMethod.GET)
public void getKaptcha(HttpServletResponse response, HttpSession session) {
//生成验证码
String text = kaptchaProducer.createText();
BufferedImage image = kaptchaProducer.createImage(text);
//将验证码存入session
session.setAttribute("kaptcha", text);
//将图片输出给浏览器
response.setContentType("image/png");//指定响应给浏览器的类型为png格式的图片;ContentType内置有很多种
//response做响应;获取输出流
try {
OutputStream os = response.getOutputStream();
ImageIO.write(image, "png", os);
} catch (IOException e) {
logger.error("响应验证码失败:" + e.getMessage());
}
}
3、登录:
-
访问登录页面:点击顶部区域的链接,打开登录页面。
-
登录:验证账号、密码、验证码;
服务端/客户端凭证有效期设置(记住登录):cookie有效期与LoginTicket表中有效期;
成功时,生成登录凭证,发放给客户端;
失败时,跳转回登录页; -
退出:将登录凭证修改为失效状态;跳转至网站首页;
分布式服务器的情形:
1)可以将同一个ip总是分配给同一个服务器去进行处理;黏性session;问题:很难保证服务器之间是负载均衡的了;
2)同步session:访问一个服务器创建session后,将此session同步给其他所有的服务器;问题:同步对性能影响;服务器全部产生了关联,对部署产生影响;
3)共享session:单体服务器来管理session;问题:分布式部署是解决性能瓶颈,而这样使用单体服务器挂掉的话,系统就不能正常工作了;
4)现在一般不存session,存放在cookie里,需要的session存放到数据库中,数据库可以是数据库集群,数据是存放在硬盘里;问题:可能访问数据库较慢;使用非关系型数据库,是在内存里,访问速度较快。
使用注解的Mapper层:
@Mapper
public interface LoginTicketMapper {
@Insert({
"insert into login_ticket(user_id,ticket,status,expired) ",
"values(#{userId},#{ticket},#{status},#{expired})"
})
@Options(useGeneratedKeys = true,keyProperty = "id")//自动生成主键id
int insertLoginTicket(LoginTicket loginTicket);
@Select({
"select id,user_id,ticket,status,expired ","from login_ticket where ticket=#{ticket}"
})
LoginTicket selectByTicket(String ticket);
@Update({
""
})
int updateStatus(String ticket, int status);
}
service:login
    //==========登录的业务逻辑处理=============================
    public Map login(String username, String password, int expiredSeconds){
        Map map = new HashMap<>();
        //空值处理
        if(StringUtils.isBlank(username)){
            map.put("usernameMsg","账号不能为空!");
            return map;
        }
        if(StringUtils.isBlank(password)){
            map.put("passwordMsg","密码不能为空!");
            return map;
        }
        // 验证账号
        User user = userMapper.selectByName(username);
        if (user == null) {
            map.put("usernameMsg", "该账号不存在!");
            return map;
        }

        // 验证状态
        if (user.getStatus() == 0) {
            map.put("usernameMsg", "该账号未激活!");
            return map;
        }

        // 验证密码
        password = CommunityUtil.md5(password + user.getSalt());
        if (!user.getPassword().equals(password)) {
            map.put("passwordMsg", "密码不正确!");
            return map;
        }

        // 生成登录凭证
        LoginTicket loginTicket = new LoginTicket();
        loginTicket.setUserId(user.getId());//user表中的id
        loginTicket.setTicket(CommunityUtil.generateUUID());//凭证是一个随机生成的字符串
        loginTicket.setStatus(0);//status:0表示有效;1表示无效
        loginTicket.setExpired(new Date(System.currentTimeMillis() + expiredSeconds * 1000));
        loginTicketMapper.insertLoginTicket(loginTicket);

        map.put("ticket", loginTicket.getTicket());
        return map;
    }

    public void logout(String ticket) {
        loginTicketMapper.updateStatus(ticket, 1);//1表示无效
    }
Collector:login
    @RequestMapping(path = "/login", method = RequestMethod.GET)
    public String getLoginPage() {
        return "/site/login";
    }

    //===========================登录界面输入完成后,提交表单数据到服务器============================
    @RequestMapping(path = "/login", method = RequestMethod.POST)//路径相同但为post方法
    public String login(String username, String password, String code, boolean rememberme,
                        Model model, HttpSession session, HttpServletResponse response) {
        //用户名,密码,验证码,是否记住密码;返回响应数据的时候用到model;
        // 页面传进来的验证码之前是放到session,现在要取出来;
        // 如果登录成功了,最终要将ticket发放给客户端,用到cookie来保存,response来传

        //前端页面中:
        //有两种方式取得用户名,密码,验证码值:1)对于这种普通的传入参数,不会自动装到model中,
        // 所以,可以在此方法中手动装配到model中,再取得;2)它们是在request中的,通过request来获得参数
        //此处通过2来获得:
        // 在thymeleaf模板中th:value="${param.password}的意思是:request.getParameter(password)

        // 检查验证码
        String kaptcha = (String) session.getAttribute("kaptcha");
        if (StringUtils.isBlank(kaptcha) || StringUtils.isBlank(code) || !kaptcha.equalsIgnoreCase(code)) {
            model.addAttribute("codeMsg", "验证码不正确!");
            return "/site/login";//返回登录页面
        }

        // 检查账号,密码
        int expiredSeconds = rememberme ? REMEMBER_EXPIRED_SECONDS : DEFAULT_EXPIRED_SECONDS;//根据是否记住,设置过期时间
        Map map = userService.login(username, password, expiredSeconds);
        if (map.containsKey("ticket")) {//会话管理
            Cookie cookie = new Cookie("ticket", map.get("ticket").toString());
            cookie.setPath(contextPath);
            cookie.setMaxAge(expiredSeconds);
            response.addCookie(cookie);
            return "redirect:/index";//登录成功返回首页
        } else {
            model.addAttribute("usernameMsg", map.get("usernameMsg"));
            model.addAttribute("passwordMsg", map.get("passwordMsg"));
            return "/site/login";//返回登录页面
        }
    }

    @RequestMapping(path = "/logout", method = RequestMethod.GET)
    public String logout(@CookieValue("ticket") String ticket) {
        userService.logout(ticket);
        return "redirect:/login";
} 定义ThreadLocal用户工具类;
定义获取cookie值的工具类;
public class CookieUtil {
//从request中取参数的工具类,直接定义为静态方法,直接应用;后面经常会用到此方法,所以封装到工具类中了
    public static String getValue(HttpServletRequest request, String name) {
        if (request == null || name == null) {
            throw new IllegalArgumentException("参数为空!");
        }
        Cookie[] cookies = request.getCookies();
        if (cookies != null) {
            for (Cookie cookie : cookies) {
                if (cookie.getName().equals(name)) {
                    return cookie.getValue();
                }
            }
        }
        return null;
    }
}
@Component
public class HostHolder {
//主要起到一个容器的作用
private ThreadLocal users = new ThreadLocal<>();
//ThreadLocal是以线程为key存取值的;获取当前线程,达到当前线程的一个map,根据得到的map来存取值
public void setUser(User user) {
users.set(user);
}
public User getUser() {
return users.get();
}
public void clear() {
users.remove();
}
} 4、页面访问显示登录信息
使用拦截器:定义拦截器:实现HandlerInterceptor接口,配置拦截器:实现WebMvcConfigurer接口
请求--(拦截器)--Controller--(拦截器)---渲染
1、在请求开始时查询登录用户
2、在本次请求中持有用户数据
3、在模板视图上显示用户数据
4、在请求结束时清理用户数据

(一)登录状态
实现HandlerInterceptor接口的拦截器:
@Component
public class LoginTicketInterceptor implements HandlerInterceptor {

    @Autowired
    private UserService userService;

    @Autowired
    private HostHolder hostHolder;

    // 在Controller之前执行
    @Override
    public boolean preHandle(HttpServletRequest request, HttpServletResponse response, Object handler) throws Exception {
        //最开始就要获取请求的cookie中的ticket,后面用ticket去查找用户,有的话就暂存
        // 第一步通过cookie得到ticket;从cookie中获取凭证:
        //这个方法是由接口定义的,其中参数不能随便加;所以不能在这里用@Cookie value注解了
        String ticket = CookieUtil.getValue(request, "ticket");

        if (ticket != null) {
            // 查询凭证
            LoginTicket loginTicket = userService.findLoginTicket(ticket);
            // 检查凭证是否有效
            if (loginTicket != null && loginTicket.getStatus() == 0 && loginTicket.getExpired().after(new Date())) {
                // 根据凭证查询用户
                User user = userService.findUserById(loginTicket.getUserId());
                // 在本次请求中持有用户
                //每个浏览器访问服务器,服务器会产生一个独立的线程来处理请求;服务器是在多线程的环境;
                // 所以存放用户如果仅仅是在一个类定义的变量中,会出现问题
                hostHolder.setUser(user);//存放到了线程对应的对象中去了
            }
        }

        return true;
    }

    // 在Controller之后执行;有参数:ModelAndView modelAndView
    @Override
    public void postHandle(HttpServletRequest request, HttpServletResponse response, Object handler, ModelAndView modelAndView) throws Exception {
        //使用user,将user存到model里,在模板引擎之前用
        User user = hostHolder.getUser();
        if (user != null && modelAndView != null) {
            modelAndView.addObject("loginUser", user);
        }
    }

    // 在TemplateEngine之后执行
    @Override
    public void afterCompletion(HttpServletRequest request, HttpServletResponse response, Object handler, Exception ex) throws Exception {
        hostHolder.clear();//模板引擎都执行完之后,整个请求结束,清掉hostHolder
    }
}
实现WebMvcConfigurer接口的配置类:配置拦截器的拦截路径
@Configuration
public class WebMvcConfig implements WebMvcConfigurer {

    @Autowired
    private AlphaInterceptor alphaInterceptor;

    @Autowired
    private LoginTicketInterceptor loginTicketInterceptor;

    @Autowired
    private LoginRequiredInterceptor loginRequiredInterceptor;

    @Override
    public void addInterceptors(InterceptorRegistry registry) {
        registry.addInterceptor(alphaInterceptor)
                .excludePathPatterns("/**/*.css", "/**/*.js", "/**/*.png", "/**/*.jpg", "/**/*.jpeg")
                .addPathPatterns("/register", "/login");
        //实现拦截器,对所有的资源都生效除了静态资源;希望拦截的路径功能:/register , /login

        registry.addInterceptor(loginTicketInterceptor)
                .excludePathPatterns("/**/*.css", "/**/*.js", "/**/*.png", "/**/*.jpg", "/**/*.jpeg");


        registry.addInterceptor(loginRequiredInterceptor).
                excludePathPatterns("/**/*.css", "/**/*.js", "/**/*.png", "/**/*.jpg", "/**/*.jpeg");

    }

}
(二)权限处理:使用拦截器检查登录状态:自定义注解:声明于需要登录的页面
@Target(ElementType.METHOD)
@Retention(RetentionPolicy.RUNTIME)
public @interface LoginRequired {
//自定义了一个注解;用于拦截器;仅声明在用户登录才能访问的方法上:设置,上传头像
}
实现拦截器:如果访问的是被LoginRequired注解的方法,返回到首页
@Component
public class LoginRequiredInterceptor implements HandlerInterceptor {

    @Autowired
    private HostHolder hostHolder;

    @Override
    public boolean preHandle(HttpServletRequest request, HttpServletResponse response, Object handler) throws Exception {
        if (handler instanceof HandlerMethod) {//只判断拦截的是不是一个方法
            HandlerMethod handlerMethod = (HandlerMethod) handler;
            Method method = handlerMethod.getMethod();
            LoginRequired loginRequired = method.getAnnotation(LoginRequired.class);
            if (loginRequired != null && hostHolder.getUser() == null) {
                response.sendRedirect(request.getContextPath() + "/login");
                //如果访问的是被LoginRequired注解的方法,返回到首页
                return false;//如果返回false,则直接返回了,不会再执行controller中的请求
            }
        }
        return true;
    }
}
5、账号设置
上传文件
1、请求:必须是POST请求
2、表单:enctype=“multipart/form-data”
3、Spring MVC:通过 MultipartFile 处理上传文件
步骤:
1、访问账号设置页面:/setting
2、上传头像: /upload
3、更新获取头像:/header/{fileName}
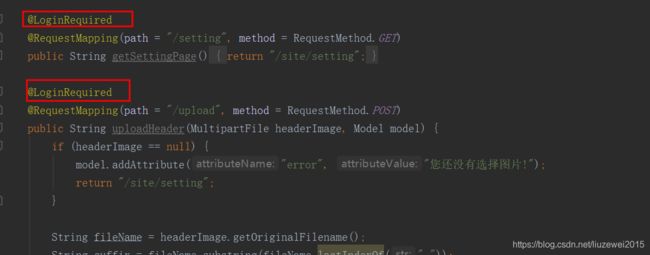
    @LoginRequired
    @RequestMapping(path = "/setting", method = RequestMethod.GET)
    public String getSettingPage() {
        return "/site/setting";
    }

    @LoginRequired
    @RequestMapping(path = "/upload", method = RequestMethod.POST)
    public String uploadHeader(MultipartFile headerImage, Model model) {
        if (headerImage == null) {
            model.addAttribute("error", "您还没有选择图片!");
            return "/site/setting";
        }

        String fileName = headerImage.getOriginalFilename();
        String suffix = fileName.substring(fileName.lastIndexOf("."));
        if (StringUtils.isBlank(suffix)) {
            model.addAttribute("error", "文件的格式不正确!");
            return "/site/setting";
        }

        // 生成随机文件名
        fileName = CommunityUtil.generateUUID() + suffix;
        // 确定文件存放的路径
        File dest = new File(uploadPath + "/" + fileName);
        try {
            // 存储文件
            headerImage.transferTo(dest);
        } catch (IOException e) {
            logger.error("上传文件失败: " + e.getMessage());
            throw new RuntimeException("上传文件失败,服务器发生异常!", e);
        }

        // 更新当前用户的头像的路径(web访问路径)
        // http://localhost:8080/community/user/header/xxx.png
        User user = hostHolder.getUser();
        String headerUrl = domain + contextPath + "/user/header/" + fileName;
        userService.updateHeader(user.getId(), headerUrl);

        return "redirect:/index";
    }

    @RequestMapping(path = "/header/{fileName}", method = RequestMethod.GET)
    public void getHeader(@PathVariable("fileName") String fileName, HttpServletResponse response) {
        // 服务器存放路径
        fileName = uploadPath + "/" + fileName;
        // 文件后缀
        String suffix = fileName.substring(fileName.lastIndexOf("."));
        // 响应图片
        response.setContentType("image/" + suffix);
        try (
                FileInputStream fis = new FileInputStream(fileName);
                OutputStream os = response.getOutputStream();
        ) {
            byte[] buffer = new byte[1024];
            int b = 0;
            while ((b = fis.read(buffer)) != -1) {
                os.write(buffer, 0, b);
            }
        } catch (IOException e) {
            logger.error("读取头像失败: " + e.getMessage());
        }
    }
6、保障用户数据安全性
- https注册页
- 公匙加密私匙解密,支付宝h5页面的支付密码加密
- 用户密码salt防止破解
- Token有效期(一段时间记住的密码过期,需要重新登陆)
- 单一平台的单点登陆,登陆IP异常检验
- 用户状态的权限判断
- 添加验证码机制,防止爆破和批量注册。