Android自定义View
Android自定义View
转载请标明出处:http://blog.csdn.net/zhijunhong/article/details/51056302 谢谢!~
最近,新写了一个Android项目,把里面自定view的部分拿出来与大家分享(附源码):
自定义view 基本可以分为两种方式:
1.通过继承ViewGroup方式(如:LinearLayout,RelativeLayout,FrameLayout等),使用LayoutInflater.from(context).inflate(R.layout.xxxx, this,true);加载布局文件,继而修改布局文件中控件的属性值。
2.通过继承View的方式,重写onMeasure()、onLayout()、onDraw()、onSizeChanged()等方法
方式一、通过继承ViewGroup方式
新建一个类,继承ViewGourp,这里以
public class FdjMineInfoView extends RelativeLayout为例,在res的values文件夹下新建attrs.xml文件,定义自定义View属性
    <declare-styleable name="FdjMineInfoView">

        <attr name="icon_mine_left" format="reference">attr>

        <attr name="text_mine_center" format="string">attr>

        <attr name="icon_mine_right" format="reference">attr>

        <attr name="txt_mine_right" format="string">attr>
    declare-styleable>
在layout文件夹中新建布局文件:view_mine_info.xml
<RelativeLayout xmlns:android="http://schemas.android.com/apk/res/android"
    android:layout_width="match_parent"
    android:layout_height="45dp"
    android:paddingLeft="15dp"
    android:paddingRight="15dp">
    <ImageView
        android:id="@+id/iv_mine_left"
        android:layout_width="wrap_content"
        android:layout_height="wrap_content"
        android:layout_centerVertical="true" />
    <TextView
        android:id="@+id/tv_mine_center"
        android:layout_width="wrap_content"
        android:layout_height="wrap_content"
        android:layout_centerVertical="true"
        android:layout_marginLeft="10dp"
        android:layout_toRightOf="@+id/iv_mine_left"
        android:textColor="@color/default_color_3"
        android:textSize="15sp" />
    <TextView
        android:layout_centerVertical="true"
        android:id="@+id/tv_text_right"
        android:layout_width="wrap_content"
        android:layout_height="wrap_content"
        android:layout_toLeftOf="@+id/iv_mine_right"
        android:gravity="right"
        android:layout_marginRight="9dp"
        android:textColor="@color/default_color_9"
        android:textSize="14sp" />
    <ImageView
        android:id="@+id/iv_mine_right"
        android:layout_width="wrap_content"
        android:layout_height="wrap_content"
        android:layout_alignParentRight="true"
        android:layout_centerVertical="true" />
RelativeLayout>
重写类的三个构造方法:
 public FdjMineInfoView(Context context) {
        this(context, null);
    }

    public FdjMineInfoView(Context context, AttributeSet attrs) {
        this(context, attrs, 0);
    }

    public FdjMineInfoView(Context context, AttributeSet attrs, int defStyleAttr) {
        super(context, attrs, defStyleAttr);

        LayoutInflater.from(context).inflate(R.layout.view_mine_info, this, true);

        mIvMineLeft = (ImageView) this.findViewById(R.id.iv_mine_left);

        mTvMineCenter = (TextView) this.findViewById(R.id.tv_mine_center);

        mIvMineRight = (ImageView) findViewById(R.id.iv_mine_right);

        mTvMineRight = (TextView) findViewById(R.id.tv_text_right);

        TypedArray typedArray = context.obtainStyledAttributes(attrs, R.styleable.FdjMineInfoView);
        mIconLeft = typedArray.getDrawable(R.styleable.FdjMineInfoView_icon_mine_left);
        mTextCenter = typedArray.getString(R.styleable.FdjMineInfoView_text_mine_center);
        mIconRight = typedArray.getDrawable(R.styleable.FdjMineInfoView_icon_mine_right);
        mTextRight =  typedArray.getString(R.styleable.FdjMineInfoView_txt_mine_right);

        typedArray.recycle();

        //初始化界面
        initView();
    }
notice:基本的套路就是第一个构造方法调用第二个构造,第二个构造方法调用第三个构造
注意代码里面this和super的使用
初始化界面方法
 private void initView() {
        mIvMineLeft.setImageDrawable(mIconLeft);
        mTvMineCenter.setText(mTextCenter);
        mIvMineRight.setImageDrawable(mIconRight);
        mTvMineRight.setText(mTextRight);
    }
如果想要改变属性值,可以通过setXXX()方法设置
     * 设置中间文本信息
     *
     * @param mNewTextLeft
     */
    public void setTextLeft(String mNewTextLeft) {
        if (!TextUtils.isEmpty(mNewTextLeft)) {
            mTvTextLeft.setText(mNewTextLeft);
        }
    }
//end–以上就是通过继承ViewGroup的方式自定view
方式二、通过继承View,重写onDraw()方式
简要步骤就是:通过继承 View的方式计算控件width和height,在onDraw()方法中,通过计算画图。
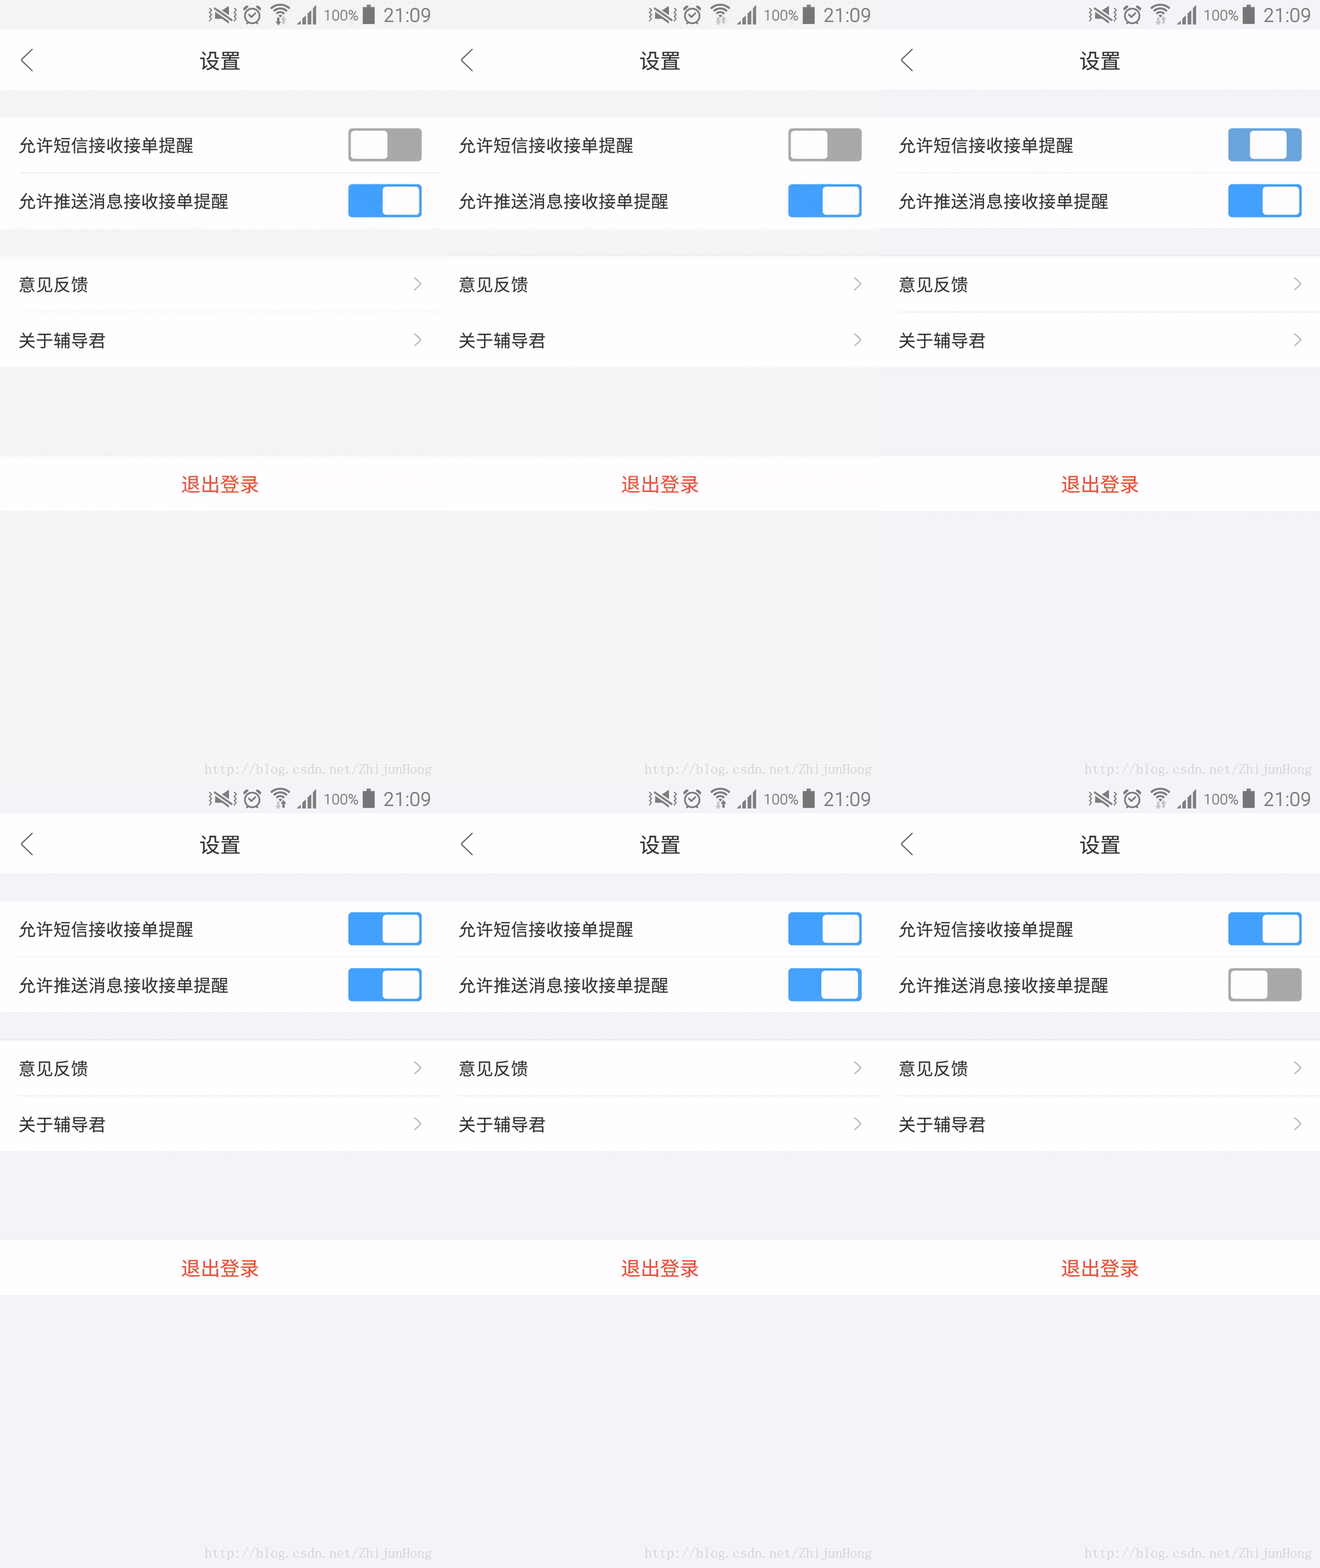
这里以实现一个Android滑动开关为例:

新建一个类:
public class FdjSwitchView extends View implements View.OnClickListener {在res的values文件夹下新建attrs.xml文件,定义自定义View属性
 <declare-styleable name="FdjSwitchView">
        <attr name="inRectFWidth" format="dimension">attr>
    declare-styleable>
与前一种方式一样,重新类的三个构造,这里不在赘述,直接贴代码:
 public FdjSwitchView(Context context) {
        this(context, null);
    }
    public FdjSwitchView(Context context, @Nullable AttributeSet attrs) {
        this(context, attrs, 0);
    }
    public FdjSwitchView(Context context, @Nullable AttributeSet attrs, int defStyleAttr) {
        super(context, attrs, defStyleAttr);
        mContext = context;
        //初始化画笔
        init();

        //自定义内圆角半径宽度-在attrs.xml中增加FdjSwitchView自定义view属性
        TypedArray typedArray = context.obtainStyledAttributes(attrs, R.styleable.FdjSwitchView, 0, defStyleAttr);
        mInWidth = (int) typedArray.getDimension(R.styleable.FdjSwitchView_inRectFWidth, LibCalcUtil.dp2px(mContext, 30));
    }

    /**
     * 初始化画笔
     */
    private void init() {
        setOnClickListener(this);
        mBgColor = getResources().getColor(R.color.default_color_a);
        mRadius = (int) LibCalcUtil.dp2px(mContext, 3);
        mEdge = (int) LibCalcUtil.dp2px(mContext, 2);
        mPaint = new Paint();
        mPaint.setAntiAlias(true);
    }
重写onSizeChanged()方法,初始化View的width和height
@Override
    protected void onSizeChanged(int w, int h, int oldw, int oldh) {
        super.onSizeChanged(w, h, oldw, oldh);
        mWidth = w;
        mHeight = h;
        setBtnStatus(mBtnStatus);
    }
重写onDraw()方法,画图
@Override
    protected void onDraw(Canvas canvas) {
        super.onDraw(canvas);
        RectF outRectF = new RectF(0, 0, mWidth, mHeight);
        mPaint.setColor(mBgColor);
        //画外圆角矩形
        canvas.drawRoundRect(outRectF, mRadius, mRadius, mPaint);

        mPaint.setColor(getResources().getColor(R.color.white));
        mInRectF = new RectF(mEdge + mOffset, mEdge, mEdge + mInWidth + mOffset, mHeight - mEdge);
        //画内圆角矩形
        canvas.drawRoundRect(mInRectF, mRadius, mRadius, mPaint);

}需要实现点击控件时,实现开关的打开或关闭:增加监听事件,通过ValueAnimator平移动画将内圆角矩形滑动相应位置并使用颜色渐变器ArgbEvaluator,实现颜色渐变
@Override
    public void onClick(View view) {
        if (mAnimator != null && mAnimator.isRunning()) return;

        if (mBtnStatus) {
            //修改开关为关闭状态
            mBtnStatus = false;
            mAnimator = ObjectAnimator.ofInt(mWidth - 2 * mEdge - mInWidth, 0);
            mAnimator.setDuration(mDuration);
            mAnimator.addUpdateListener(new ValueAnimator.AnimatorUpdateListener() {
                @Override
                public void onAnimationUpdate(ValueAnimator valueAnimator) {
                    mOffset = (int) valueAnimator.getAnimatedValue();
                    //颜色渐变器
                    ArgbEvaluator argEvaluator = new ArgbEvaluator();
                    mBgColor = (int) argEvaluator.evaluate(valueAnimator.getAnimatedFraction(), getResources().getColor(R.color.blue), getResources().getColor(R.color.default_color_a));
                    invalidate();
                }
            });
        } else {
            //修改开关为打开状态
            mBtnStatus = true;
            mAnimator = ObjectAnimator.ofInt(0, mWidth - 2 * mEdge - mInWidth);
            mAnimator.setDuration(mDuration);

            mAnimator.addUpdateListener(new ValueAnimator.AnimatorUpdateListener() {
                @Override
                public void onAnimationUpdate(ValueAnimator valueAnimator) {
                    mOffset = (int) valueAnimator.getAnimatedValue();
                    //颜色渐变器
                    ArgbEvaluator argEvaluator = new ArgbEvaluator();
                    mBgColor = (int) argEvaluator.evaluate(valueAnimator.getAnimatedFraction(), getResources().getColor(R.color.default_color_a), getResources().getColor(R.color.blue));
                    invalidate();
                }
            });
        }

        mAnimator.addListener(new Animator.AnimatorListener() {
            @Override
            public void onAnimationStart(Animator animator) {

            }

            @Override
            public void onAnimationEnd(Animator animator) {
                //动画执行结束
                //TODO...回调返回当前状态

            }

            @Override
            public void onAnimationCancel(Animator animator) {

            }

            @Override
            public void onAnimationRepeat(Animator animator) {

            }
        });
        mAnimator.start();
    }
再增加设置开关初始化状态的方法
 /**
     * 设置按钮的状态
     *
     * @param mBtnStatus
     */
    public void setBtnStatus(boolean mBtnStatus) {
        this.mBtnStatus = mBtnStatus;
        if (mWidth != 0) {
            //设置当前为选中
            if (mBtnStatus) {
                mOffset = mWidth - 2 * mEdge - mInWidth;
                mBgColor = getResources().getColor(R.color.blue);
            } else {
                mOffset = 0;
                mBgColor = getResources().getColor(R.color.default_color_a);
            }
            invalidate();
        }
    }
至此一个自定以的Android滑动开关就自定好了。
//end–以上就是通过继承View的方式自定view
