Android | RadioButton与Checkbox事件处理
文章目录
- 1. RadioButton(单选按钮)
- 1.1 RadioButton XML布局
- 1.2 RadioButton三种事件处理方法
- 1.2.0 事件处理大致步骤
- 1.2.1 demo需求
- 1.2.2 onClickListener
- 1.2.3 RadioGroup.onCheckedChangeListener
- 1.2.4 CompoundButton.OnCheckedChangeListeren
- 2. CheckBox(复选框)
- 2.1 CheckBox XML布局
- 2.2 CheckBox的事件处理
- 2.2.1 OnClick方法
- 2.2.2 CompoundButton.OnCheckedChangeListener
1. RadioButton(单选按钮)
1.1 RadioButton XML布局
RadioButton即单选按钮,也就是一组单选按钮,我们只能选择其中的一个。RadioButton要包含在RadioGroup中。
看一下布局效果(图片有点小):
    <RadioGroup
        android:id="@+id/rg"
        android:layout_width="wrap_content"
        android:layout_height="wrap_content"
        android:orientation="horizontal">
        <RadioButton
            android:id="@+id/male"
            android:layout_width="wrap_content"
            android:layout_height="wrap_content"
            android:text="男"
            android:textSize="20sp" />
        <RadioButton
            android:id="@+id/female"
            android:layout_width="wrap_content"
            android:layout_height="wrap_content"
            android:text="女"
            android:textSize="20sp" />
    RadioGroup>
1.2 RadioButton三种事件处理方法
1.2.0 事件处理大致步骤
点击我访问事件处理步骤博客~ (真的只是点击我)
1.2.1 demo需求
实现一个单选框,然后用不同的事件处理方法,把我们选中的某个单选按钮的十六进制Id值和文本内容输出在控制台上。
1.2.2 onClickListener
onClickListener是老朋友了,也是一个最基本的控件,我们只需要实现onClickListener接口,重写其中的onClick方法,最后绑定到控件上就OK了。
先来看一下最后的输出:
public class MainActivity extends AppCompatActivity {
    //0、声明对象
    private RadioGroup rg;
    private RadioButton male, female;

    @Override
    protected void onCreate(Bundle savedInstanceState) {
        super.onCreate(savedInstanceState);
        setContentView(R.layout.demo);
        //1、findViewById获取对象
        rg = (RadioGroup) findViewById(R.id.rg);
        male = (RadioButton) findViewById(R.id.male);
        female = (RadioButton) findViewById(R.id.female);
        //3、为控件绑定监听事件
        RadioOnClick roc = new RadioOnClick();
        male.setOnClickListener(roc);
        female.setOnClickListener(roc);
    }

    //2、实现OnClickListener接口,重写onClick方法
    class RadioOnClick implements View.OnClickListener {
        @Override
        public void onClick(View v) {
            RadioButton rb = (RadioButton) v;
            String m = rb.getId() + "-------->" + rb.getText();
            System.out.println(m);
        }
    }
}
1.2.3 RadioGroup.onCheckedChangeListener
用这个onCheckedChangeListener只需要绑定到RadioGroup组件上就好了,需要重写onCheckedChanged方法,这个方法包含下面两个参数:
RadioGroup group:这个参数就是传来的RadioGroup对象int CheckedId:这个参数传来的是被选中的某个按钮的id属性,我们用它来判断谁被选中了。
看一下最后的输出结果:
public class MainActivity extends AppCompatActivity {
    //0、声明对象
    private RadioGroup rg;
    private RadioButton male, female;

    @Override
    protected void onCreate(Bundle savedInstanceState) {
        super.onCreate(savedInstanceState);
        setContentView(R.layout.demo);
        //1、findViewById获取对象
        rg = (RadioGroup) findViewById(R.id.rg);
        male = (RadioButton) findViewById(R.id.male);
        female = (RadioButton) findViewById(R.id.female);
        //2、匿名内部类直接怼
        rg.setOnCheckedChangeListener(new RadioGroup.OnCheckedChangeListener() {
            @Override
            public void onCheckedChanged(RadioGroup group, int checkedId) {
                String m = "OnCheckedChangeListener:";
                if (checkedId == R.id.male) m += male.getId() + "--->" + male.getText();
                else m += female.getId() + "--->" + female.getText();
                System.out.println(m);
            }
        });
    }
}
因为只设置了两个单选按钮,可以直接判断。如果有的人怼了超级多
RadioButton,可以直接使用循环去判断,从0开始循环到group.getChildCount个,判断有没有被选中的就可以了。
1.2.4 CompoundButton.OnCheckedChangeListeren
这个接口跟上面的那个接口重名,但是不属于同一个包。用这个接口需要实现onCheckedChanged方法,也和上面的那个方法一样。但是传递的参数不一样。两个参数分别是:
CompoundButton buttonView:传递过来的类型boolean isChecked:是否被选中
看一下效果:
public class MainActivity extends AppCompatActivity {
    //0、声明对象
    private RadioGroup rg;
    private RadioButton male, female;

    @Override
    protected void onCreate(Bundle savedInstanceState) {
        super.onCreate(savedInstanceState);
        setContentView(R.layout.demo);
        //1、findViewById获取对象
        rg = (RadioGroup) findViewById(R.id.rg);
        male = (RadioButton) findViewById(R.id.male);
        female = (RadioButton) findViewById(R.id.female);
        //3、绑定
        RadioOnClick roc = new RadioOnClick();
        male.setOnCheckedChangeListener(roc);
        female.setOnCheckedChangeListener(roc);

    }
    //2、实现接口,重写方法
    class RadioOnClick implements CompoundButton.OnCheckedChangeListener{
        @Override
        public void onCheckedChanged(CompoundButton buttonView, boolean isChecked) {
            String m = "";
            if(buttonView.getId()==R.id.male) m+=buttonView.getText() + "---->";
            else m+=buttonView.getText() + "----->";
            if(isChecked) m+="被选中了!";
            else m+="没有被选中!";
            System.out.println(m);
        }
    }
}
2. CheckBox(复选框)
2.1 CheckBox XML布局
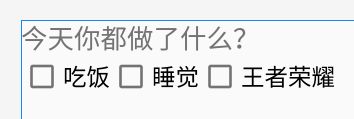
CheckBox的布局和上面的RadioButton布局很相似,直接写就好了。
XML代码:
    <LinearLayout
        android:layout_width="wrap_content"
        android:layout_height="wrap_content"
        android:orientation="horizontal">

        <CheckBox
            android:id="@+id/eat"
            android:layout_width="wrap_content"
            android:layout_height="wrap_content"
            android:text="吃饭"
            android:textSize="18sp" />

        <CheckBox
            android:id="@+id/sleep"
            android:layout_width="wrap_content"
            android:layout_height="wrap_content"
            android:text="睡觉"
            android:textSize="18sp" />

        <CheckBox
            android:id="@+id/game"
            android:layout_width="wrap_content"
            android:layout_height="wrap_content"
            android:text="王者荣耀"
            android:textSize="18sp" />
    LinearLayout>
2.2 CheckBox的事件处理
2.2.1 OnClick方法
和上述的RadioButton几乎一样,这里不再展示
2.2.2 CompoundButton.OnCheckedChangeListener
也和上述的一样,这个方法同样有两个参数,因为上面已经说过了,直接写个案例,先来看看效果:
public class MainActivity extends AppCompatActivity {

    private CheckBox eat, game, sleep;

    @Override
    protected void onCreate(Bundle savedInstanceState) {
        super.onCreate(savedInstanceState);
        setContentView(R.layout.demo);
        eat = (CheckBox) findViewById(R.id.eat);
        sleep = (CheckBox) findViewById(R.id.sleep);
        game = (CheckBox) findViewById(R.id.game);
        CheckChange cc = new CheckChange();
        eat.setOnCheckedChangeListener(cc);
        sleep.setOnCheckedChangeListener(cc);
        game.setOnCheckedChangeListener(cc);
    }

    class CheckChange implements CompoundButton.OnCheckedChangeListener {
        @Override
        public void onCheckedChanged(CompoundButton buttonView, boolean isChecked) {
            String m = "";
            switch (buttonView.getId()) {
                case R.id.eat:
                    m += buttonView.getText();
                    break;
                case R.id.sleep:
                    m += buttonView.getText();
                    break;
                case R.id.game:
                    m += buttonView.getText();
                    break;
            }
            System.out.println(m);
        }
    }
}
ok啦!
如果我们想设置某一个被选中那就直接用
setChecked(true)就够了!


