elasticSearch5.6.4添加SSL认证searchGuard5
注:本教程elasticsearch安装采用解压版,安装路径为/usr/local/elasticsearch-5.6.4
参考blog:https://blog.csdn.net/m0_37895851/article/details/81205277
1、离线安装plugins:searchGuard5
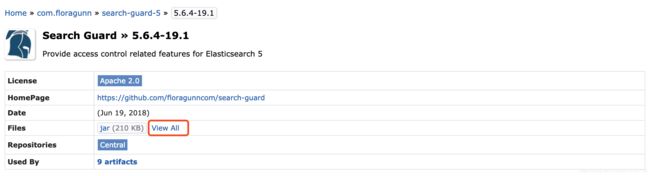
查找下载对应版本离线安装包:https://mvnrepository.com/artifact/com.floragunn/search-guard-5/5.6.4-19.1
查看对应版本:https://docs.search-guard.com/v5/search-guard-versions
2、离线安装:
将离线包放置到/usr/local目录下,在ES安装目录下执行命令安装
bin/elasticsearch-plugin install -b file:/usr/local/search-guard-5-5.6.4-19.1.zip
3、离线生成证书:https://search-guard.com/tls-certificate-generator/

4、将邮箱收到证书放到/usr/local/ 下并解压,然后移动文件:
cp /usr/local/search-guard-certificates/truststore.jks /usr/local/elasticsearch-5.6.4/plugins/search-guard-5/tools/
cp /usr/local/search-guard-certificates/truststore.jks /usr/local/elasticsearch-5.6.4/config/
cp /usr/local/search-guard-certificates/node-certificates/CN=test-keystore.jks /usr/local/elasticsearch-5.6.4/config
cp /usr/local/search-guard-certificates/client-certificates/CN=sgadmin-keystore.jks /usr/local/elasticsearch-5.6.4/plugins/search-guard-5/tools/
5、修改elasticsearch.yml,添加
searchguard.ssl.transport.keystore_filepath: CN=test-keystore.jks
searchguard.ssl.transport.keystore_password: d8febd614f7ca8d5e53a
searchguard.ssl.transport.truststore_filepath: truststore.jks
searchguard.ssl.transport.truststore_password: 94d6f043a62e975ee9bc
searchguard.ssl.transport.enforce_hostname_verification: false
searchguard.ssl.http.enabled: true
searchguard.ssl.http.keystore_filepath: CN=test-keystore.jks
searchguard.ssl.http.keystore_password: d8febd614f7ca8d5e53a
searchguard.ssl.http.truststore_filepath: truststore.jks
searchguard.ssl.http.truststore_password: 94d6f043a62e975ee9bc
searchguard.authcz.admin_dn:
  - CN=sgadmin
密码在/usr/local/search-guard-certificates/README.txt 查看:
Passwords

### Common passwords

Root CA password: 94b4f01c1e520ced1a56fbe41cd62a0c9672d3c9
Truststore password: 94d6f043a62e975ee9bc
Admin keystore and private key password: ee448e2a86de7d08522d
Demouser keystore and private key password: 8a9d3bc3d7033c3af005

## Host/Node specific passwords

Host: secray
secray keystore and private key password: d8febd614f7ca8d5e53a
secray keystore: node-certificates/CN=test-keystore.jks
secray PEM certificate: node-certificates/CN=test.crtfull.pem
secray PEM private key: node-certificates/CN=test.key.pem
6、重启ES,注意重启的时候不要有报错,有报错根据提示解决掉再进行下一步
7、在任意节点执行
cd plugins/search-guard-5/tools/
./sgadmin.sh -ts truststore.jks -tspass 94d6f043a62e975ee9bc -ks CN=sgadmin-keystore.jks -kspass ee448e2a86de7d08522d -cn es-cluster -nhnv -cd ../sgconfig/ -h node1 -cn clustername
-cn es-cluster es-cluster替换为自己的集群名
-h node1 node1 替换为自己的节点主机名
8、验证:https://访问IP:9200 账号密码: admin admin 注意:https!!!
9、离线生成证书参考https://docs.search-guard.com/v5/offline-tls-tool
备注:
1、如果使用elasticsearch-head,先修改elasticsearch.yml,添加
http.cors.allow-headers:Authorization,X-Requested-With,Content-Length,Content-Type
访问路径 http://localhost:9100/?auth_user=admin&auth_password=admin
![]()
2、JAVA客户端使用:
下载依赖jar:
https://search-guard.com/searchguard-elasicsearch-transport-clients/
https://mvnrepository.com/artifact/com.floragunn/search-guard-ssl
将下列两个文件:
/usr/local/search-guard-certificates/client-certificates/CN=sgadmin-keystore.jks
/usr/local/search-guard-certificates/truststore.jks
放到指定文件路径下,使用以下code测试:
public static void main(String[] args) throws UnknownHostException {
        Settings settings = Settings.builder()
                .put("path.home", ".")
                .put("path.conf", "/Users/secray/Desktop/testES")
                .put("cluster.name", "es56")
                .put("searchguard.ssl.transport.enabled", true)
                .put("searchguard.ssl.transport.keystore_filepath", "CN=sgadmin-keystore.jks")
                .put("searchguard.ssl.transport.truststore_filepath", "truststore.jks")
                .put("searchguard.ssl.http.keystore_password", "ee448e2a86de7d08522d")
                .put("searchguard.ssl.http.truststore_password", "94d6f043a62e975ee9bc")
                .put("searchguard.ssl.transport.keystore_password", "ee448e2a86de7d08522d")
                .put("searchguard.ssl.transport.truststore_password", "94d6f043a62e975ee9bc")
                .put("searchguard.ssl.transport.enforce_hostname_verification", false)
                .build();

        TransportClient client = new PreBuiltTransportClient(settings, SearchGuardSSLPlugin.class)
                .addTransportAddress(new InetSocketTransportAddress(InetAddress.getByName("secray"), 9300));

        client.admin().cluster().nodesInfo(new NodesInfoRequest()).actionGet();

        //搜索数据
        GetResponse response = client.prepareGet("test", "name", "1").execute().actionGet();
        //输出结果
        System.out.println(response.getSourceAsString());
        //关闭client
        client.close();
    }
3、证书查看:
keytool -printcert -file /usr/local/search-guard-certificates/client-certificates/CN=sgadmin.crt.pem
4、新建用户:
生成密码:
/usr/local/elasticsearch-5.6.4/plugins/search-guard-5/tools/hash.sh -p 123456
结果如下
![]()
cd /usr/local/elasticsearch-5.6.4/plugins/search-guard-5/sgconfig/
编辑sg_internal_users.yml
vi sg_internal_users.yml
添加:
  test:
     hash: $2a$12$z7zaGwFdvJgHMIKwI57jqORXASfvaQBNUlZsKDKBpipa0NsxC6Zi6
     #password id: 123456
编辑sg_roles_mapping.yml
vi sg_roles_mapping.yml
在sg_all_access下添加用户
sg_all_access:
  users:
    - admin
    - test
在任意节点执行以下命令生效
cd plugins/search-guard-5/tools/
./sgadmin.sh -ts truststore.jks -tspass 94d6f043a62e975ee9bc -ks CN=sgadmin-keystore.jks -kspass ee448e2a86de7d08522d -cn es-cluster -nhnv -cd ../sgconfig/ -h node1 -cn clustername
-cn es-cluster es-cluster替换为自己的集群名
-h node1 node1 替换为自己的节点主机名