Android Study 之 教你6分钟撸一个上滑标题渐变透明直到消失~
LZ-Say:多喝水 多吃饭 多穿衣服 多撸码 烦恼少 生病少 多撸代码 乐开怀~

前言
最近的神接口,神后台,让人无可奈何,能做的,就是心态要好,干好自己的即可~希望各位阅读本文的伙伴能遇到好后台~
今天为大家带来一个效果,个人觉得还是不错的,简单、实用又能提升逼格,我们一起来看一下吧~
运行效果
光说不练假把式,光扯犊子不放图,找不着女朋友~

本文目标
通过分析得出实现思路,继而实现如图所示效果。
分析
我们现在简单分析下,我们看到的这个界面,大致分为俩个部分:
标题导航栏部分;
内容填充区,也就是我们一个又一个Button。
接着,我们进行如下推测:
- 在滑动的时候,监听滑动的范围,从而控制标题栏透明度
那么,根据上面,我们进行我们具体实现部分。
细说并撸码实现
首先我们创建一个自定义View,那么定义之前我们需要注意什么呢?
上下滑动,里面包括各种填充体,也就是各种控件,这里选择使用ScrollView开刀;
提供的样例是在上下滑动时,标题导航栏进行变换,所以这里我们需要对ScrollChange进行监听,同时在这里处理我们的操作。
基于以上,创建如下:
package com.scrollviewtoolbar.weight;

import android.content.Context;
import android.util.AttributeSet;
import android.widget.ScrollView;

import com.scrollviewtoolbar.listener.TranslucentListener;

/**
 * Created by HLQ on 2017/11/13 0013.
 */

public class MyScrollView extends ScrollView {

    public MyScrollView(Context context) {
        this(context, null);
    }

    public MyScrollView(Context context, AttributeSet attrs) {
        this(context, attrs, 0);
    }

    public MyScrollView(Context context, AttributeSet attrs, int defStyleAttr) {
        this(context, attrs, defStyleAttr, 0);
    }

    public MyScrollView(Context context, AttributeSet attrs, int defStyleAttr, int defStyleRes) {
        super(context, attrs, defStyleAttr, defStyleRes);
    }

    @Override
    protected void onScrollChanged(int l, int t, int oldl, int oldt) {
        super.onScrollChanged(l, t, oldl, oldt);
    }
}
接着,透明度的渐变一定是根据当前滑动的范围(距离)而进行改变的,那么,我们就要对外以回调的形式让外界可以对透明度取值进行操控。
基于以上我们定义如下接口:
package com.scrollviewtoolbar.listener;

/**
 * Created by HLQ on 2017/11/13
 * 透明度回调监听
 */
public interface TranslucentListener {

    /**
     * 透明度的回调监听
     *
     * @param alpha 0~1 透明度
     */
    public void onTranslucent(float alpha);

}
定义好之后再我们的自定义ScrollView中进行初始化并对外暴露操作方法:
    private TranslucentListener mTranslucentListener;

    public void setTranslucentListener(TranslucentListener translucentListener) {
        this.mTranslucentListener = translucentListener;
}上面我们说到,它关键点便是在于滑动时对时间进行处理,也就是设置导航栏透明度,那么具体是如何操作的呢?
首先获取到ScrollView滑动的距离,也就是高度。
其次,我们需要拿到屏幕高度。那么为什么呢?
试问,伙计你想一下,既然是根据滑动去进行动态设置透明度,那么我滑动距离以及相应的标准又是什么呢?(这里大家想下,很Easy~)回调监听,设置透明值
下面依据以上分析进行快速撸码~
    if (mTranslucentListener != null) {
        // 获取ScrollView滑出高度
        int scrollY = getScrollY();
        // 获取屏幕高度
        int screenHeight = getContext().getResources().getDisplayMetrics().heightPixels;
        // 这里定义的规则 也就是有效滑动距离为屏幕3分之一
        if (scrollY <= screenHeight / 3f) {
            // alpha = 滑动高度/(screenHeight/3f)
            // 渐变的过程 1~0
            mTranslucentListener.onTranslucent(1 - scrollY / (screenHeight / 3f));
        }
    }
到这里,我们完成了基本的准备工作,也就是我们自定义的ScrollView已经具备了标题所述效果,那么还差一步,那就是展示了~
布局很简单,ToolBar、自定义ScrollView、兼容LinearLayout以及填充的Button。
"http://schemas.android.com/apk/res/android"
xmlns:app="http://schemas.android.com/apk/res-auto"
android:layout_width="match_parent"
android:layout_height="match_parent">
<com.scrollviewtoolbar.weight.MyScrollView
android:id="@+id/id_scrollView"
android:layout_width="fill_parent"
android:layout_height="fill_parent"
android:paddingTop="?attr/actionBarSize">
.support.v7.widget.LinearLayoutCompat
android:layout_width="fill_parent"
android:layout_height="fill_parent"
android:orientation="vertical">
.support.v7.widget.LinearLayoutCompat>
com.scrollviewtoolbar.weight.MyScrollView>
.support.v7.widget.Toolbar
android:id="@+id/id_toolbar"
android:layout_width="match_parent"
android:layout_height="?attr/actionBarSize"
android:background="?attr/colorPrimary"
app:title="HLQ_Blog" />
撸码撸了三分钟,赶紧瞅瞅效果~
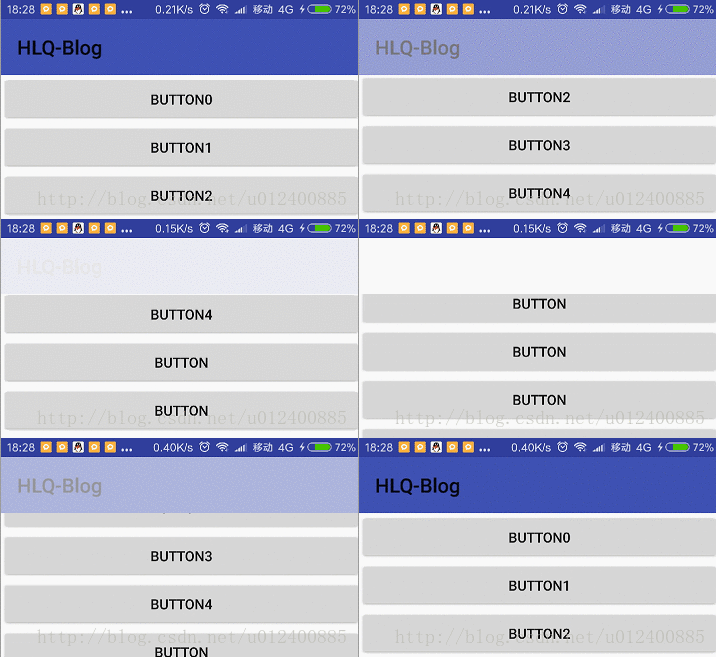
咦,上面这空白特么的是什么鬼?莫急莫急~

上面的空白控件恰恰是我们透明了得ToolBar,下面介绍俩个神器~
android:clipChildren=”false”
android:clipToPadding=”false”
这俩个又是什么鬼呢?
android:clipChildren: 是否裁剪控件。(简单粗暴的说法就是:子控件随便浪,父容器你别管我)
android:clipToPadding: 控件的绘制区域是否在padding里面。(简单粗暴的说法就是:内容可以被延伸屏幕之外)
默认俩这皆为true,设置为false即可。
当我们运行时,快速滑动时,会发现有个问题,LZ这里简单描述下,然后附上截图。
问题:
当快速滑动到底部,上面标题栏没有完全消失。
猜测原因:
滑动计算有效区域与实际有所偏差。
异常效果图:
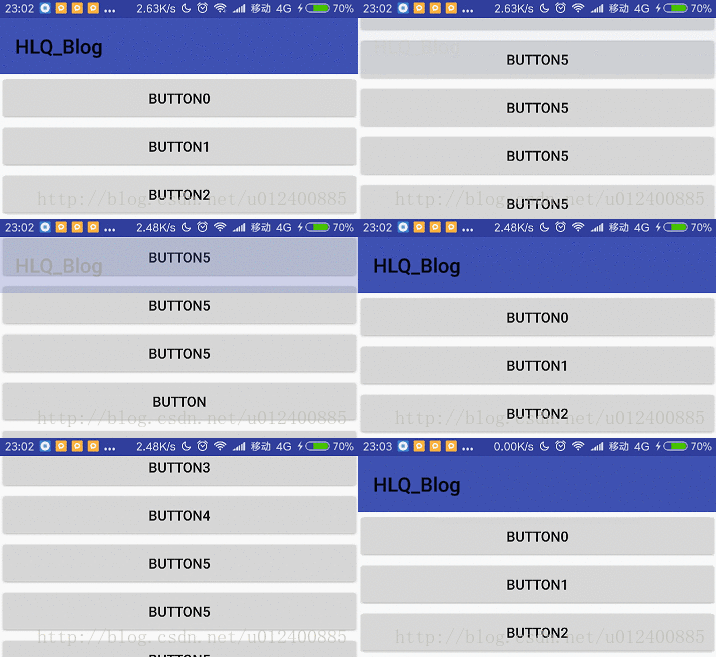
接着猜测有了,我们紧接着去Log打印输入一些对于我们关键的数据进行论证,从而找出解决办法。
以下为大家截图俩章,分别为慢慢滑动以及快速滑动最终结束点。

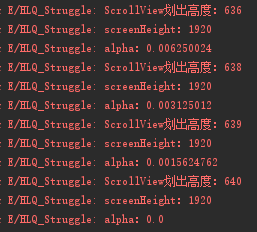
相比之下,大体可以验证出我们之前的结论是正确的,接着,修改我们滑动有效区域,如下。
    // 这里定义的规则 也就是有效滑动距离为屏幕2分之一
    if (scrollY <= screenHeight / 2f) {
        Log.e("HLQ_Struggle", "ScrollView划出高度:" + scrollY);
        Log.e("HLQ_Struggle", "screenHeight:" + screenHeight);
        Log.e("HLQ_Struggle", "alpha:" + (1 - scrollY / (screenHeight / 3f)));
        // alpha = 滑动高度/(screenHeight/3f)
        // 渐变的过程 1~0
        mTranslucentListener.onTranslucent(1 - scrollY / (screenHeight / 3f));
    }
一起来看看效果~
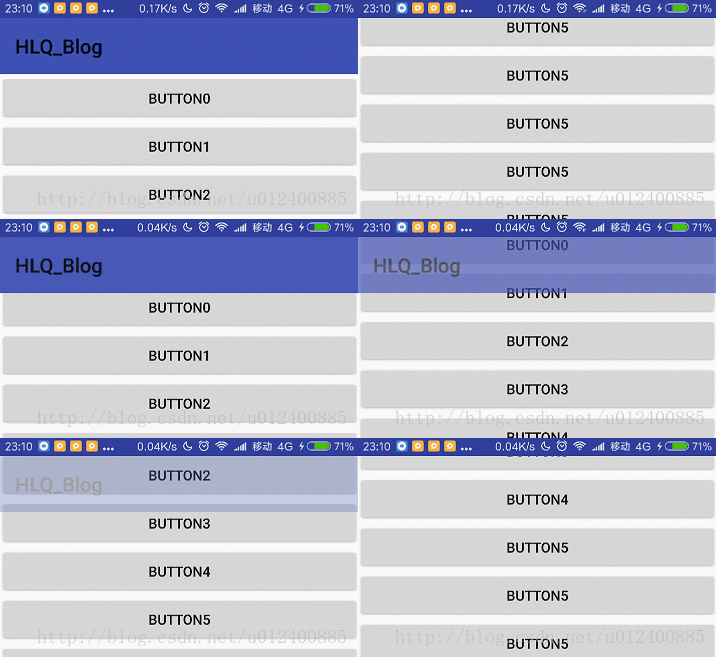
Soga,本文讲解到此结束~

赞赏
如果觉得LZ写的还不错,不放赞助LZ喝点东西,一分也是爱呐~

GitHub查看地址
https://github.com/HLQ-Struggle/ScrollViewToolBar
The end~
每一次的结束 都是为了下次更好的相聚;
每一篇文章的结束 同样也是为了带来下次更好的讲解;
希望大家开心撸码~
心态一定要好~
一起加油~!