信息提醒之Notification,兼容全部SDK-更新中
概述
Notification与对话框、Toast无论从外观上还是从使用方法上有本质的区别。
Notification是Android中很理想的提示方法,Notification可以在Android桌面上最上方的状态栏显示提示信息,还可以显示图像,甚至可以将控件加载到上面,而且只要用户不清空,这些信息可以永久的保留在状态栏,除了这些还有其他更吸引人的特性,让我们一起发掘下吧。
本篇博文中使用的创建Notification 是通过一个兼容全部SDK的工具类创建的,因为setLatestEventInfo方法在API11中不建议使用了,而且谷歌在API23 (Android6.0)中彻底废弃了该方法。
所以本篇博文中会提供一个创建Notification的工具类,来兼容所有额SDK版本~
NotificationUtils.java
import android.annotation.TargetApi;
import android.app.Notification;
import android.app.PendingIntent;
import android.content.Context;
import android.os.Build;

import com.apkfuns.logutils.LogUtils;

import java.lang.reflect.Method;

/**
 * 兼容所有SDK的NotificationUtil
 *
 * @author Mr.Yang on 2016-02-18  20:34.
 * @version 1.0
 * @desc
 */
public class NotificationUtil {

    public static Notification createNotification(Context context, PendingIntent pendingIntent, String title, String text, int iconId) {
        Notification notification;
        if (isNotificationBuilderSupported()) {
            LogUtils.d("isNotificationBuilderSupported");
            notification = buildNotificationWithBuilder(context, pendingIntent, title, text, iconId);
        } else {
            // 低于API 11 Honeycomb
            LogUtils.d("buildNotificationPreHoneycomb");
            notification = buildNotificationPreHoneycomb(context, pendingIntent, title, text, iconId);
        }
        return notification;
    }

    public static boolean isNotificationBuilderSupported() {
        try {
            return (Build.VERSION.SDK_INT >= Build.VERSION_CODES.HONEYCOMB) && Class.forName("android.app.Notification.Builder") != null;
        } catch (ClassNotFoundException e) {
            return false;
        }
    }

    @SuppressWarnings("deprecation")
    private static Notification buildNotificationPreHoneycomb(Context context, PendingIntent pendingIntent, String title, String text, int iconId) {
        Notification notification = new Notification(iconId, "", System.currentTimeMillis());
        try {
            // try to call "setLatestEventInfo" if available
            Method m = notification.getClass().getMethod("setLatestEventInfo", Context.class, CharSequence.class, CharSequence.class, PendingIntent.class);
            m.invoke(notification, context, title, text, pendingIntent);
        } catch (Exception e) {
            // do nothing
        }
        return notification;
    }

    @TargetApi(Build.VERSION_CODES.HONEYCOMB)
    @SuppressWarnings("deprecation")
    private static Notification buildNotificationWithBuilder(Context context, PendingIntent pendingIntent, String title, String text, int iconId) {
        android.app.Notification.Builder builder = new android.app.Notification.Builder(context)
                .setContentTitle(title)
                .setContentText(text)
                .setContentIntent(pendingIntent)
                .setSmallIcon(iconId);
        if (Build.VERSION.SDK_INT >= Build.VERSION_CODES.JELLY_BEAN) {
            return builder.build();
        } else {
            return builder.getNotification();
        }
    }

}
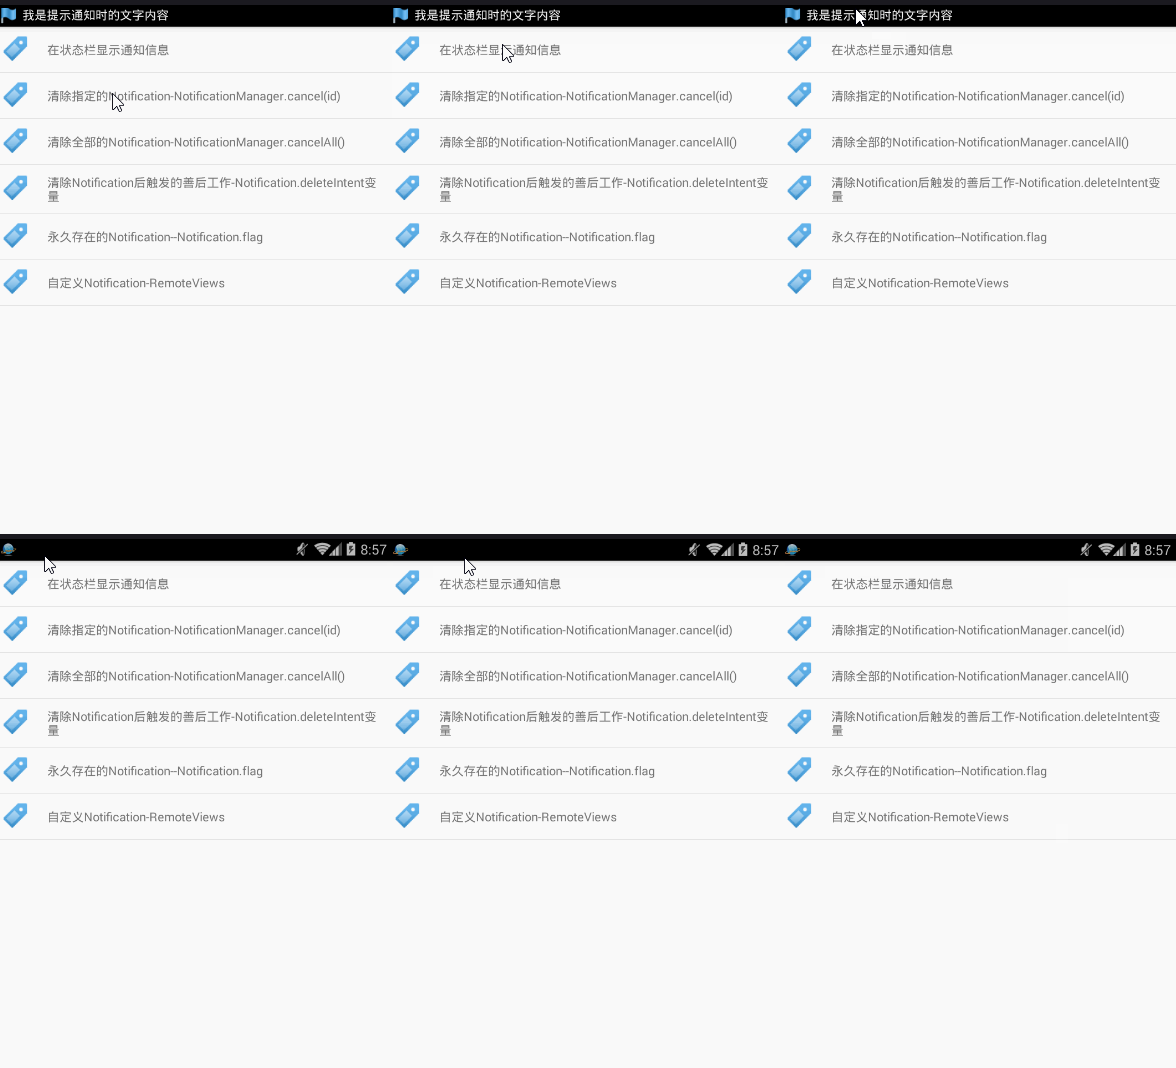
在状态栏上显示通知信息
Notification需要使用NotificationManager来管理,一般来讲创建并显示Notification需要以下5个步骤:
- 通过getSystemService方法获取一个NotificationManager对象
- 创建一个Notification对象,在这里我们使用兼容较好的NotificationUtils类来创建
- 由于Notification可以与应用程序脱离,也就是说,即使应用程序被关闭,Notification仍然会显示在状态栏中,当应用程序再此启动后,又可以重新控制这些Notification,如清除或者替换他们。因此,需要创建一个PendingIntent对象。该对象由Android系统负责维护,因此在应用程序关闭后,该对象仍然不会被释放。
- 使用Notification类的setLatestEventInfo方法设置详细信息(改方法已经在6.0废弃,可使用提供的工具类来代替)
- 使用NotificationManager类的notify方法显示Notification。再这一步需要指定标识Notification的唯一ID,改ID必须相对于同一个NotificationManager对象是唯一的,否则就会覆盖相同ID的Notification。
 /**
     * 全部兼容
     * http://blog.csdn.net/yangshangwei/article/details/50688221
     */
    private void showNotification() {

        notificationManager = (NotificationManager) getSystemService(NOTIFICATION_SERVICE);

        PendingIntent pendingIntent = PendingIntent.getActivity(this, 0, getIntent(), 0);
        // 工具类判断版本,通过不同的方式获取Notification
        Notification notification = NotificationUtil.createNotification(this, pendingIntent, "您有新消息", "消息内容", R.drawable.flag_mark_blue);
        notification.tickerText = "我是提示通知时的文字内容";
        notification.when = System.currentTimeMillis();
        // 使用默认的声音
        notification.defaults = Notification.DEFAULT_SOUND;
        // 使用默认的震动 需要添加uses-permission  android.permission.VIBRATE
        notification.defaults = Notification.DEFAULT_VIBRATE;
        // 使用默认的Light
        notification.defaults = Notification.DEFAULT_LIGHTS;
        // 所有的都是用默认值
        notification.defaults = Notification.DEFAULT_ALL;

        notificationManager.notify(R.drawable.flag_mark_blue, notification);


        // 5S后,执行取消的方法,即5S后 自动清除该通知栏 ,根据需求考虑是否需要这样
//        Handler handler = new Handler();
//        handler.postDelayed(new Runnable() {
//            @Override
//            public void run() {
//                notificationManager.cancel(R.drawable.flag_mark_blue);
//            }
//        },5*1000);

    }
上述代码中的
PendingIntent pendingIntent = PendingIntent.getActivity(this, 0, getIntent(), 0);返回一个PendingIntent对象,这个对象与一个Activity对象关联,这个案例中与当前的Activity关联。将Android状态栏滑下来后,单击Notification,就会显示关联的这个Activity。如果Activity已经显示,仍然会显示一个新的Activity,并覆盖当前显示的Activity。不过这些显示的Activity都是一样的,除了getActivity方法之外,还可以getBroacast和getService方法。 这两个方法用于单击Notification后发出一条广播或者启动一个服务。
设置默认发声、震动、Light效果
   // 使用默认的声音
        notification.defaults = Notification.DEFAULT_SOUND;
        // 使用默认的震动 需要添加uses-permission  android.permission.VIBRATE
        notification.defaults = Notification.DEFAULT_VIBRATE;
        // 使用默认的Light
        notification.defaults = Notification.DEFAULT_LIGHTS;
        // 所有的都是用默认值
        notification.defaults = Notification.DEFAULT_ALL;
注意事项:
- defaults属性必须在调用notify方法之前调用,否则不起作用
- 设置震动效果需要在AndroidManifest.xml中添加权限
清除指定的Notification
如果要清除某个消息可以使用NotificationManager.cancel方法,该方法只有一个参数,表示要清除的Notification的ID。

 case 1:// 清除指定的Notification-cancel(id)
                                    cancelNotification(R.drawable.flag_mark_blue);
/**
* 清除某个消息,
*
* @param id Notification的id
*/
private void cancelNotification(int id) {
notificationManager.cancel(id);
}清除全部的Notification
使用cancelAll()可以清除当前NotificationManager对象中的所有的Notification。
清除Notification后触发的善后工作
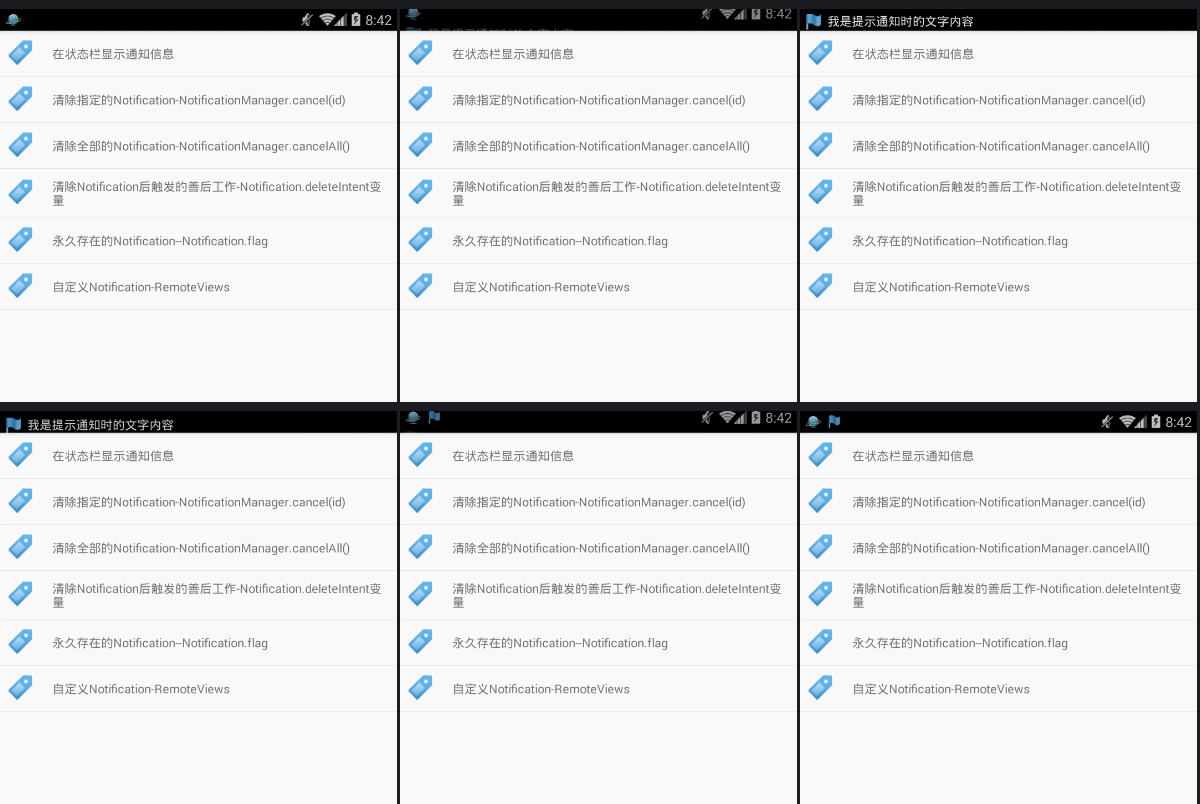
当我们将状态栏下拉下来之后都会看到在屏幕的右上角有一个“清除“按钮或者图标,单击该按钮可以清除所有的Notification, 那么在清除后,往往需要做一些善后的工作,这个就需要通过Notification.deleteIntent来完成。
deleteIntent也需要设置一个PendingIntent类型的变量,由于在清除所有的Notification时调用,可以将这个动作和Activity、Broadcast、Service关联。
 private void notificationDeleteIntent() {
        // 通过getSystemservice获取NotificationManager
        notificationManager = (NotificationManager) getSystemService(NOTIFICATION_SERVICE);

        // PendingIntent --getAct ,getBrc ,getSev等等
        PendingIntent pendingIntent = PendingIntent.getActivity(this, 0, new Intent(this, MainActivity_.class), 0);


        // Notification
        Notification notification = NotificationUtil.createNotification(this, pendingIntent, "Title", "text", R.drawable.tag_blue);
        notification.when = System.currentTimeMillis();
        notification.tickerText = "清除Notificaiton的善后工作";

        // 清除通知,触发的操作,这里将清除Notification触发的deleteIntent设置为跳转到ToastDemoListAct,当然了也可以启动广播 服务等等
        PendingIntent deleteIntent = PendingIntent.getActivity(this, 0, new Intent(this, ToastDemoListAct.class), 0);
        notification.deleteIntent = deleteIntent;

        notificationManager.notify(R.drawable.tag_blue, notification);

    }
如果想响应删除动作的Activity传递数据,可以利用被PendingIntent封装的intent。例如
......
Intent intent = new Intent(this,Main.class);
//传递数据
intent.putExtra("msg","what r u  doing ?");

PendingIntent pendingIntent = PendingIntent.getActivity(this,0.intent,0);
.......
这样在Activity中(一般在onCreate方法中)接收解即可
String msg = getIntent().getStringExtra("msg");
.........
永久存在的Notification
我们发现单击”清除“按钮,有些Notification并没有被清除掉,这样无法被清除的Notification被称为永久Notification,这些Notification只能通过他们的程序 来清除。
实现这样的效果很简单,只需要设置Notification.flag即可。
/**
     * FLAG_SHOW_LIGHTS  //控制闪光
     *
     * FLAG_ONGOING_EVENT  //显示在”正在运行的“一栏中
     *
     * FLAG_INSISTENT   //重复发出声音,直到用户响应此通知
     *
     * FLAG_ONLY_ALERT_ONCE  //标记声音或者震动一次
     *
     * FLAG_AUTO_CANCEL  //在通知栏上点击此通知后自动清除此通知
     *
     * FLAG_NO_CLEAR    //将flag设置为这个属性那么通知栏的那个清楚按钮就不会出现
     *
     * FLAG_FOREGROUND_SERVICE//前台服务标记
     *
     * https://developer.android.com/intl/zh-cn/reference/android/app/Notification.html#FLAG_GROUP_SUMMARY
     *
     * FLAG_GROUP_SUMMARY
     *
     * FLAG_LOCAL_ONLY
     */
    private void permanentNotification() {

        // 通过getSystemService获取NotificationManager
        notificationManager = (NotificationManager) getSystemService(NOTIFICATION_SERVICE);

        // PendingIntent
        PendingIntent pendingIntent = PendingIntent.getActivity(this, 0, getIntent(), 0);

        // Notification
        Notification notification = NotificationUtil.createNotification(this, pendingIntent, "Title", "Content", R.drawable.face);
        notification.tickerText = "清除不掉的Notification";
        notification.when = System.currentTimeMillis();

        notification.flags = Notification.FLAG_NO_CLEAR;


        // 展示Notification
        notificationManager.notify(R.drawable.face, notification);


    }
自定义Notification
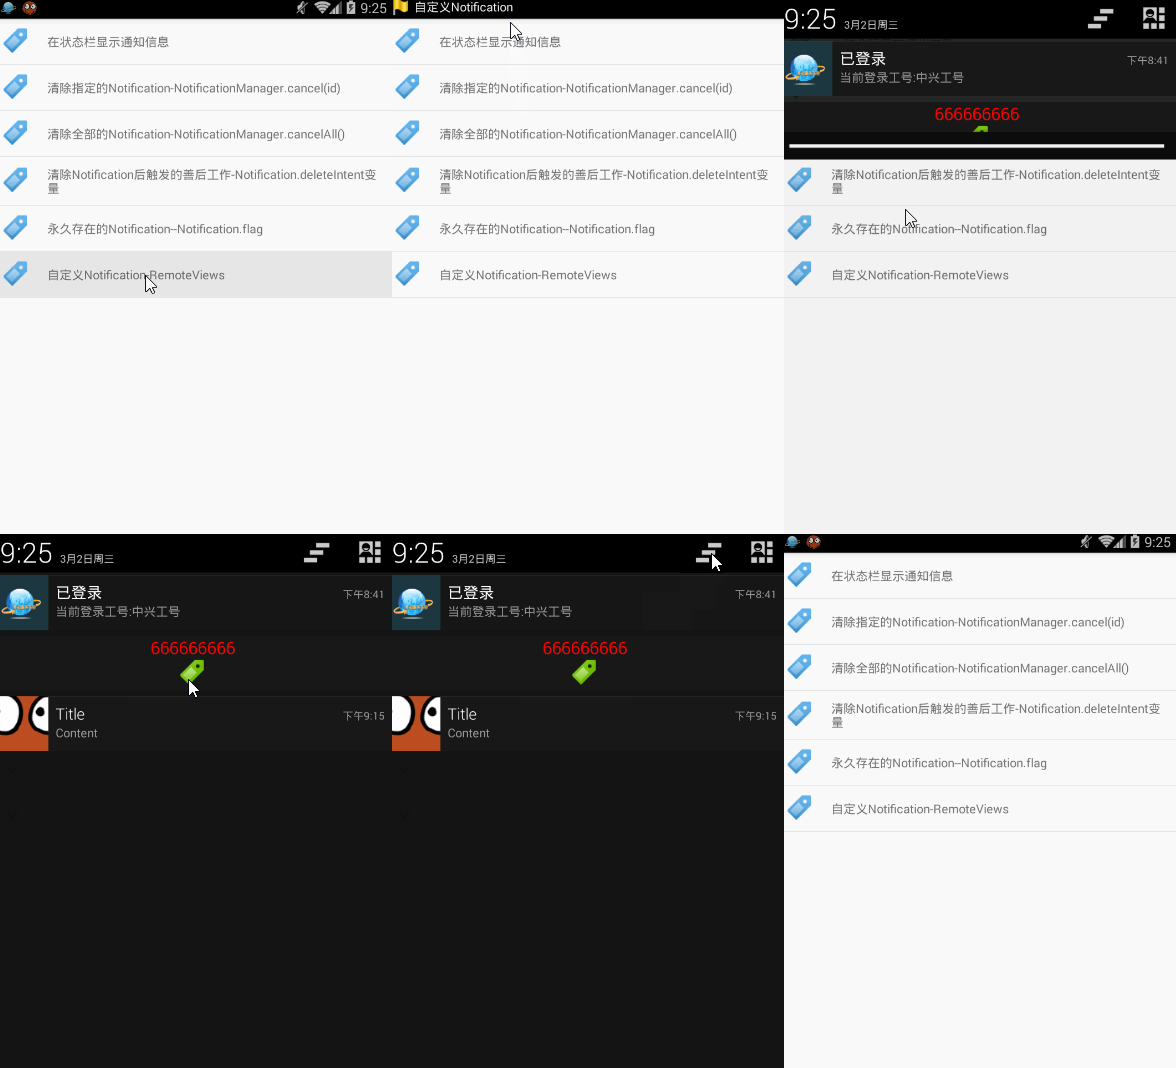
我们可以通过Notification.contentView 来自定义Notification。
contentView 并不是一个View,而是RemoteViews类型。
RemoteView只支持有限的几个控件和布局,如下所示
RemoteView支持的布局
- FrameLayout
- LinearLayout
- RelativeLayout
RemoteView支持的控件
- AnalogClock
- Button
- Chronometer
- ImageButton
- ImageView
- ProgressBar
- TextView
如果使用其他控件,会抛出异常。
实现步骤
activity_custom_notification.xml
<LinearLayout xmlns:android="http://schemas.android.com/apk/res/android"
    android:layout_width="fill_parent"
    android:layout_height="fill_parent"
    android:orientation="vertical">

    <TextView
        android:id="@+id/textview"
        android:layout_width="fill_parent"
        android:layout_height="wrap_content"
        android:gravity="center"
        android:text="自定义内容"
        android:textColor="#F00"
        android:textSize="20sp" />

    <ImageView
        android:layout_width="wrap_content"
        android:layout_height="wrap_content"
        android:layout_gravity="center"
        android:src="@drawable/tag_green" />


LinearLayout>
    private void customNotification() {

        // 通过getSystemService()获取NotificationManager
        notificationManager = (NotificationManager) getSystemService(NOTIFICATION_SERVICE);

        //PendingIntent
        PendingIntent pendingIntent = PendingIntent.getActivity(this,0,getIntent(),0);

        // Notification
        Notification notification = NotificationUtil.createNotification(this,pendingIntent,"Title","text",R.drawable.flag_mark_yellow);

        // 设置属性...
        notification.tickerText="自定义Notification";
        notification.when = System.currentTimeMillis();

        //自定义Notification布局
        RemoteViews remoteViews = new RemoteViews(getPackageName(),R.layout.activity_custom_notification);
        remoteViews.setTextViewText(R.id.textview,"666666666");
        notification.contentView = remoteViews ;

        // notifiy
        notificationManager.notify(R.drawable.flag_mark_yellow,notification);

    }
运行效果
大拿总结的,可以参考


