flutter中上导航栏和下导航栏的实现
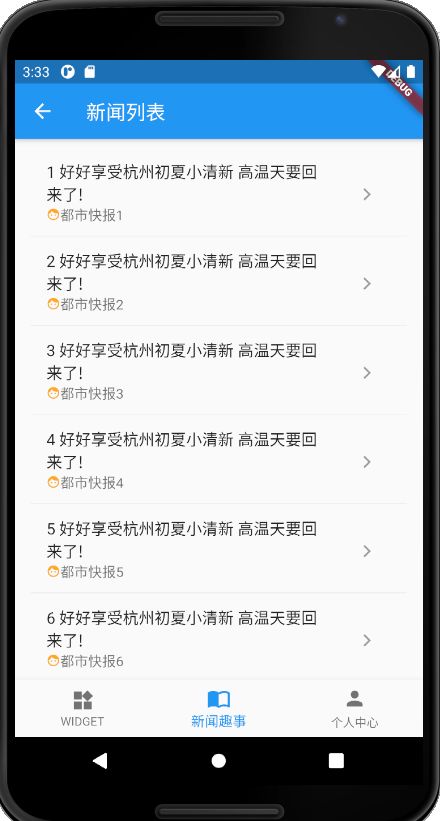
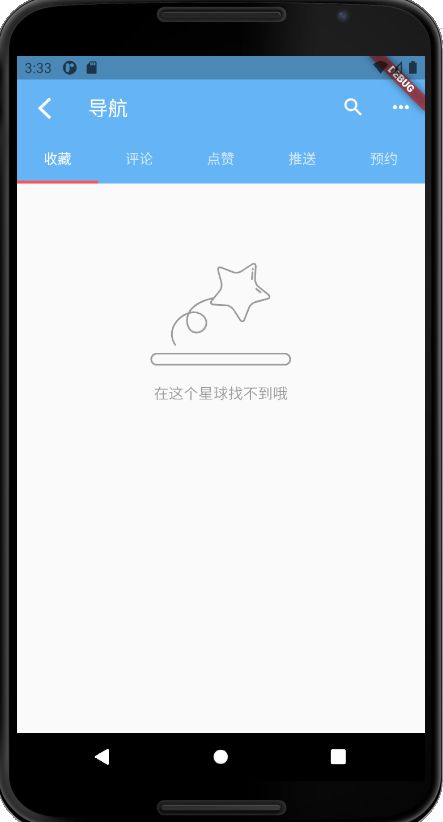
在flutter用于app的开发中,总是会有上导航栏和下导航栏的实现需求,如下图类似的需求,点击不同导航会进入对应界面或者UI视图。


一、下导航栏的实现
Scaffold是一个路由页的骨架,我们在其中使用bottomNavigationBar属性实现下导航栏,代码如下。
// An highlighted block
Widget build(BuildContext context) {
    // TODO: implement build
    return Scaffold(
      body: _buildList(),
      bottomNavigationBar: BottomNavigationBar( // 底部导航
        items: <BottomNavigationBarItem>[
          BottomNavigationBarItem(icon: Icon(Icons.widgets), title: Text("WIDGET")),
          BottomNavigationBarItem(icon: Icon(Icons.import_contacts), title: Text("新闻趣事")),
          BottomNavigationBarItem(
            icon: Icon(Icons.person),
            title: Text("个人中心"),
          ),
        ],
        currentIndex: 1,
//        currentIndex: _selectedIndex, //当前的导航索引值,会随着点击不同的导航而变化
        fixedColor: Colors.blue,
        onTap: _onItemTapped, //点击导航之后的触发函数
      ),
    );
  }
点击导航之后的触发函数,进入不同界面,大家根据自己的跳转需求来即可。
// An highlighted block
int _selectedIndex = 1;
  void _onItemTapped(int index) {
    _selectedIndex = index;
    switch(_selectedIndex) {
      case 0:
        Navigator.push(context,
          MaterialPageRoute(
            builder: (context) {
              return WidgetSection();
            },
          ),
        );
        break;
      case 1:
        Navigator.push(context,
          MaterialPageRoute(
              builder: (context) {
                return MyNewsList(); // 新的界面
              }
          ),
        );break;
      case 2:
        Navigator.push(context,
          MaterialPageRoute(
            builder: (context) {
              return PersonCenter(); //新的界面
            }
          ),
        );break;
    }
    setState(() {
    });
  }
一、上导航栏的实现
使用的是AppBar里面的属性bottom,其中tabs数组的个数要与DefaultTabController的length属性值对应上,在body中的元素个数也要一致。
界面的实现代码:
// An highlighted block
class MySaved extends StatelessWidget {
  @override
  Widget build(BuildContext context) {
    // TODO: implement build
    return DefaultTabController(
      length: 5,
      child: Scaffold(
        appBar: AppBar(
          elevation: 0,
          brightness: Brightness.light, //???没起效果
          backgroundColor: Colors.blue[300],
          leading: IconButton(
            icon: Icon(IconData(0xe603, fontFamily: 'BackIcons')),
            tooltip: 'Navigreation',
            onPressed: () => Navigator.pop(context),
          ),
          title: Text(
            '导航',
            style: TextStyle(
            ),
          ),
          actions: <Widget>[
            IconButton(
              icon: Icon(Icons.search,),
              tooltip: 'Search',
              onPressed: () => debugPrint('Search button is pressed'),
            ),
            IconButton(
              icon: Icon(Icons.more_horiz,),
              tooltip: 'More',
              onPressed: () => debugPrint('More button is pressed'),
            )
          ],
          bottom: TabBar(
            indicatorColor: Colors.redAccent,
            indicatorSize: TabBarIndicatorSize.tab,
            indicatorWeight: 3.0,
            tabs: <Widget>[
              Tab(text: "收藏"),
              Tab(text: "评论"),
              Tab(text: "点赞"),
              Tab(text: "推送"),
              Tab(text: "预约"),
//              Tab(icon: Icon(Icons.local_florist)),
            ],
          ),
        ),
        body: SavedNews(),
      ),
    );
  }
}
在类SavedNews中body的绘构
return Scaffold(
      body: TabBarView(
        children: <Widget>[
          _mySaved(),
          Icon(Icons.local_florist, size: 128, color: Colors.black38),
          Icon(Icons.send, size: 128, color: Colors.black38),
          Icon(Icons.ac_unit, size: 128, color: Colors.black38),
          Icon(Icons.adb, size: 128, color: Colors.black38),
        ],
      ),
    );
    ...
    Widget _mySaved() {
    	return Container(
    		...
    	);
    }
ok啦!有什么错误或者问题欢迎大家评论哦❤