树莓派+MCP2515 实现 CAN 通信
项目原件控制由 Adruino 转 CAN , 基础配置过程。

| 硬件 | 数量 |
|---|---|
| 树莓派3 | 2 |
| 杜邦线 | 6 * 2 |
| MCP2515 | 2 |
任何带SPI口的设备都可以使用MCP2515进行通信
| 软件 | 备注 |
|---|---|
| can-utils | apt / can 口测试 |
| python-can | py2 py3 / python脚本 can 收发 |
1 连线
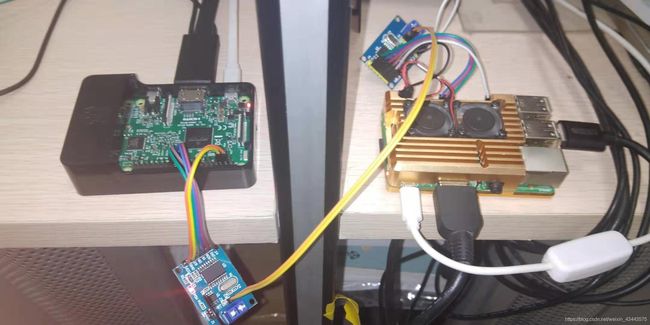
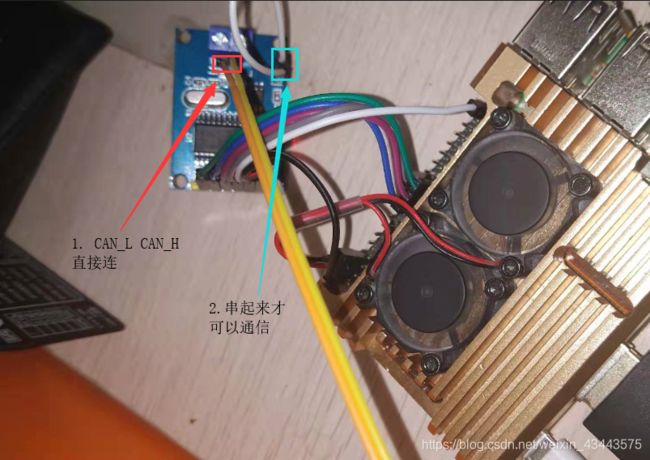
 按照MCP2515引脚连接后,有如图两点需要注意
1 . CAN 总线可以直接用 1 所示连接
2. 1对1 CAN 网测试需要把 2 所示穿起来才可以通信(CAN 网络需两个 120Ω总线电阻)
2 配置CAN
2.1 打开SPI
sudo raspi-config
Interfacing Options - SPI
打开SPI
2.2 配置CAN
sudo vim /boot/config.txt
dtparam=spi=on 下一行添加
dtoverlay=mcp2515-can0,oscillator=8000000,interrupt=25,spimaxfrequency=1000000
sudo reboot

dmesg | grep -i '\(can\|spi\)'
sudo ip link set can0 type can bitrate 500000 restart-ms 100
sudo ifconfig can0 up
添加启动项
sudo vim /etc/network/interfaces
添加
allow-hotplug can0
iface can0 can static
    bitrate 500000
    restart-ms 100
3 测试
3.1 使用 can-utils
sudo apt install can-utils
发送
cansend can0 111#00000000
接收
candump can0
3.2 使用 python-can
pip3 install python-can
import can

bus = can.interface.Bus(bustype='socketcan', channel='can0', bitrate=500000)

msg_snd = can.Message(arbitration_id=0xc0ffee,
                      data=[0, 25, 0, 1, 3, 1, 4, 1],
                      is_extended_id=True)

# send message
try:
        bus.send(msg_snd)
        print("Message sent on {}".format(bus.channel_info))
except can.CanError:
        print("Message NOT sent")


# recieve message
msg_recv = bus.recv(0.0)