网络版坦克大战
作业与练习
- 1、选择一个以前的作业或自己选择一个小游戏,设计成网络游戏。
制作网络版坦克大战
优化
- 有两种操作方式,可以自主选择
- 每辆坦克有三条生命
制作地图
在网络上找到地图资源,里面包括了地图、坦克、及子弹资源。该资源中具有坦克移动脚本以及发射子弹脚本。
将该脚本中的多余场景(已完成的游戏场景)及控制器脚本全部删除,以快速生成后面的exe可执行文件。否则会集成的很慢。
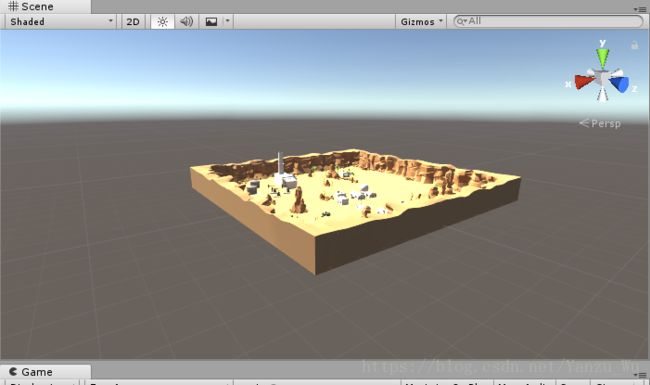
将已有的资源中的地图放进场景。
设置网络
网络管理器
添加新的空对象,并添加脚本
NetworkManagerNetworkManager HUD
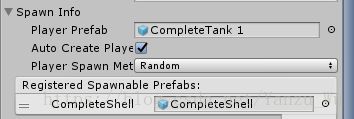
为游戏对象坦克和子弹添加 ‘NetworkIdentity’ 并完成注册
此时,需要修改已有脚本,并将玩家同步到网络上,主要有两个步骤,第一步是设置输入时,只有自己可以移动,第二步是将发射子弹动作设置为
Command
第一部很简单,只需将继承的类改为NetworkBehaviour,并在Update()中添加判断语句即可。
由于发射动作和移动动作在两个类中,因此需要做两次修改。
            if (!isLocalPlayer)
                return;
第二步也非常简单,同样是修改继承类,其次添加
[Command],并将发射子弹函数名称加入前缀Cmd
此时,已经可以开始游戏了,但是还有一些需要优化的地方,例如:原版中坦克只有一条生命,当生命值小于零时则自动爆炸;原版游戏中有两套操作,但是是非选择性的,玩家不能够自主选择操作模式;游戏时,为上帝视角,一方面无法分辨敌我,另一方面,游戏体验不佳。
接下来,将针对这些做一些优化。
设置摄像头
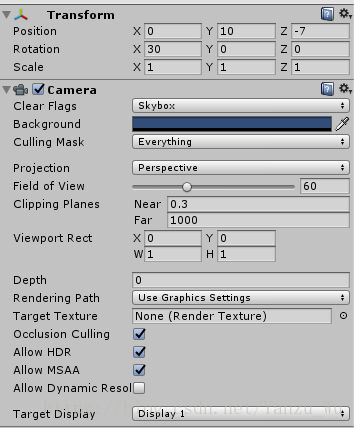
制作新的预制对象坦克,在原有基础上,加入一个摄像头。
摄像头的深度需要设置为0,因为主摄像头的深度为-1。
调整位置及面向方向,直到合适值。
设置多条生命
在原函数中,当生命值低于0的时候则调用函数
OnDeath()触发爆炸效果并将坦克设置为不活跃。
        private void OnDeath ()
        {
            // Set the flag so that this function is only called once.
            m_Dead = true;

            // Move the instantiated explosion prefab to the tank's position and turn it on.
            m_ExplosionParticles.transform.position = transform.position;
            m_ExplosionParticles.gameObject.SetActive (true);

            // Play the particle system of the tank exploding.
            m_ExplosionParticles.Play ();

            // Play the tank explosion sound effect.
            m_ExplosionAudio.Play();

            // Turn the tank off.
            gameObject.SetActive (false);
        }
设置新的参数
m_CurrentLife记录当前生命值,并判断条件,当生命值低于0并且没有生命数也为0的时候才会死亡,否则将调用decadeLife()函数,复活并减去一条生命。该函数中,触发爆炸效果,恢复生命值并减掉一条生命数,然后初始化坦克位置。
- 判断
            if (m_CurrentHealth <= 0f && m_CurrentLife <= 1)
            {
                OnDeath ();
            } else if (m_CurrentHealth <= 0f && m_CurrentLife > 0)
            {
                DecadeLife();
}decadeLife()private void DecadeLife() { Debug.Log("decade one life"); // Move the instantiated explosion prefab to the tank's position and turn it on. m_ExplosionParticles.transform.position = transform.position; m_ExplosionParticles.gameObject.SetActive(true); // Play the particle system of the tank exploding. m_ExplosionParticles.Play(); // Play the tank explosion sound effect. m_ExplosionAudio.Play(); gameObject.transform.position = Vector3.zero; m_CurrentLife--; m_CurrentHealth = m_StartingHealth; Debug.Log(m_CurrentHealth); SetHealthUI(); }
加入GUI组件,显示当前的生命数目。
        private void OnGUI()
        {
            GUI.Button(new Rect(Screen.width / 2, 0, 100, 20), "My Life: " + m_CurrentLife);
        }
设置两套操作模式以支持在一台电脑游戏
为了方便玩家自己选择,添加两个
button以供选择两种操作模式,一种是wasd控制,一种为上下左右控制。选择结束后,根据选择设置应当触发的按钮。
                if (GUI.Button(new Rect(Screen.width / 2, 40, 100, 20), "Mode 1"))
                {

                    // The axes names are based on player number.
                    m_MovementAxisName = "Vertical";
                    m_TurnAxisName = "Horizontal";

                    // Store the original pitch of the audio source.
                    m_OriginalPitch = m_MovementAudio.pitch;
                    mode = 1;
                }
                if (GUI.Button(new Rect(Screen.width / 2, 60, 100, 20), "Mode 2"))
                {

                    // The axes names are based on player number.
                    m_MovementAxisName = "Vertical1";
                    m_TurnAxisName = "Horizontal1";

                    // Store the original pitch of the audio source.
                    m_OriginalPitch = m_MovementAudio.pitch;
                    mode = 2;
                }
修改
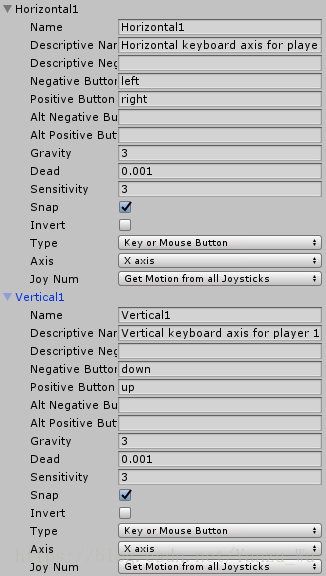
Edit -> Project Setting -> Input的参数值。
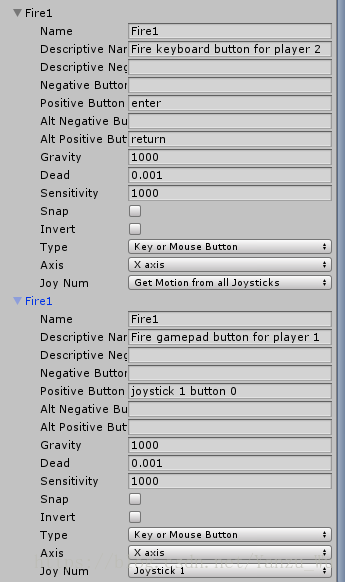
同理,发射也有两种方式,分别为
spaceenter,同样设置。
                if (GUI.Button(new Rect(Screen.width / 2, 80, 100, 20), "space shoot"))
                {
                    m_FireButton = "Fire2";
                    mode = 1;
                }
                if (GUI.Button(new Rect(Screen.width / 2, 100, 100, 20), "enter shoot"))
                {
                    m_FireButton = "Fire1";
                    mode = 2;
                }
游戏完成
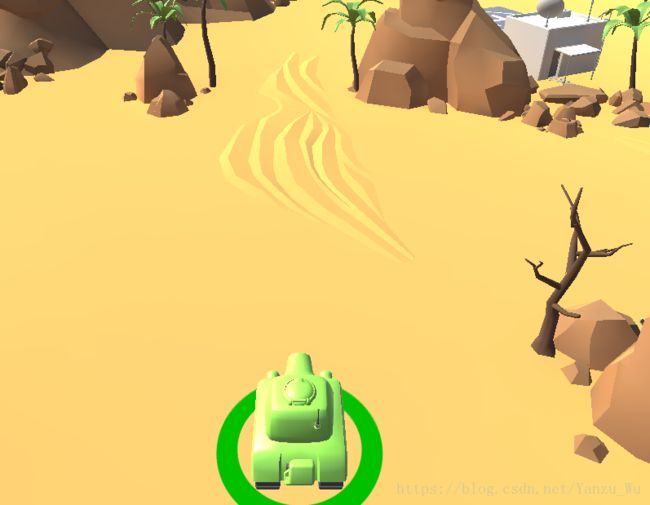
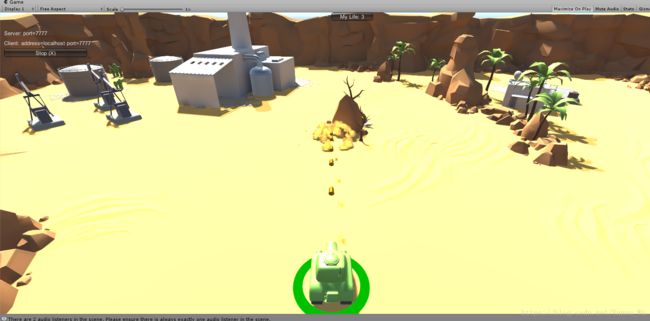
- 成品图
- 视频
视频
