SpringCloud LoadBalancer初体验
文章目录
- 简介
- 步骤
- 创建后端服务实例
- 创建一个普通的Web应用
- 主程序
- 应用配置
- 运行多个服务实例
- 访问后端服务
- 创建LoadBalancerClient应用
- 初始化应用
- 主程序
- WebClientConfig.java
- 配置LoadBalancer的后端服务实例
- 配置application.yml
- 通过LoadBalancerClient访问后端实例
- 注意事项
- 参考资料
简介
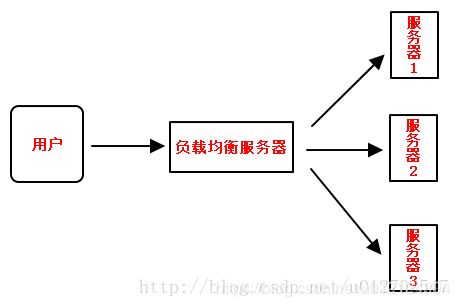
一般情况下我们所说的负载均衡通常都是指服务端负载均衡,负载均衡器会维护一个可用的后端服务器清单,然后通过心跳机制来删除故障的服务端节点以保证清单中都是可以正常访问的服务端节点,此时当客户端的请求到达负载均衡服务器时,负载均衡器按照某种配置好的规则从可用服务端清单中选出一台服务器去处理客户端的请求。
客户端负载均衡和服务端负载均衡最大的区别在于服务清单所存储的位置。在客户端负载均衡中,所有的客户端节点都有一份自己要访问的服务端清单,这些清单统统都是从Eureka服务注册中心获取的。在Spring Cloud中我们如果想要使用客户端负载均衡,方法很简单,开启@LoadBalanced注解即可,这样客户端在发起请求的时候会先自行选择一个服务端,向该服务端发起请求,从而实现负载均衡。
负载均衡的工作原理如下图:
SpringCloud原有的客户端负载均衡方案Ribbon已经被废弃,取而代之的是SpringCloud LoadBalancer。本文介绍SpringCloud LoadBalancer的搭建和测试验证过程。
步骤
我们首先需要先创建几个后端应用实例,然后创建一个应用使用客户端负载均衡器LoadBalancerClient将用户的请求分发到这些后端实例上。
创建后端服务实例
创建一个普通的Web应用
利用Spring Initializr初始化我们的应用,在这里后端服务只要是一个普通的Web服务就可以了,所以添加一个Spring Web依赖即可:
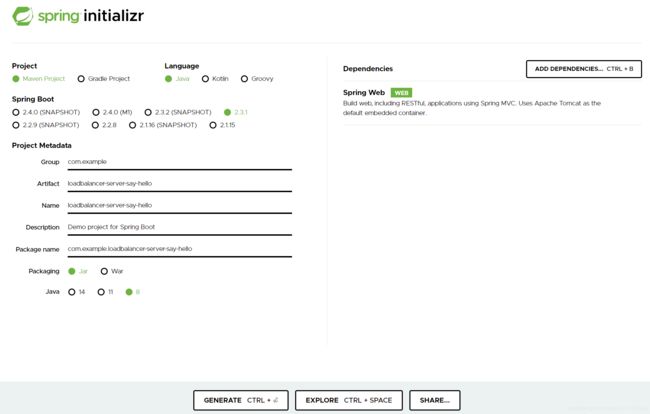
将得到的压缩包解压后导入到idea中。
主程序
后端实例对外暴露了/greeting和/访问点(endpoint),greeting会从3个字符串中随机返回一个,具体代码如下:
package com.example.loadbalancerserversayhello;

import java.util.Arrays;
import java.util.List;
import java.util.Random;
import org.slf4j.Logger;
import org.slf4j.LoggerFactory;
import org.springframework.boot.SpringApplication;
import org.springframework.boot.autoconfigure.SpringBootApplication;
import org.springframework.web.bind.annotation.GetMapping;
import org.springframework.web.bind.annotation.RestController;

@RestController
@SpringBootApplication
public class LoadbalancerServerSayHelloApplication {

	private static Logger log = LoggerFactory.getLogger(LoadbalancerServerSayHelloApplication.class);

	public static void main(String[] args) {
		SpringApplication.run(LoadbalancerServerSayHelloApplication.class, args);
	}

	@GetMapping("/greeting")
	public String greet() {
		log.info("Access /greeting");

		List<String> greetings = Arrays.asList("Hi there", "Greetings", "Salutations");
		Random rand = new Random();

		int randomNum = rand.nextInt(greetings.size());
		return greetings.get(randomNum);
	}

	@GetMapping("/")
	public String home() {
		log.info("Access /");
		return "Hi!";
	}
}
应用配置
在src/main/resources/application.yml加入以下配置,指定服务的名称和运行的端口:
spring:
  application:
    name: say-hello

server:
  port: 8100
运行多个服务实例
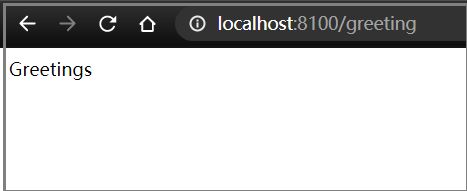
我们首先在idea上直接运行,该服务实例会根据src/main/resources/application.yml中的配置运行在8100端口上。
但我们还需要再运行多几个实例,才能看出负载均衡的效果,并且各个实例之间不能出现端口冲突,我们可以将应用打成jar包,通过多次运行jar包并指定不同端口来在一台机器上运行同个应用的多个实例。
打开终端,将该应用打成jar包:
mvn clean package
使用jar包指定端口运行实例:
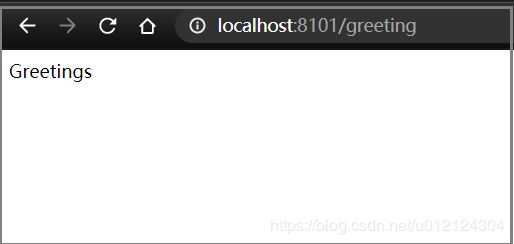
java -jar .\loadbalancer-server-say-hello-0.0.1-SNAPSHOT.jar --server.port=8101
可以再打开几个终端,运行多几个实例,在这里我们再运行一个实例(需要打开一个新的终端):
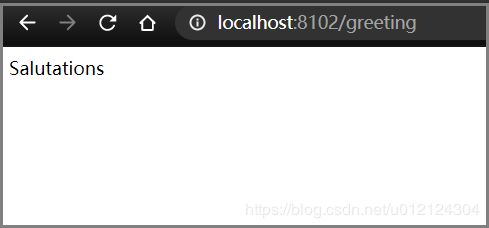
java -jar .\loadbalancer-server-say-hello-0.0.1-SNAPSHOT.jar --server.port=8102
访问后端服务
创建LoadBalancerClient应用
初始化应用
利用Spring Initializr初始化我们的应用,这里我们添加如下两个依赖:
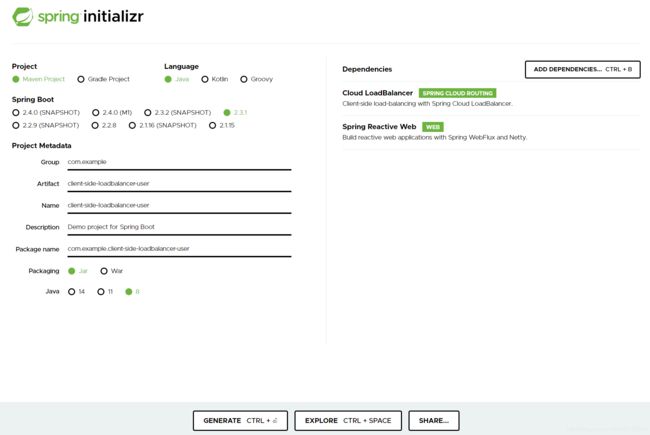
主程序
主程序ClientSideLoadbalancerUserApplication.java的具体代码如下:
package com.example.clientsideloadbalanceruser;

import org.springframework.boot.SpringApplication;
import org.springframework.boot.autoconfigure.SpringBootApplication;
import org.springframework.cloud.client.loadbalancer.reactive.ReactorLoadBalancerExchangeFilterFunction;
import org.springframework.web.bind.annotation.RequestMapping;
import org.springframework.web.bind.annotation.RequestParam;
import org.springframework.web.bind.annotation.RestController;
import org.springframework.web.reactive.function.client.WebClient;
import reactor.core.publisher.Mono;

@RestController
@SpringBootApplication
public class ClientSideLoadbalancerUserApplication {

	private final WebClient.Builder loadBalancedWebClientBuilder;
	private final ReactorLoadBalancerExchangeFilterFunction lbFunction;

	public ClientSideLoadbalancerUserApplication(WebClient.Builder webClientBuilder,
						   ReactorLoadBalancerExchangeFilterFunction lbFunction) {
		this.loadBalancedWebClientBuilder = webClientBuilder;
		this.lbFunction = lbFunction;
	}

	public static void main(String[] args) {
		SpringApplication.run(ClientSideLoadbalancerUserApplication.class, args);
	}

	@RequestMapping("/hi")
	public Mono<String> hi(@RequestParam(value = "name", defaultValue = "Mary") String name) {
		return loadBalancedWebClientBuilder.build().get().uri("http://say-hello/greeting")
				.retrieve().bodyToMono(String.class)
				.map(greeting -> String.format("%s, %s!", greeting, name));
	}

	@RequestMapping("/hello")
	public Mono<String> hello(@RequestParam(value = "name", defaultValue = "John") String name) {
		return WebClient.builder().filter(lbFunction).build().get().uri("http://say-hello/greeting").retrieve().bodyToMono(String.class)
				.map(greeting -> String.format("%s, %s!", greeting, name));
	}
}
其中,loadBalancedWebClientBuilder是注入进去的,具体该bean的配置见下文。
loadBalancedWebClientBuilder.build()会构建出一个WebClient对象,表示某个后端实例。
WebClientConfig.java
package com.example.clientsideloadbalanceruser;

import org.springframework.cloud.client.loadbalancer.LoadBalanced;
import org.springframework.cloud.loadbalancer.annotation.LoadBalancerClient;
import org.springframework.context.annotation.Bean;
import org.springframework.context.annotation.Configuration;
import org.springframework.web.reactive.function.client.WebClient;

@Configuration
@LoadBalancerClient(name = "say-hello", configuration = SayHelloConfiguration.class)
public class WebClientConfig {

    @LoadBalanced
    @Bean
    WebClient.Builder webClientBuilder() {
        return WebClient.builder();
    }
}
提供了WebClient.Builder实例,当用户访问/hi时,我们使用这个builder来创建一个WebClient实例,这个实例会被用来向Say Hello服务发送一个Get请求,并把结果作为一个String返回给我们。
配置LoadBalancer的后端服务实例
我们需要一个实现ServiceInstanceListSupplier接口的类来配置LoadBalancer的后端服务实例,完整代码如下:
package com.example.clientsideloadbalanceruser;

import java.util.Arrays;
import java.util.List;

import reactor.core.publisher.Flux;

import org.springframework.cloud.client.DefaultServiceInstance;
import org.springframework.cloud.client.ServiceInstance;
import org.springframework.cloud.loadbalancer.core.ServiceInstanceListSupplier;
import org.springframework.context.annotation.Bean;
import org.springframework.context.annotation.Configuration;
import org.springframework.context.annotation.Primary;

@Configuration
public class SayHelloConfiguration {

    @Bean
    @Primary
    ServiceInstanceListSupplier serviceInstanceListSupplier() {
        return new DemoServiceInstanceListSuppler("say-hello");
    }

}

class DemoServiceInstanceListSuppler implements ServiceInstanceListSupplier {

    private final String serviceId;

    DemoServiceInstanceListSuppler(String serviceId) {
        this.serviceId = serviceId;
    }

    @Override
    public String getServiceId() {
        return serviceId;
    }

    @Override
    public Flux<List<ServiceInstance>> get() {
        return Flux.just(Arrays
                .asList(new DefaultServiceInstance(serviceId + "1", serviceId, "localhost", 8100, false),
                        new DefaultServiceInstance(serviceId + "2", serviceId, "localhost", 8101, false),
                        new DefaultServiceInstance(serviceId + "3", serviceId, "localhost", 8102, false)));
    }
}
上述代码定义了负载均衡的后端实例的地址,在这里我们指定了我们前面创建的3个后端实例localhost:8100、localhost:8101、localhost:8102。
配置application.yml
在src\main\resources\application.yml中加入以下配置:
spring:
    application:
        name: user

server:
    port: 8200
通过LoadBalancerClient访问后端实例
打开浏览器,输入LoadBalancerClient地址http://localhost:8200/hello,可以成功访问,查看3个后端实例,可以看到请求会被轮流分发到这3个后端实例上。
注意事项
当一个应用作为DiscoveryClient注册到服务发现中心时,就不需要使用@LoadBalancerClient并且手动为这个LoadBalancer创建配置了,这个应用会使用默认的Spring Cloud LoadBalancer配置来找到服务的实例,访问这些实例时只会选择那些正常运行中的实例。
参考资料
什么是客户端负载均衡
https://spring.io/guides/gs/spring-cloud-loadbalancer/
