图像处理100题习题与代码(21~30)
题目原地址:https://github.com/gzr2017/ImageProcessing100Wen
我的github地址:https://github.com/LeonG7/image_100question
前言:
这是图像处理100题的题目记录以及我自己写的参考代码,感谢@gzr2017提供中文翻译。
所有代码由jupyter book软件导出,如需可执行源代码,请在我的github下载。
如有任何问题或错误,欢迎在评论区讨论和指正
图像处理21~30题
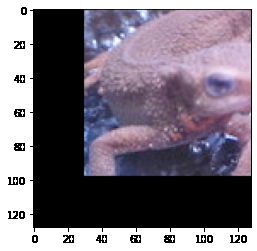
读取图片:
import cv2
import numpy as np
%matplotlib inline
from matplotlib import pyplot as plt

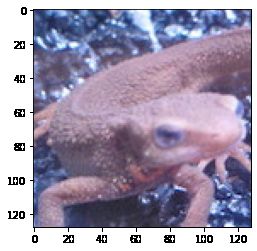
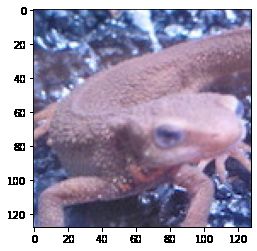
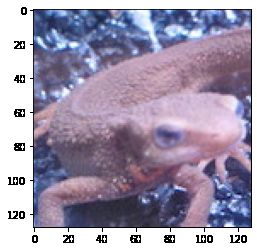
img = cv2.imread("imori.jpg")
img_gamma = cv2.imread("imori_gamma.jpg")
img_dark = cv2.imread("imori_dark.jpg")
img = img[:,:,[2,1,0]]
img_gamma = img_gamma[:,:,[2,1,0]]
img_dark = img_dark[:,:,[2,1,0]]
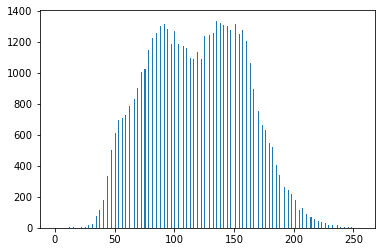
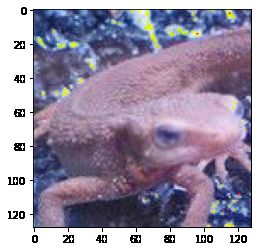
1.直方图归一化(Histogram Normalization)
又称灰度变换,主要适用于将灰度图片还原到彩色图片
公式如下:
x o u t = { a ( if x i n < c ) b − a d − c ( x i n − c ) + a ( else if c ≤ x i n < d ) b ( else ) x_{out}=\begin{cases}a& (\text{if}\quad x_{in}
def normalHist(img):
    a = 0
    b = 255
    c = img.min()
    d = img.max()
    img = (b-a)/(d-c)*(img-c)+a
    img = img .astype(np.uint8)
    return img
imgshow = plt.imshow(img_dark)
plt.show()

img1 = img_dark.copy()
img1 = normalHist(img1)
imgshow = plt.imshow(img1)
plt.show()
hist1 = plt.hist(img1.reshape(-1),bins=255,rwidth=0.85,range=(0,255))
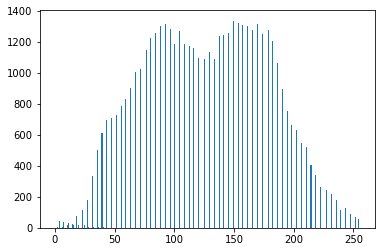
2.直方图平坦化(evenHist)
调整直方图的平均值和标准差
x o u t = s 0 s ( x i n − m ) + m 0 x_{out}=\frac{s_0}{s}\ (x_{in}-m)+m_0 xout=ss0 (xin−m)+m0
def evenHist(img,m0,s0):
    m = img.mean()
    s = np.sqrt(img.var())
    img = (s0/s)*(img-m)+m0
    img = img.astype(np.uint8)
    return img
imgshow = plt.imshow(img_dark)
plt.show()

img2 = img_dark.copy()
img2 = evenHist(img2,128,52)
imgshow = plt.imshow(img2)
plt.show()
hist1 = plt.hist(img2.reshape(-1),bins=255,rwidth=0.85,range=(0,255))
3.直方图均衡化(Histogram Equalization)
直方图均衡化保证在图像像素映射过程中原来的大小关系保持不变,即较亮的区域依旧较亮,较暗的依旧较暗,只是对比度增加,不能明暗颠倒;保证像素映射函数的值域在0和255之间。
按照以下步骤对像素值进行处理:
-
对图像中的像素点进行统计,统计每个像素值对应的个数和占比
-
进行函数映射,zmax是映射范围,一般为255。h(i)的累加是灰度值的累计像素个数。S是像素点个数
Z ′ = Z m a x ∑ i = 0 z h ( i ) S Z' = Z_{max} \ \frac{\sum\limits_{i=0}^z\ h(i)}{S} Z′=Zmax Si=0∑z h(i)
计算方法就是用当前灰度值的累计像素个数乘上要分布映射的范围(255)
比如100个像素点,其中像素值最小为3,个数为5个,(sum(3) = 5)
那么就把像素值为3的像素点值改为 255 × ( 5 100 ) = 12.75 255×(\frac{5}{100}) = 12.75 255×(1005)=12.75 -> 取整 -> 13
下一个像素值为4,个数有8个,那么sum(4) = 5+8 = 12
把像素值为4的像素点值改为 255 × ( 12 100 ) = 30.6 255×(\frac{12}{100}) = 30.6 255×(10012)=30.6 ----> 取整 ----> 31
依次累加计算像素值
def equalHist(img):
    result = np.zeros_like(img)
    #像素总数
    imgsize = img.size
    #统计0~255的值的个数
    count = np.bincount(img.reshape(-1))

    for i in range(count.size):
        #如果这个像素值的个数不为0(就是存在该像素值的点)
        if count[i]:
            #计算累计个数
            sum = count[:i+1].sum()
            x = 255*(sum/imgsize)
            #四舍五入后转为uint8类型
            x = np.around(x).astype(np.uint8)
            #修改原本的像素值,改动放到新的图片上,以免打乱后面的像素值运算
            result[img == i] = x

    return result
imgshow = plt.imshow(img)
plt.show()

img3 = img.copy()
img3 = equalHist(img3)
imgshow = plt.imshow(img3)
plt.show()
hist1 = plt.hist(img3.reshape(-1),bins=255,rwidth=0.85,range=(0,255))
4.伽马矫正(Gamma Correction)
伽马矫正用于调整图片的亮度。
由于照相机拍摄的图片在显示器上显示较暗。所以要进行伽马矫正。
矫正方法(c为常数, γ \gamma γ为伽马指数):
归 一 化 : x n o r m a l = x i n / 255 归一化: x_{normal} = x_{in}/ 255 归一化:xnormal=xin/255
伽 马 矫 正 : x g a m m a = 1 c ⋅ x n o r m a l 1 γ 伽马矫正: x_{gamma} = \frac{1}{c}·x_{normal}^{\frac{1}{\gamma}} 伽马矫正:xgamma=c1⋅xnormalγ1
反 归 一 化 : x o u t = x g a m m a ⋅ 255 反归一化:x_{out} = x_{gamma}·255 反归一化:xout=xgamma⋅255
假设图像中有一个像素,值是 200 ,那么对这个像素进行校正必须执行如下步骤:
- 归一化 :将像素值转换为 0 ~ 1 之间的实数。 算法如下 : ( i + 0. 5)/256 这里包含 1 个除法和 1 个加法操作。对于像素 A 而言 , 其对应的归一化值为 0. 783203 。
- 预补偿 :根据公式 , 求出像素归一化后的 数据以 1 /gamma 为指数的对应值。这一步包含一个 求指数运算。若 gamma 值为 2. 2 , 则 1 /gamma 为 0. 454545 , 对归一化后的 A 值进行预补偿的结果就 是 0. 783203 ^0. 454545 = 0. 894872 。
- 反归一化 :将经过预补偿的实数值反变换为 0 ~ 255 之间的整数值。具体算法为 : f*256 - 0. 5 此步骤包含一个乘法和一个减法运算。续前例 , 将A的预补偿结果 0. 894872代入上式,得到A预补偿后对应的像素值为228,这个 228 就是最后送入显示器的数据。
def gammaCorrection(img,gamma,c = 1):
    img_normal = (img+0.01)/255
    img_gamma = (1/c)*np.power(img_normal,(1/gamma))
    img_out = img_gamma*255 - 0.01
    #防止溢出
    img_out = np.clip(img_out, 0, 255)
    result = img_out.astype(np.uint8)
    return result
imgshow = plt.imshow(img_gamma)
plt.show()

img4 = img.copy()
img4 = gammaCorrection(img4,1)
imgshow = plt.imshow(img4)
plt.show()
参考输出的图片过暗,感觉gamma=1正好符合输出效果,而2.2则过亮
5.最邻近插值(Nearest-neighbor Interpolation)
将放大后的像素点位置设为近邻点的像素值,达到粗劣的放大效果, α \alpha α为放大比例
I ′ ( x , y ) = I ( [ x α ] , [ y α ] ) I'(x,y) = I([\frac{x}{\alpha}], [\frac{y}{\alpha}]) I′(x,y)=I([αx],[αy])
def nnInterpolation(img,a):
    newshape = [int(img.shape[0]*a),int(img.shape[1]*a),img.shape[2]]
    result = np.zeros((newshape))
    for x in range(newshape[0]):
        for y in range(newshape[1]):
            x_a = int(np.floor(x/a))
            y_a = int(np.floor(y/a))
            result[x,y] = img[x_a,y_a]

    result = result.astype(np.uint8)
    return result
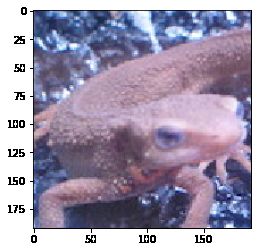
imgshow = plt.imshow(img)
plt.show()

img5 = img.copy()
img5 = nnInterpolation(img5,1.5)
imgshow = plt.imshow(img5)
plt.show()
6.双线性插值(Billnear Interpolation)
使用双线性插值将图像放大 1.5 1.5 1.5倍吧!
双线性插值考察 4 4 4邻域的像素点,并根据距离设置权值。虽然计算量增大使得处理时间变长,但是可以有效抑制画质劣化。
-
放大后图像的座标 ( x ′ , y ′ ) (x',y') (x′,y′)除以放大率 a a a,可以得到对应原图像的座标 ( ⌊ x ′ a ⌋ , ⌊ y ′ a ⌋ ) (\lfloor \frac{x'}{a}\rfloor , \lfloor \frac{y'}{a}\rfloor) (⌊ax′⌋,⌊ay′⌋)。
-
求原图像的座标 ( ⌊ x ′ a ⌋ , ⌊ y ′ a ⌋ ) (\lfloor \frac{x'}{a}\rfloor , \lfloor \frac{y'}{a}\rfloor) (⌊ax′⌋,⌊ay′⌋)周围 4 4 4邻域的座标 I ( x , y ) I(x,y) I(x,y), I ( x + 1 , y ) I(x+1,y) I(x+1,y), I ( x , y + 1 ) I(x,y+1) I(x,y+1), I ( x + 1 , y + 1 ) I(x+1, y+1) I(x+1,y+1):
-
分别求这4个点与 ( x ′ a , y ′ a ) (\frac{x'}{a}, \frac{y'}{a}) (ax′,ay′)的距离,根据距离设置权重: w = d ∑ d w = \frac{d}{\sum\ d} w=∑ dd
-
根据下式求得放大后图像 ( x ′ , y ′ ) (x',y') (x′,y′)处的像素值:
d x = x ′ a − x d y = y ′ a − y I ′ ( x ′ , y ′ ) = ( 1 − d x ) ( 1 − d y ) I ( x , y ) + d x ( 1 − d y ) I ( x + 1 , y ) + ( 1 − d x ) d y I ( x , y + 1 ) + d x d y I ( x + 1 , y + 1 ) d_x = \frac{x'}{a} - x\\ d_y = \frac{y'}{a} - y\\ I'(x',y') = (1-d_x)\ (1-d_y)\ I(x,y) + d_x\ (1-d_y)\ I(x+1,y) + (1-d_x)\ d_y\ I(x,y+1) + d_x\ d_y\ I(x+1,y+1) dx=ax′−xdy=ay′−yI′(x′,y′)=(1−dx) (1−dy) I(x,y)+dx (1−dy) I(x+1,y)+(1−dx) dy I(x,y+1)+dx dy I(x+1,y+1)
双线性插值是将原图像(oldimg)进行伸缩旋转变化之后得到新图像(newimg),将新图像像素点的位置映射回到原图像上,坐标值可能不会是整数,但是我们能获得这个点最近的四个点,通过这四个点进行计算。
1.现在假设一张图放大两倍。
2.在新图像上,我们想计算点A(1,1)的像素值,先将这个点映射到原图像上,得到的坐标是(0.5,0.5)
3.计算(0.5,0.5)最近的四个点: a1(0,0),a2(0,1),a3(1,0),a1(0,1),代入公式即可。
def bnInterprolation(img,a):
    newshape = [int(img.shape[0]*a),int(img.shape[1]*a),img.shape[2]]
    result = np.zeros((newshape))
    #遍历新的图像坐标
    for x in range(newshape[0]):
        for y in range(newshape[1]):
            #对应的原图像上的点(向下取整,也就是左上点的位置)
            x0 = int(np.floor(x/a))
            y0 = int(np.floor(y/a))
            #新图像的坐标/放缩比例 - 原图像坐标点 = 距离
            dx = x/a-x0
            dy = y/a-y0

            #防止溢出
            x1 = x0+1 if x0<img.shape[0]-1 else x0
            y1 = y0+1 if y0<img.shape[1]-1 else y0
            result[x,y] = (1-dx)*(1-dy)*img[x0,y0]+dx*(1-dy)*img[x1,y0]\
                            +(1-dx)*dy*img[x0,y1]+dx*dy*img[x1,y1]

    result = result.astype(np.uint8)
    return result
imgshow = plt.imshow(img)
plt.show()

img6 = img.copy()
img6 = bnInterprolation(img6,1.5)
imgshow = plt.imshow(img6)
plt.show()
7.双三次插值( Bicubic Interpolation )
使用双三次插值将图像放大 1.5 1.5 1.5倍吧!
双三次插值是双线性插值的扩展,使用邻域 16 16 16像素进行插值。
各自像素间的距离由下式决定:
KaTeX parse error: No such environment: align* at position 8: \begin{̲a̲l̲i̲g̲n̲*̲}̲ d_{x_1} = |\fr…
权重由基于距离的函数取得。 a a a在大部分时候取 − 1 -1 −1。大体上说,图中蓝色像素的距离 ∣ t ∣ ≤ 1 |t|\leq 1 ∣t∣≤1,绿色像素的距离 1 < ∣ t ∣ ≤ 2 1<|t|\leq 2 1<∣t∣≤2:
h ( t ) = { ( a + 2 ) ∣ t ∣ 3 − ( a + 3 ) ∣ t ∣ 2 + 1 when ∣ t ∣ ≤ 1 a ∣ t ∣ 3 − 5 a ∣ t ∣ 2 + 8 a ∣ t ∣ − 4 a when 1 < ∣ t ∣ ≤ 2 0 else h(t)= \begin{cases} (a+2)\ |t|^3 - (a+3)\ |t|^2 + 1 &\text{when}\quad |t|\leq 1 \\ a\ |t|^3 - 5\ a\ |t|^2 + 8\ a\ |t| - 4\ a&\text{when}\quad 1<|t|\leq 2\\ 0&\text{else} \end{cases} h(t)=⎩⎪⎨⎪⎧(a+2) ∣t∣3−(a+3) ∣t∣2+1a ∣t∣3−5 a ∣t∣2+8 a ∣t∣−4 a0when∣t∣≤1when1<∣t∣≤2else
利用上面得到的权重,通过下面的式子扩大图像。将每个像素与权重的乘积之和除以权重的和。
I ′ ( x ′ , y ′ ) = 1 ∑ j = 1 4 ∑ i = 1 4 h ( d x i ) h ( d y j ) ∑ j = 1 4 ∑ i = 1 4 I ( x + i − 2 , y + j − 2 ) h ( d x i ) h ( d y j ) I'(x', y')=\frac{1}{\sum\limits_{j=1}^4\ \sum\limits_{i=1}^4\ h(d_{xi})\ h(d_{yj})}\ \sum\limits_{j=1}^4\ \sum\limits_{i=1}^4\ I(x+i-2,y+j-2)\ h(d_{xi})\ h(d_{yj}) I′(x′,y′)=j=1∑4 i=1∑4 h(dxi) h(dyj)1 j=1∑4 i=1∑4 I(x+i−2,y+j−2) h(dxi) h(dyj)
#权重计算公式
def weight(absd):
    weights = np.zeros_like(absd)
    a = -1
    #先计算距离为0~1的点的权重
    w = (a+2)*np.power(absd,3) - (a+3)*np.square(absd) + 1
    weights[absd <= 1] = w[absd <= 1]
    #再计算距离为1~2的点的权重
    w = a*np.power(absd,3) - 5*a*np.square(absd) + 8*a*absd -4*a
    weights[(absd > 1)*(absd <= 2)] = w[(absd > 1)*(absd <= 2)]
    #其余的都为0
    return weights
def bicInterpolation(img,a):

    max_x,max_y,_ = img.shape
    #将新图像的x的坐标点映射回原图像,所以每个点的坐标为(x[i,j],y[i,j])
    list = np.arange(img.shape[0]*a)/a
    y = np.tile(list,list.shape[0]).reshape(list.shape[0],-1)
    x = y.T
    #映射点(图中红点)对应的左上角蓝点坐标
    x0 = np.floor(x)
    y0 = np.floor(y)

    #其他15个点的坐标
    xx = np.array([np.maximum(x0-1,0),x0,np.minimum(x0+1,max_x-1),np.minimum(x0+2,max_x-1)])

    yy = np.array([np.maximum(y0-1,0),y0,np.minimum(y0+1,max_y-1),np.minimum(y0+2,max_y-1)])
    # 前面的对应的映射点的坐标(带小数)
    #而后面对应的周围16点的坐标。相减取绝对值得到距离
    #用maximun限定坐标下限(0),用minmun限定坐标上限(max)防止溢出
    dx = np.abs(x-xx)
    dy = np.abs(y-yy)

    wx = weight(dx)
    wy = weight(dy)

    #初始化联合权重和输出(3,192,192)
    #联合权重  = 将距离代入权重函数后横纵权重相乘再累加,公式见题
    h_sum = np.zeros((img.shape[2],int(img.shape[0]*a),int(img.shape[1]*a)))
    i_sum = np.zeros_like(h_sum)
    for i in range(4):
        for j in range(4):
            #像素值
            x = img[xx[i].astype(np.int),yy[i].astype(np.int)]
            #旋转一下维度,让通道变为第一维,方便矩阵相乘
            x = x.transpose(2,0,1)
            #联合权重,扩充成3维,方便计算
            w_xy = wx[i]*wy[j]
            wxy = np.array([w_xy,w_xy,w_xy])
            h_sum += w_xy

            #联合权重在乘上对应的像素值
            i_sum += (x*w_xy)

    #相除得到结果,再把通道放回第三维
    result = (i_sum/h_sum).transpose(1,2,0)
    result = np.clip(result, 0, 255)
    result = result.astype(np.uint8)

    return result
imgshow = plt.imshow(img)
plt.show()

img7 = img.copy()
img7 = bicInterpolation(img7,10)
imgshow = plt.imshow(img7)
plt.show()
8.仿射变换( Afine Transformations )——平行移动
利用仿射变换让图像在 x x x方向上 + 30 +30 +30,在 y y y方向上 − 30 -30 −30吧!
仿射变换利用 3 × 3 3\times3 3×3的矩阵来进行图像变换。
变换的方式有平行移动(问题二十八)、放大缩小(问题二十九)、旋转(问题三十)、倾斜(问题三十一)等。
原图像记为 ( x , y ) (x,y) (x,y),变换后的图像记为 ( x ′ , y ′ ) (x',y') (x′,y′)。
图像放大缩小矩阵为下式:
( x ′ y ′ ) = ( a b c d ) ( x y ) \left( \begin{matrix} x'\\ y' \end{matrix} \right)= \left( \begin{matrix} a&b\\ c&d \end{matrix} \right)\ \left( \begin{matrix} x\\ y \end{matrix} \right) (x′y′)=(acbd) (xy)
另一方面,平行移动按照下面的式子计算:
( x ′ y ′ ) = ( x y ) + ( t x t y ) \left( \begin{matrix} x'\\ y' \end{matrix} \right)= \left( \begin{matrix} x\\ y \end{matrix} \right)+ \left( \begin{matrix} t_x\\ t_y \end{matrix} \right) (x′y′)=(xy)+(txty)
把上面两个式子盘成一个:
( x ′ y ′ 1 ) = ( a b t x c d t y 0 0 1 ) ( x y 1 ) \left( \begin{matrix} x'\\ y'\\ 1 \end{matrix} \right)= \left( \begin{matrix} a&b&t_x\\ c&d&t_y\\ 0&0&1 \end{matrix} \right)\ \left( \begin{matrix} x\\ y\\ 1 \end{matrix} \right) ⎝⎛x′y′1⎠⎞=⎝⎛ac0bd0txty1⎠⎞ ⎝⎛xy1⎠⎞
平行移动操作使用下面的式子计算。 t x t_x tx和 t y t_y ty是像素移动的距离。
( x ′ y ′ 1 ) = ( 1 0 t x 0 1 t y 0 0 1 ) ( x y 1 ) \left( \begin{matrix} x'\\ y'\\ 1 \end{matrix} \right)= \left( \begin{matrix} 1&0&t_x\\ 0&1&t_y\\ 0&0&1 \end{matrix} \right)\ \left( \begin{matrix} x\\ y\\ 1 \end{matrix} \right) ⎝⎛x′y′1⎠⎞=⎝⎛100010txty1⎠⎞ ⎝⎛xy1⎠⎞
def transformations(img,mtrix):
    result = np.zeros_like(img)

    #将图像的坐标点保存
    list = np.arange(img.shape[1]).reshape(-1,1)
    x = np.tile(list,img.shape[0])
    list = np.arange(img.shape[0])
    y = np.tile(list,img.shape[1]).reshape(-1,img.shape[0])

    #仿射变换矩阵
    v = np.array([x.reshape(-1),y.reshape(-1),np.ones((x.size))])
    new_xy = np.dot(mtrix,v)
    new_xy = new_xy[0:2].astype(np.uint8)

    #将溢出部分去除
    out = (new_xy[1]<result.shape[0])*(new_xy>=0)*(new_xy[0]<result.shape[1])
    out = np.multiply(out[0],out[1])
    for i,flag in enumerate(out):
        #只计算未溢出部分
        if flag:
            #将原来的图像赋值到新图像
            result[new_xy[1,i],new_xy[0,i]] = img[y.reshape(-1)[i],x.reshape(-1)[i]]
    return result
def transMtrix(a,b,c,d,tx,ty):
    mtrix = np.array([[a,b,tx],[c,d,ty],[0,0,1]])
    return mtrix
imgshow = plt.imshow(img)
plt.show()

img8 = img.copy()
m = transMtrix(1,0,0,1,30,-30)
img8 = transformations(img8,m)
imgshow = plt.imshow(img8)
plt.show()
8.仿射变换( Afine Transformations )——放大缩小
- 使用仿射变换,将图片在 x x x方向上放大 1.3 1.3 1.3倍,在 y y y方向上缩小至原来的 4 5 \frac{4}{5} 54。
- 在上面的条件下,同时在 x x x方向上向右平移 30 30 30( + 30 +30 +30),在 y y y方向上向上平移 30 30 30( − 30 -30 −30)。
方法使用逆仿射变换法,将新的坐标点代入公式求得对应的原坐标点
( x y ) = 1 a d − b c ( d − b − c a ) ( x ′ y ′ ) − ( t x t y ) \left( \begin{matrix} x\\ y \end{matrix} \right)= \frac{1}{a\ d-b\ c}\ \left( \begin{matrix} d&-b\\ -c&a \end{matrix} \right)\ \left( \begin{matrix} x'\\ y' \end{matrix} \right)- \left( \begin{matrix} t_x\\ t_y \end{matrix} \right) (xy)=a d−b c1 (d−c−ba) (x′y′)−(txty)
def AfineTrans(img,a,b,c,d,tx,ty):
    result = np.zeros((int(img.shape[0]*d),int(img.shape[1]*a),img.shape[2]))

    #将新图像的横坐标和竖坐标保存到数组中
    list = np.arange(result.shape[1]).reshape(-1,1)
    new_x = np.tile(list,result.shape[0])
    list = np.arange(result.shape[0])
    new_y = np.tile(list,result.shape[1]).reshape(-1,result.shape[0])

    #逆仿射变换求出对应的点
    ad_bc = a*d-b*c
    x = (((d*new_x)-(b*new_y))/ad_bc).astype(np.uint8)
    y = (((-c*new_x)+(a*new_y))/ad_bc).astype(np.uint8)

    #将原坐标的点输入到新坐标中
    result[new_y,new_x] = img[y,x]
    result = result.astype(np.uint8)

    m = transMtrix(1,0,0,1,tx,ty)
    result = transformations(result,m)
    return result
imgshow = plt.imshow(img)
plt.show()

img9 = img.copy()
img9 = AfineTrans(img9,1.3,0,0,0.8,30,-30)
imgshow = plt.imshow(img9)
plt.show()
10.仿射变换( Afine Transformations )——旋转
- 使用仿射变换,逆时针旋转 30 30 30度。
- 使用仿射变换,逆时针旋转 30 30 30度并且能让全部图像显现(也就是说,单纯地做仿射变换会让图片边缘丢失,这一步中要让图像的边缘不丢失,需要耗费一些工夫)。
我偷懒了!直接把边缘去掉了,我有罪。。。
使用下面的式子进行逆时针方向旋转 A A A度的仿射变换:
( x ′ y ′ 1 ) = ( cos ( A ) − sin ( A ) t x sin ( A ) cos ( A ) t y 0 0 1 ) ( x y 1 ) \left( \begin{matrix} x'\\ y'\\ 1 \end{matrix} \right)= \left( \begin{matrix} \cos(A)&-\sin(A)&t_x\\ \sin(A)&\cos(A)&t_y\\ 0&0&1 \end{matrix} \right)\ \left( \begin{matrix} x\\ y\\ 1 \end{matrix} \right) ⎝⎛x′y′1⎠⎞=⎝⎛cos(A)sin(A)0−sin(A)cos(A)0txty1⎠⎞ ⎝⎛xy1⎠⎞
def AfineTrans2(img,a,b,c,d,tx,ty):
    #边缘去掉方便计算
    img[0,:] = 0
    img[-1,:] = 0
    img[:,0] = 0
    img[:,-1] = 0

    result = np.zeros_like(img)
    #将新图像的横坐标和竖坐标保存到数组中
    list = np.arange(result.shape[0])
    new_x = np.tile(list,result.shape[1]).reshape(-1,result.shape[0])
    list = np.arange(result.shape[1]).reshape(-1,1)
    new_y = np.tile(list,result.shape[0])
    #逆仿射变换求出对应的点
    ad_bc = a*d-b*c
    x = np.round((d*new_x-b*new_y)/ad_bc).astype(np.int)-tx
    y = np.round((-c*new_x+a*new_y)/ad_bc).astype(np.int)-ty

    x = np.minimum(np.maximum(x, 0), img.shape[0]-1).astype(np.uint8)
    y = np.minimum(np.maximum(y, 0), img.shape[1]-1).astype(np.uint8)

    #将原坐标的点输入到新坐标中
    result[new_x,new_y] = img[x,y]
    result = result.astype(np.uint8)

    return result
imgshow = plt.imshow(img)
plt.show()

img10 = img.copy()
cc = 30*np.pi/180
img10 = AfineTrans2(img10,np.cos(cc),-np.sin(cc),np.sin(cc),np.cos(cc),20,-40)
imgshow = plt.imshow(img10)
plt.show()
这次的十个题目感觉比之前的硬核很多,要仔细研究,话说回来扎实的基础也挺重要的
原创首发,欢迎来我的博客留言讨论,我的博客主页:LeonG是什么意思?我的知乎专栏:LeonG与机器学习
版权声明:本文为博主原创文章,遵循 CC 4.0 BY-SA 版权协议,转载请附上原文出处链接和本声明。


