python下通过dlib和opencv实现人脸对齐(包括关键点检测和仿射变换)
dlib里面这个人脸关键点检测实现的是CVPR2014 One Millisecond Face Alignment with an Ensemble of Regression Trees 里面的算法
python的dlib库的安装:
下载dlib源码,有个setup.py文件,安装,
然后把python_examples文件夹中dlib.so文件拷贝到python的site-packages文件中即可
opencv的安装参考我的另外一篇,里面有python模块的安装:
ubuntu16下编译并安装opencv2.4.9(附卸载方式)
参考:
python中基于dlib的人脸关键点检测http://blog.csdn.net/sunmc1204953974/article/details/49976045
python下opencv几何变换http://blog.csdn.net/a352611/article/details/51418178
c++下opencv放射变换http://blog.csdn.net/yanyan_xixi/article/details/36372901
关键点顺序http://blog.csdn.net/muyouhang/article/details/52875288?locationNum=14&fps=1
直接贴代码:
说明,函数的输入是4维的人脸图片矩阵(已经crop出来的人脸图),numpy.array类型即可
维度分别是 num * num * width * height * channels
感觉这个效果就那样吧...如果人脸的旋转比较大以及侧脸角度大的话,就不怎么好
def face_alignment(faces,show=False):
    '''
    faces: num * width * height * channels ,value = 0~255, dtype = np.uint8,
    note: width must equal to height
    '''
    print(faces.shape)
    if len(faces.shape)==4 and faces.shape[3]==1:
        faces = faces.reshape(faces.shape[:-1]) # if gray, turns to num * width * height, no channel axis 如果是灰度图,去掉最后一维,否则predictor会报错
    num = faces.shape[0]
    import numpy as np
    faces_aligned = np.zeros(shape=faces.shape,dtype=np.uint8)
    import dlib
    predictor_path = "./shape_predictor_68_face_landmarks.dat" # dlib提供的训练好的68个人脸关键点的模型,网上可以下
    predictor = dlib.shape_predictor(predictor_path) # 用来预测关键点
    for i in range(num):
        img = faces[i]
        rec = dlib.rectangle(0,0,img.shape[0],img.shape[1])
        shape = predictor(np.uint8(img),rec) # 注意输入的必须是uint8类型
        order=[36,45,30,48,54] # left eye, right eye, nose, left mouth, right mouth  注意关键点的顺序,这个在网上可以找
        if show:
            plt.pyplot.figure()
            plt.pyplot.imshow(img,cmap='gray')
            for j in order:
                x = shape.part(j).x
                y = shape.part(j).y
                plt.pyplot.scatter(x,y) # 可以plot出来看看效果,这里我只plot5个点
        eye_center =( (shape.part(36).x + shape.part(45).x) * 1./2, # 计算两眼的中心坐标
                      (shape.part(36).y + shape.part(45).y) * 1./2)
        dx = (shape.part(45).x - shape.part(36).x) # note: right - right
        dy = (shape.part(45).y - shape.part(36).y)
        import math
        angle = math.atan2(dy,dx) * 180. / math.pi # 计算角度
#        print angle
        import cv2
        RotateMatrix = cv2.getRotationMatrix2D(eye_center, angle, scale=1) # 计算仿射矩阵
        RotImg = cv2.warpAffine(img, RotateMatrix, (img.shape[0], img.shape[1])) # 进行放射变换,即旋转
        faces_aligned[i] = RotImg
    return faces_aligned # uint8
来个demo感受一下效果:
def demo():
    import cv2
    im_raw1 = cv2.imread('1_4129.png').astype('uint8')
    plt.pyplot.figure() # plt是import matplotlib as plt,这里的输入最好是unint8
    plt.pyplot.imshow(im_raw1,cmap='gray')
    im_raw1 = cv2.resize(im_raw1,(181,181))
    im_raw2 = cv2.imread('21_014735000_00000003.png').astype('uint8')
    plt.pyplot.figure()
    plt.pyplot.imshow(im_raw2,cmap='gray')# cmap怎么指定彩色图????查了好久没查到
    im_raw2 = cv2.resize(im_raw2,(181,181))
    imgs = np.zeros([2,181,181,3],dtype=np.uint8)
    imgs[0] = im_raw1
    imgs[1] = im_raw2
    faces_aligned = face_alignment(imgs,show=True)
    plt.pyplot.figure()
    plt.pyplot.imshow(faces_aligned[0],cmap='gray')
    plt.pyplot.figure()
    plt.pyplot.imshow(faces_aligned[1],cmap='gray') # cmap怎么指定彩色图????查了好久没查到
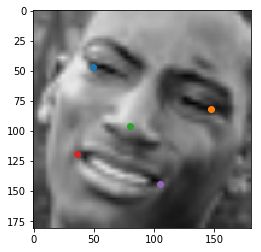
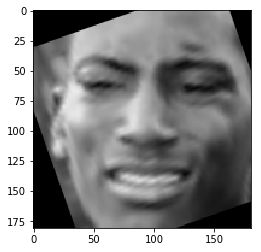
结果图:
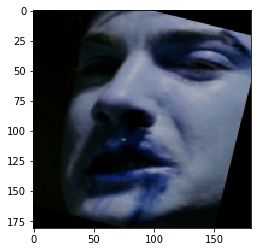
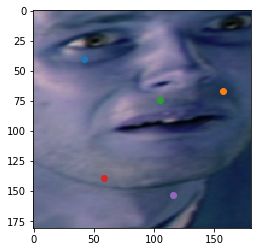
比较差的:
待续


