prometheus+grafana监控springboot集群项目
在此是自己调研prometheus的监控项目,利用grafana当做展示页面,对应的我们自己的项目是springboot的集群项目。
首先下载prometheus和grafana,我下的版本prometheus是2.6.0,grafana是5.4.2
下载prometheus
https://prometheus.io/download/
下载grafana
https://grafana.com/grafana/download?platform=linux
配置监控可以分成两种模式,一种是利用spring-security来配置,分开了访问端口,利用spring-security的用户名密码配置好进行访问,另外一种就是普通的配置,利用正常的访问端口进行配置。
一.springboot项目配置
spring-security方式,采用两个端口号配置
1.在项目中配置引入jar包
普通配置,不需要配置spring-security
去掉spring-boot-starter-security
2.springboot启动文件中加入配置
@EnablePrometheusEndpoint
@EnableSpringBootMetricsCollector
/**
* 避免增加自定义metrics时覆盖默认metrics
*
* @param strings
* @throws Exception
*/
@Override
public void run(String... strings) throws Exception {
DefaultExports.initialize();
}
普通配置,不需要配置run的方法
例:
3.在properties配置文件中指定
# performance monitor actuator
endpoints:
health:
enabled: true
metrics:
enabled: true
security:
basic:
enabled: true
path: /metrics,/prometheus
user:
name: tal_admin
password: Brandy100tal
management:
security:
enabled: false
port: 10003
management.port需要和server.port区分开
普通配置
management:
# actuator暴露接口使用的端口,为了和api接口使用的端口进行分离
#port: 7778
# actuator暴露接口的前缀
context-path: /
security:
# actuator是否需要安全保证
enabled: false
# 可以访问管理端点的用户角色列表,逗号分隔
roles: SUPERUSER
endpoints:
metrics:
# actuator的metrics接口是否开启
enabled: true
# actuator的metrics接口是否需要安全保证
sensitive: false
health:
# actuator的health接口是否开启
enabled: true
# actuator的health接口是否需要安全保证
sensitive: false
#启用shutdown
shutdown:
enabled: true
4.springboot在1.5配置需要加入tomcat配置,2.0不需要
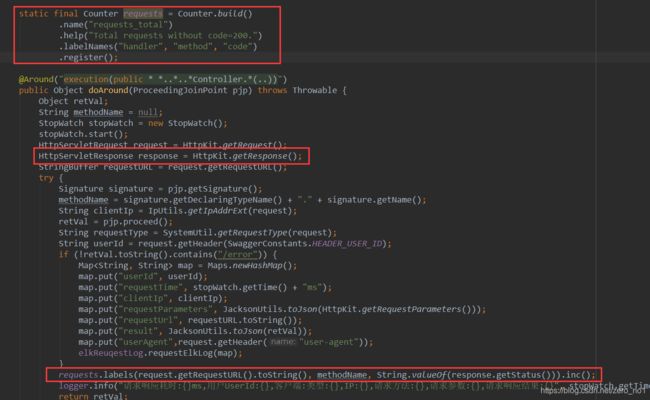
5.需要加入每个请求的时间,需要加入拦截器配置
6.aop可以加入判断是否返回为200
二.linux下prometheus配置
1.下载解压
2.添加并修改配置文件
spring-security配置:
scrape_configs:
# The job name is added as a label `job=
- job_name: 'spring-boot'
basic_auth:
username: tal_admin
password: Brandy100tal
metrics_path: '/prometheus'
scrape_interval: 5s
scrape_timeout: 5s
# metrics_path defaults to '/metrics'
# scheme defaults to 'http'.
static_configs:
- targets:
- 172.17.0.112:10003
- 172.17.0.108:10003
主要确定basic_auth的用户名密码和项目一致
确定target下的ip及地址一致
普通配置:
scrape_configs:
# The job name is added as a label `job=
#- job_name: 'spring-boot'
#metrics_path: '/prometheus'
# static_configs:
# - targets:
# - localhost:9090
- job_name: 'spring-boot-jackl'
metrics_path: '/prometheus'
static_configs:
- targets:
- 172.17.0.108:9003
3.启动命令
指定端口号:./prometheus --config.file=prometheus.yml --web.listen-address=0.0.0.0:8090 &
如需要定制化配置:
nginx访问配置:https://www.cnblogs.com/aguncn/p/10002366.html
三.linux下grafana配置
1.下载解压
2.添加配置文件
只添加了需要改动的地方
[server]
# Protocol (http, https, socket) 访问方式
protocol = http
# The http port to use 指定的端口号
http_port = 8094
# The public facing domain name used to access grafana from a browser 访问的地址在浏览器上
domain = pxtest.facethink.com
#################################### Database ############################
[database]
# You can configure the database connection by specifying type, host, name, user and password
# as separate properties or as on string using the url property.
# Either "mysql", "postgres" or "sqlite3", it's your choice 提前制定好数据库地址信息
type = mysql
host = 192.168.0.27:3306
name = grafana
user = root
# If the password contains # or ; you have to wrap it with triple quotes. Ex """#password;"""
password = password
3.启动命令
./grafana-server --config ../conf/config.ini &
4.初次启动用户名密码为
admin/admin 会提示重置密码
5.添加数据源
6.添加数据看板
可以选择导入,填写名称,添加刚才配置的数据源
提供一个demo的test.json
https://download.csdn.net/download/zero_no1/10923285
修改json中的title属性以上传多个json配置多个项目
以上为我们自用的配置~


