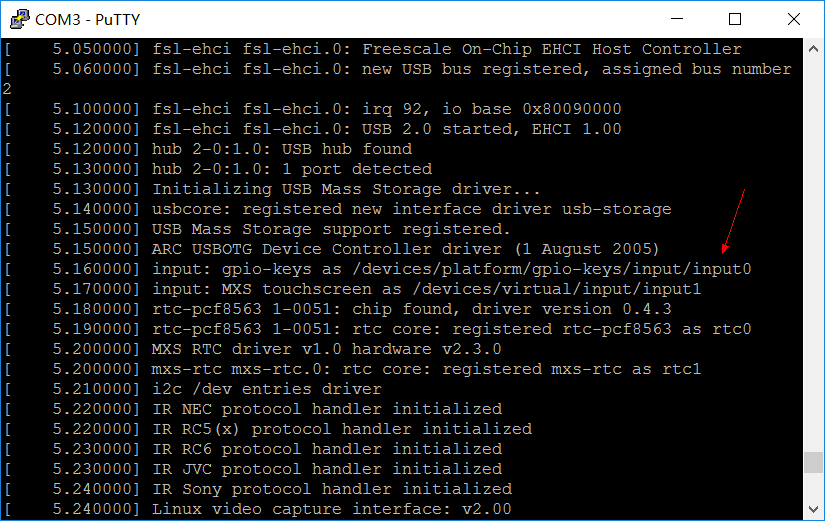
linux下的GPIO -keys
Linux GPIO Key 驱动的加载
gpio-keys是基于input子系统实现的一个通用的GPIO按键驱动,基于platform来实现,位于drivers/input/keyboard/gpio_keys.c,这个文件是硬件无关的,而硬件有关的需要我们自己来注册.进入这个gpio_keys.c这个函数,第一步就是初始化.
static int __init gpio_keys_init(void)
{
        return platform_driver_register(&gpio_keys_device_driver);
}
然后加载这个结构体:
static struct platform_driver gpio_keys_device_driver = {
        .probe          = gpio_keys_probe,
        .remove         = __devexit_p(gpio_keys_remove),
        .driver         = {
                .name   = "gpio-keys",
                .owner  = THIS_MODULE,
#ifdef CONFIG_PM
                .pm     = &gpio_keys_pm_ops,
#endif
        }
};
进入后会执行probe函数,进行设备的probe.当然只是注册设备,没什么必要看.还比如gpio_keys_isr就是去抖动检测,这是上半部分函数.
static irqreturn_t gpio_keys_isr(int irq, void *dev_id)
{
        struct gpio_button_data *bdata = dev_id;
        struct gpio_keys_button *button = bdata->button;
        BUG_ON(irq != gpio_to_irq(button->gpio));
        if (button->debounce_interval)
                mod_timer(&bdata->timer,
                        jiffies + msecs_to_jiffies(button->debounce_interval));
        else
                schedule_work(&bdata->work);
        return IRQ_HANDLED;
}
然后由定时器在超时时候,触发的下半部分.
static void gpio_keys_work_func(struct work_struct *work)
{
        struct gpio_button_data *bdata =
                container_of(work, struct gpio_button_data, work);
        gpio_keys_report_event(bdata);
}
既然gpio_keys这么简单,那么看看我们如何绑定.在此之前,先打开相应的头文件.
#ifndef _GPIO_KEYS_H
#define _GPIO_KEYS_H
struct gpio_keys_button {
        /* Configuration parameters */
        int code;               /* input event code (KEY_*, SW_*) */
        int gpio;
        int active_low;
        char *desc;
        int type;               /* input event type (EV_KEY, EV_SW) */
        int wakeup;             /* configure the button as a wake-up source */
        int debounce_interval;  /* debounce ticks interval in msecs */
        bool can_disable;
};
struct gpio_keys_platform_data {
        struct gpio_keys_button *buttons;
        int nbuttons;
        unsigned int rep:1;             /* enable input subsystem auto repeat */
};
#endif
其中gpio_keys_button就是我们要引用到板级相关文件的一个重要的结构体,他的每个字段的意义,挑重点的说一说.
code字段,意思就是对应Linux的按键事件,gpio要对应gpio号,active_low是低电平有效,desc是功能描述,debounce_interval是消抖间隔.当然这个gpio_keys_button最终要关联到gpio_keys_platform_data里,其中nbuttons就是有的按键总数.在板级文件中要声明.比如做2个引脚,一个是F1,一个是F2的功能.
static struct gpio_keys_button mx28evk_buttons[] =
{
    {
        .gpio                   = MXS_PIN_TO_GPIO(MXS_PIN_ENCODE(2, 4)),         /*K1 */
        .code                  = KEY_F1,
        .desc                  = "Button 1",
        .active_low      = 1,
    },
    {
        .gpio                   = MXS_PIN_TO_GPIO(MXS_PIN_ENCODE(2, 6)),         /*K2 */
        .code                  = KEY_F2,
        .desc                  = "Button 2",
        .active_low      = 1,
    },
};
然后声明一个组合起来的platform结构.
static struct gpio_keys_platform_data mx28evk_button_data =
{
    .buttons   = mx28evk_buttons,
    .nbuttons  = ARRAY_SIZE(mx28evk_button_data),
};
最后构建device,因为所有初始化都只识别device.
static struct platform_device mx28evk_button_device =
{
    .name                = "gpio-keys",
    .id              = -1,
    .dev           = {
        .platform_data         = &mx28evk_button_data,
    }
};
最后只需要注册设备,就可以顺利使用了.
static struct platform_device *mx28evk_button_device_p[] __initdata = {
         &mx28evk_button_device,
};
platform_add_devices(mx28evk_button_device_p,ARRAY_SIZE(mx28evk_button_device_p));
