《Spring Cloud Alibaba教程五》- 使用Nacos实现分布式配置中心
Nacos 文档: https://nacos.io/zh-cn/docs/what-is-nacos.html
Spring Cloud Alibaba文档: Spring Cloud Alibaba Reference Documentation
一、什么是Nacos
以下部分解释摘自于Nacos官方文档:
Nacos致力于帮助您发现、配置和管理微服务。Nacos提供了一组简单易用的特性集,帮助您快速实现动态服务发现、服务配置、服务元数据及流量管理。Nacos帮助您更敏捷和容易地构建、交付和管理微服务平台。Nacos是构建以“服务”为中心的现代应用架构 (例如微服务范式、云原生范式) 的服务基础设施。- 其实
Nacos就是第一代微服务中的注册中心Eureka和Spring Cloud Config配置中心的合体,由国内知名的Bat公司Alibaba团队开源,在第二代微服务Spring Cloud Alibaba中被广泛使用,你完全可以使用nacos替换eureka和config这两个组件。 - Nacos可以实现分布式服务注册与发现和分布式配置中心动态管理
为了方便排版,Spring Cloud Config后面就缩写为config
二、孵化版本和毕业版本对应关系
0. 组件版本关系
| Spring Cloud Alibaba Version | Sentinel Version | Nacos Version | RocketMQ Version | Dubbo Version | Seata Version |
|---|---|---|---|---|---|
| (毕业版本) 2.2.1.RELEASE | 1.7.1 | 1.2.1 | 4.4.0 | 2.7.6 | 1.1.0 |
| (毕业版本) 2.2.0.RELEASE | 1.7.1 | 1.1.4 | 4.4.0 | 2.7.4.1 | 1.0.0 |
| (毕业版本) 2.1.1.RELEASE or 2.0.1.RELEASE or 1.5.1.RELEASE | 1.7.0 | 1.1.4 | 4.4.0 | 2.7.3 | 0.9.0 |
| (毕业版本) 2.1.0.RELEASE or 2.0.0.RELEASE or 1.5.0.RELEASE | 1.6.3 | 1.1.1 | 4.4.0 | 2.7.3 | 0.7.1 |
1. 毕业版本依赖关系(推荐使用)
Spring Cloud Alibaba Version有孵化版本和毕业版,这里和官方一直,都推荐大家在集成自己项目的时候,尽量去使用毕业版本;
| Spring Cloud Version | Spring Cloud Alibaba Version | Spring Boot Version |
|---|---|---|
| Spring Cloud Hoxton | 2.2.0.RELEASE | 2.2.X.RELEASE |
| Spring Cloud Greenwich | 2.1.1.RELEASE | 2.1.X.RELEASE |
| Spring Cloud Finchley | 2.0.1.RELEASE | 2.0.X.RELEASE |
| Spring Cloud Edgware | 1.5.1.RELEASE | 1.5.X.RELEASE |
1.1. 依赖管理
Spring Cloud Alibaba BOM 包含了它所使用的所有依赖的版本。
RELEASE 版本
- Spring Cloud Hoxton
如果需要使用 Spring Cloud Hoxton 版本,请在 dependencyManagement 中添加如下内容
    com.alibaba.cloud
    spring-cloud-alibaba-dependencies
    2.2.0.RELEASE
    pom
    import
- Spring Cloud Greenwich
如果需要使用 Spring Cloud Greenwich 版本,请在 dependencyManagement 中添加如下内容
    com.alibaba.cloud
    spring-cloud-alibaba-dependencies
    2.1.1.RELEASE
    pom
    import
- Spring Cloud Finchley
如果需要使用 Spring Cloud Finchley 版本,请在 dependencyManagement 中添加如下内容
    com.alibaba.cloud
    spring-cloud-alibaba-dependencies
    2.0.1.RELEASE
    pom
    import
- Spring Cloud Edgware
如果需要使用 Spring Cloud Edgware 版本,请在 dependencyManagement 中添加如下内容
    com.alibaba.cloud
    spring-cloud-alibaba-dependencies
    1.5.1.RELEASE
    pom
    import
2. 孵化器版本依赖关系(不推荐使用)
| Spring Cloud Version | Spring Cloud Alibaba Version | Spring Boot Version |
|---|---|---|
| Spring Cloud Greenwich | 0.9.0.RELEASE | 2.1.X.RELEASE |
| Spring Cloud Finchley | 0.2.X.RELEASE | 2.0.X.RELEASE |
| Spring Cloud Edgware | 0.1.X.RELEASE | 1.5.X.RELEASE |
| Note | 请注意, Spring Cloud Edgware 最低支持 Edgware.SR5 版本 |
|---|
2.1. 依赖管理
Spring Cloud Alibaba BOM 包含了它所使用的所有依赖的版本。
RELEASE 版本
- Spring Cloud Greenwich
如果需要使用 Spring Cloud Greenwich 版本,请在 dependencyManagement 中添加如下内容
<dependency>
    <groupId>org.springframework.cloud</groupId>
    <artifactId>spring-cloud-alibaba-dependencies</artifactId>
    <version>0.9.0.RELEASE</version>
    <type>pom</type>
    <scope>import</scope>
</dependency>
- Spring Cloud Finchley
如果需要使用 Spring Cloud Finchley 版本,请在 dependencyManagement 中添加如下内容
<dependency>
    <groupId>org.springframework.cloud</groupId>
    <artifactId>spring-cloud-alibaba-dependencies</artifactId>
    <version>0.2.2.RELEASE</version>
    <type>pom</type>
    <scope>import</scope>
</dependency>
- Spring Cloud Edgware
如果需要使用 Spring Cloud Edgware 版本,请在 dependencyManagement 中添加如下内容
<dependency>
    <groupId>org.springframework.cloud</groupId>
    <artifactId>spring-cloud-alibaba-dependencies</artifactId>
    <version>0.1.2.RELEASE</version>
    <type>pom</type>
    <scope>import</scope>
</dependency>
spring-cloud-alibaba版本说明: https://github.com/alibaba/spring-cloud-alibaba/wiki/版本说明
我使用的版本
- Spring Boot Version: 2.1.6.RELEASE
- Spring Cloud Version: Spring Cloud Greenwich
- Spring Cloud Alibaba Version: 2.1.1.RELEASE
- Nacos Server Version: 1.2.1
- Java Version: 1.8
注意: 请大家在搭建Nacos注册中心和配置中心时,一定要注意版本,我这套组合的版本是OK的,如果你的版本没对应上,会出现莫名其妙的问题,我遇到比较多的时config拉取配置文件会报超时异常。
三、Nacos环境搭建
参考官方文档: https://github.com/alibaba/spring-cloud-alibaba/wiki/Nacos-config
1. nacos-client搭建
如果要搭建nacos客户端,需要引入以下依赖:
<dependency>
    <groupId>com.alibaba.cloud</groupId>
    <artifactId>spring-cloud-starter-alibaba-nacos-config</artifactId>
</dependency>
2. nacos-server搭建
SpringCloud Alibaba官网默认给我们提供了nacos-server服务端,不需要我们自己构建然后打包成一个jar文件执行了,nacos-server也是一个SpringBoot应用程序,直接下载启动即可。
nacos-server下载地址:https://github.com/alibaba/nacos/releases
注意:
nacos-server的版本尽量和nacos客户端的版本对应,不然会出现常见问题,比如项目启动不起来、项目报错、从nacos-server上读取配置文件数据无效等问题。
3. 启动nacos-server

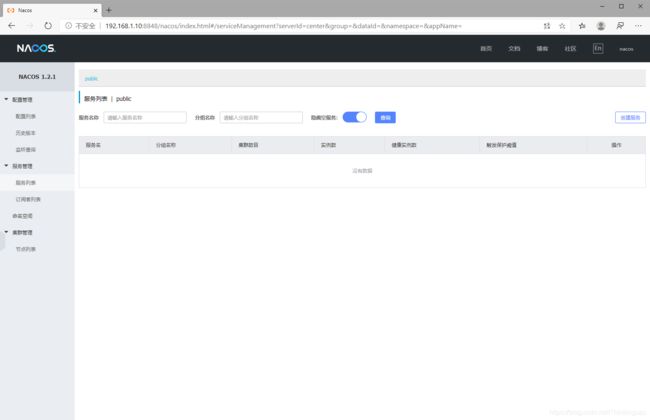
解压后,找到bin目录下的startup.cmd文件双击启动即可,默认的访问URL+ 端口是:http://127.0.0.1:8848/nacos
四、nacos-client项目搭建
1. 新建SpringBoot项目
在Maven仓库中搜索有孵化版本和毕业版本两种(正式版本),这里孵化版本0.9.0和毕业版本2.1.0.RELEASE是对应的,两者都可以,但是这里我选择毕业版本2.1.0.RELEASE
    <groupId>com.thinkingcao</groupId>
    <artifactId>springcloud_nacos_client</artifactId>
    <version>1.0-SNAPSHOT</version>
    <parent>
        <groupId>org.springframework.boot</groupId>
        <artifactId>spring-boot-starter-parent</artifactId>
        <version>2.1.6.RELEASE</version>
    </parent>
    <dependencies>

        <!--<dependency>-->
            <!--<groupId>com.alibaba.cloud</groupId>-->
            <!--<artifactId>spring-cloud-alibaba-dependencies</artifactId>-->
            <!--<version>2.1.1.RELEASE</version>-->
            <!--<type>pom</type>-->
            <!--<scope>import</scope>-->
        <!--</dependency>-->

        <!--  springboot 整合web组件-->
        <dependency>
            <groupId>org.springframework.boot</groupId>
            <artifactId>spring-boot-starter-web</artifactId>
        </dependency>

       <!-- ============ 正式版本start ========= -->
        <!-- SpringCloud整合nacos服务发现-->
        <dependency>
            <groupId>com.alibaba.cloud</groupId>
            <artifactId>spring-cloud-starter-alibaba-nacos-discovery</artifactId>
            <version>2.1.1.RELEASE</version>
        </dependency>
        <!-- SpringCloud整合nacos配置中心-->
        <dependency>
            <groupId>com.alibaba.cloud</groupId>
            <artifactId>spring-cloud-starter-alibaba-nacos-config</artifactId>
            <version>2.1.1.RELEASE</version>
        </dependency>
        <!-- ============ 正式版本end ========= -->


        <!-- ============ 孵化版本start ========= -->
        <!--<dependency>
            <groupId>org.springframework.cloud</groupId>
            <artifactId>spring-cloud-starter-alibaba-nacos-discovery</artifactId>
            <version>0.2.2.RELEASE</version>
        </dependency>
        <dependency>
            <groupId>org.springframework.cloud</groupId>
            <artifactId>spring-cloud-starter-alibaba-nacos-config</artifactId>
            <version>0.2.2.RELEASE</version>
        </dependency>-->
        <!-- ============ 孵化版本end ========= -->

        <!-- lombok插件 -->
        <dependency>
            <groupId>org.projectlombok</groupId>
            <artifactId>lombok</artifactId>
            <version>1.18.12</version>
            <scope>provided</scope>
        </dependency>
    </dependencies>
2. 配置连接nacos-server
注意: Spring Boot 配置文件的加载顺序:依次为 bootstrap.properties -> bootstrap.yml -> application.properties -> application.yml ,其中 bootstrap.properties 配置为最高优先级
nacos官方文档要求,指定配置文件必须放在 bootstrap.properties或者bootstrap.yml中加载初始化,因为在整个SpringBoot应用程序中bootstrap.properties/yml类型的文件优先级最高加载,所以我们把配置文件都放入到bootstrap.yml中。
application.yml
因为项目的端口上了生产环境之后不会轻易更该,因此不需要动态管理配置
server:
  port: 8010
bootstrap.yml
注意:其中spring.application.name是对应Nacos Config中的Data ID,不是指服务名,实际服务应用名称以配置中心文件为准。
项目启动时加载和查找配置中心文件的过程原理:
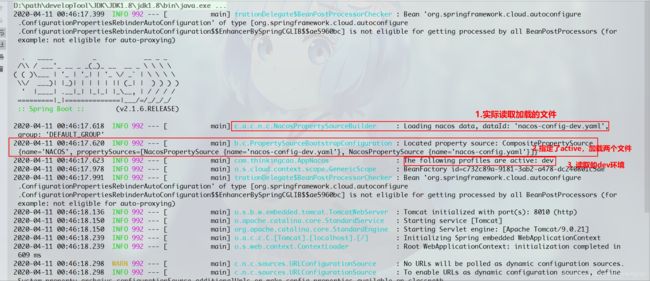
项目启动的时候,默认会去加载查找Data ID为nacos-config.yaml的配置文件;如果你设置了多环境配置profiles.active,这个时候不仅会默认加载nacos-config.yaml,另外还会去加载查找nacos-config-dev.yaml这个名称的文件。多环境下会加载查找两个文件,不指定多环境下会只默认加载一个。
| Note | 你可以通过配置 spring.cloud.nacos.config.refresh.enabled=false 来关闭动态刷新 |
|---|---|
可支持profile粒度的配置
spring-cloud-starter-alibaba-nacos-config 在加载配置的时候,不仅仅加载了以 dataid 为 ${spring.application.name}.${file-extension:properties} 为前缀的基础配置,还加载了dataid为 ${spring.application.name}-${profile}.${file-extension:properties} 的基础配置。在日常开发中如果遇到多套环境下的不同配置,可以通过Spring 提供的 ${spring.profiles.active} 这个配置项来配置。
spring.profiles.active=develop
| Note | ${spring.profiles.active} 当通过配置文件来指定时必须放在 bootstrap.properties 文件中。 |
|---|
Nacos 上新增一个dataid为:nacos-config-develop.yaml的基础配置,如下所示:
Data ID:        nacos-config-develop.yaml
Group  :        DEFAULT_GROUP
配置格式:        YAML
配置内容:        current.env: develop-env
spring:
  application:
    #对应Nacos Config中的Data ID,不是指服务名,实际服务应用名称以配置中心文件为准
    name: nacos-config
  cloud:
    nacos:
      discovery:
        #Nacos注册中心地址
        server-addr: 127.0.0.1:8848 #,127.0.0.1:8849,127.0.0.1:8850
        enabled: true
      config:
        #Nacos配置中心地址
        server-addr: 127.0.0.1:8848 #,127.0.0.1:8849,127.0.0.1:8850
        #分组选择
        group: DEFAULT_GROUP
        #类型(默认加载.properties),默认指定查找nacos-config.yml
        file-extension: yaml
  #读取环境配置,指定环境后,还会加载nacos-config-dev.yml文件
  profiles:
    active: dev
3. 读取nacos-server上数据
3.1. 动态刷新方式一:
@RefreshScope : 在所要使用配置文件参数值的类上加这个注解会自动实现动态刷新,只要nacos-server端一有文件发生变化,会动态刷新配置。
- NacosController
package com.thinkingcao.api;

import lombok.extern.slf4j.Slf4j;
import org.springframework.beans.factory.annotation.Value;
import org.springframework.cloud.context.config.annotation.RefreshScope;
import org.springframework.web.bind.annotation.GetMapping;
import org.springframework.web.bind.annotation.RestController;

/**
 * @desc: 分布式配置中心自动刷新方式一
 * @auth: cao_wencao
 * @date: 2020/4/10 15:08
 */
@Slf4j
@RestController
@RefreshScope
public class NacosController {

    @Value("${user.name}")
    private String userName;

    @GetMapping("/getConfig")
    public String getConfig() {
        log.info("从nacos-server读取的数据=>>>>>: {}", userName);
        return userName;
    }
}
3.2. 动态刷新方式二:
package com.thinkingcao.api;

import lombok.extern.slf4j.Slf4j;
import org.springframework.beans.factory.annotation.Autowired;
import org.springframework.context.ConfigurableApplicationContext;
import org.springframework.web.bind.annotation.GetMapping;
import org.springframework.web.bind.annotation.RestController;

/**
 * @desc: 分布式配置中心自动刷新方式二
 * @auth: cao_wencao
 * @date: 2020-04-10 23:05
 */
@Slf4j
@RestController
public class HelloController {

    @Autowired
    private ConfigurableApplicationContext applicationContext;

    @GetMapping("/getServerPort")
    public String getServerPort(){
        String port = applicationContext.getEnvironment().getProperty("server.port");
        log.info("我的端口是===>>>: , {}", port);
        return port;
    }

}
4. 启动类
package com.thinkingcao;

import org.springframework.boot.SpringApplication;
import org.springframework.boot.autoconfigure.SpringBootApplication;

/**
 * @desc:   nacos启动类
 * @author: cao_wencao
 * @date: 2020-04-10 15:15
 */

@SpringBootApplication
public class AppNacos {
    public static void main(String[] args) {
        SpringApplication.run(AppNacos.class,args);
    }
}
五、测试
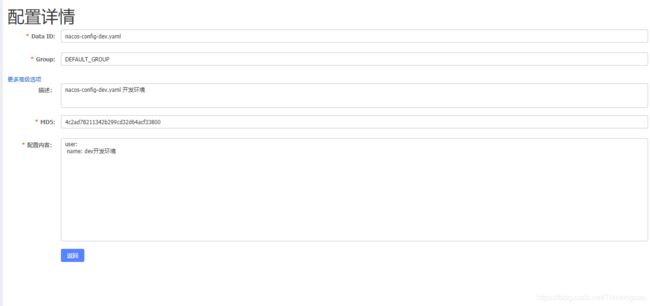
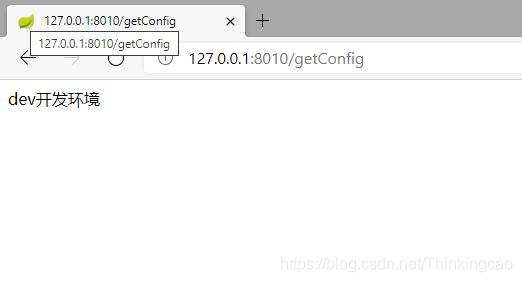
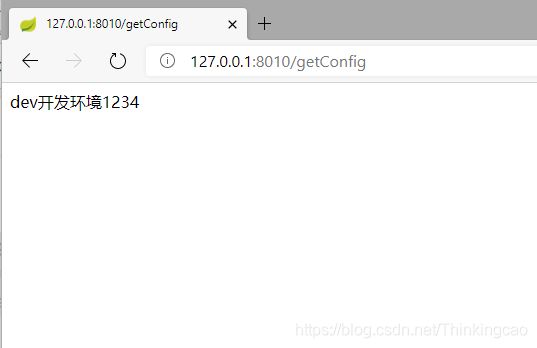
1. nacos-server新建nacos-config-dev.yaml文件
六、Spring Cloud Alibaba教程
下一篇: Spring Cloud Alibaba教程(六):解读Nacos实现配置中心默认存储方式
七、Nacos原理总结
1.Md5何时变更
在长轮询的任务中,当服务端配置信息发生变更时,客户端将最新的数据获取下来之后,保存在了 CacheData 中,同时更新了该 CacheData 的 md5 值,所以当下次执行 checkListenerMd5 方法时,对前后两次的MD5值作比对,就会发现当前 listener 所持有的 md5 值已经和 CacheData 的 md5 值不一样了,也就意味着服务端的配置信息发生改变了,这时就需要将最新的数据通知给 Listener 的持有者。
至此配置中心的完整流程已经分析完毕了,可以发现,Nacos 并不是通过推的方式将服务端最新的配置信息发送给客户端的,而是客户端维护了一个长轮询的任务,定时去拉取发生变更的配置信息,然后将最新的数据推送给 Listener 的持有者。
2.总结
在Nacos服务端创建了相关的配置项后,客户端就可以进行监听了。
客户端是通过一个长轮询的定时任务来检查自己监听的配置项的数据的,一旦服务端的数据发生变化时,客户端将会获取到最新的数据,并将最新的数据保存在一个 CacheData 对象中,然后会重新计算 CacheData 的 md5 属性的值,此时就会对该 CacheData 所绑定的 Listener 触发 receiveConfigInfo 回调。
考虑到服务端故障的问题,客户端将最新数据获取后会保存在本地的 snapshot 文件中,以后会优先从文件中获取配置信息的值,当前环境下快照地址为:C:\Users\Administrator\nacos\config\fixed-localhost_8848_nacos\snapshot\DEFAULT_GROUP\example。
八、参考文档
Nacos 文档: https://nacos.io/zh-cn/docs/what-is-nacos.html
![]()
