2019独角兽企业重金招聘Python工程师标准>>> ![]()
P:生产者,向Exchange发送消息,发送消息时,会指定一个routing key。
X:Exchange(交换机),接收生产者的消息,然后把消息递交给 与routing key完全匹配的队列
C1:消费者,其所在队列指定了需要routing key 为 orange的消息
C2:消费者,其所在队列指定了需要routing key 为 black、green的消息
多个队列通过同一个key绑定到交换机是合理的。比如上面的例子中,生产者指定routing key为black,并发送消息到交换机,交换机通过black找到所有匹配的队列。也就是c1和c2都可以收到消息,这种类似于交换机fanout(广播类型的交换机)。
下面将通过程序来介绍这种交换机如何使用
1、声明交换机
    /**
     * 1、声明交换机
     */
    @Test
    public void decalreExchange() throws Exception {

        String exchange = "hello_direct";
        // 获取到连接
        Connection connection = ConnectionUtil.getConnection();
        // 获取通道
        Channel channel = connection.createChannel();

        // 声明exchange,指定类型为direct
        channel.exchangeDeclare(exchange, BuiltinExchangeType.DIRECT,true,false,false,new HashMap<>());
    }
声明交换机的api说明
channel.exchangeDeclare(String exchange,//名字
                          String type,//类型:topic、direct、fanout、header
                          boolean durable,//是否持久化
                          boolean autoDelete,//是否自动删除
                          boolean internal,//是否是内部使用的,true的话客户端不能使用该路由器
                          Map arguments) //其他参数
注意: autoDelete 设置为 true 表示自动删除。自动删除的前提是至少有个队列或者交换器与这个交换器绑定之后所有与这个交换器绑定的队列或者交换器都与 解绑。注意不能错误地 这个参数理解为 "当与此交换器连接的客户端都断开时 RabbitMQ 会自动 除本交换器
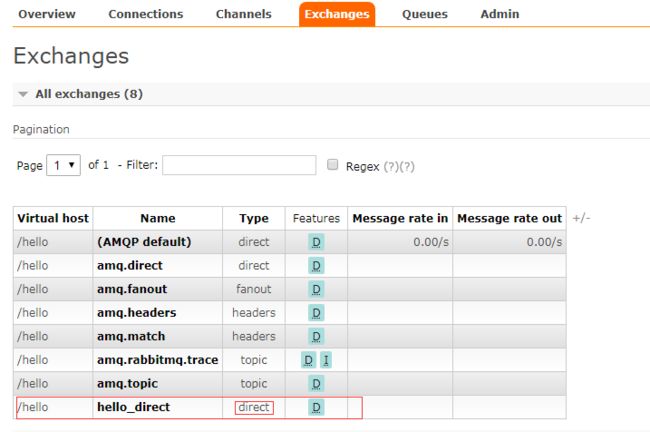
运行后,查看web管理,会看到交换机已创建成功。
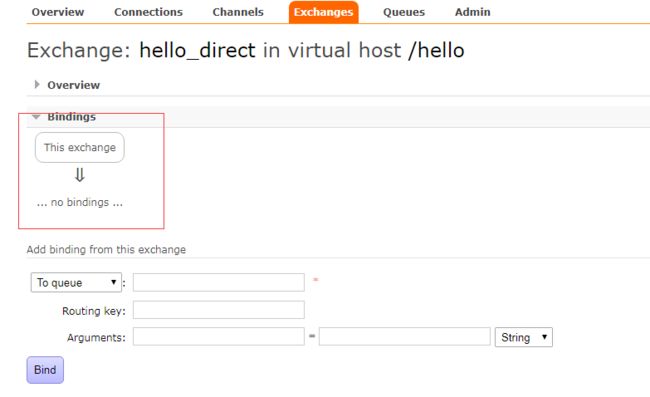
这时候还没有队列绑定到该交换机。
2、声明队列,并绑定队列到交换机
    /**
     * 2、声明队列并绑定到交换机
     */
    @Test
    public void decalreQueueAndBind() throws Exception {

        String exchange = "hello_direct";
        // 获取到连接
        Connection connection = ConnectionUtil.getConnection();
        // 获取通道
        Channel channel = connection.createChannel();

        //将队列hello_direct_c1 绑定到交换机hello_direct上
        String queueName1 = "hello_direct_c1";
        // 声明队列
        channel.queueDeclare(queueName1, true, false, false, null);
        // 绑定队列到交换机
        String routingKey1 = "orange";
        channel.queueBind(queueName1, exchange, routingKey1);

        //将队列hello_direct_c2 绑定到交换机hello_direct上
        String queueName2 = "hello_direct_c2";
        // 声明队列
        channel.queueDeclare(queueName2, false, false, false, null);
        // 绑定队列到交换机
        String routingKey2 = "black";
        channel.queueBind(queueName2, exchange, routingKey2);

    }
声明队列api说明:
channel.queueDeclare(String queue, //队列的名字
                       boolean durable, //该队列是否持久化(即是否保存到磁盘中)
                       boolean exclusive,//该队列是否为该通道独占的,即其他通道是否可以消费该队列
                       boolean autoDelete,//该队列不再使用的时候,是否让RabbitMQ服务器自动删除掉
                       Map arguments)//其他参数
绑定队列到交换机api说明:
channel.queueBind(String queue, //队列
                    String exchange, //路由器
                    String routingKey, //路由键,即绑定键
                    Map arguments) //其他绑定参数
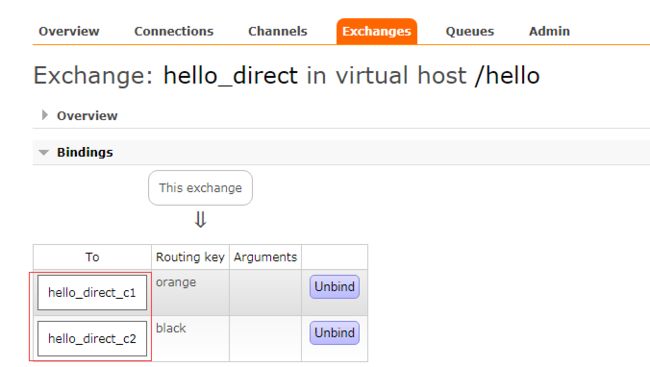
运行后,查看管理web,会看到队列已创建成功,并且绑定到了交换机上。
定义两个消费者,并启动。
//消费者1
@Slf4j
public class Consumer1 {

    public static void main(String[] argv) throws Exception {
        String queueName = "hello_direct_c1";
        // 获取到连接
        Connection connection = ConnectionUtil.getConnection();
        // 获取通道
        Channel channel = connection.createChannel();
        // 定义队列的消费者
        DefaultConsumer consumer = new DefaultConsumer(channel) {
            // 获取消息,并且处理,这个方法类似事件监听,如果有消息的时候,会被自动调用
            @Override
            public void handleDelivery(String consumerTag, Envelope envelope, AMQP.BasicProperties properties,
                                       byte[] body) throws IOException {
                // body 即消息体
                String msg = new String(body);
                log.debug("Consumer1 consume msg:{}",msg);
            }
        };
        // 监听队列,自动返回完成
        channel.basicConsume(queueName, true, consumer);
    }
}
// 消费者2
@Slf4j
public class Consumer2 {
public static void main(String[] argv) throws Exception {
String queueName = "hello_direct_c2";
// 获取到连接
Connection connection = ConnectionUtil.getConnection();
// 获取通道
Channel channel = connection.createChannel();
// 定义队列的消费者
DefaultConsumer consumer = new DefaultConsumer(channel) {
// 获取消息,并且处理,这个方法类似事件监听,如果有消息的时候,会被自动调用
@Override
public void handleDelivery(String consumerTag, Envelope envelope, AMQP.BasicProperties properties,
byte[] body) throws IOException {
// body 即消息体
String msg = new String(body);
log.debug("Consumer1 consume msg:{}",msg);
}
};
// 监听队列,自动返回完成
channel.basicConsume(queueName, true, consumer);
}
}发送消息:1条指定routing key为orange ,1条指定routing key为black
    /**
     * 生产者发送消息
     * @throws Exception
     */
    @Test
    public void sendMessage() throws Exception {
        String exchange = "hello_direct";
        // 获取到连接
        Connection connection = ConnectionUtil.getConnection();
        // 获取通道
        Channel channel = connection.createChannel();
        // 消息内容
        String message1 = "Less is more direct orange";
        // 发布消息到Exchange 指定路由键orange
        channel.basicPublish(exchange, "orange", null, message1.getBytes());

        // 消息内容
        String message2 = "Less is more direct black";
        // 发布消息到Exchange 指定路由键black
        channel.basicPublish(exchange, "black", null, message2.getBytes());

        channel.close();
        connection.close();
    }
运行后,可以自消费者的控制台看到已收到各自队列的消息
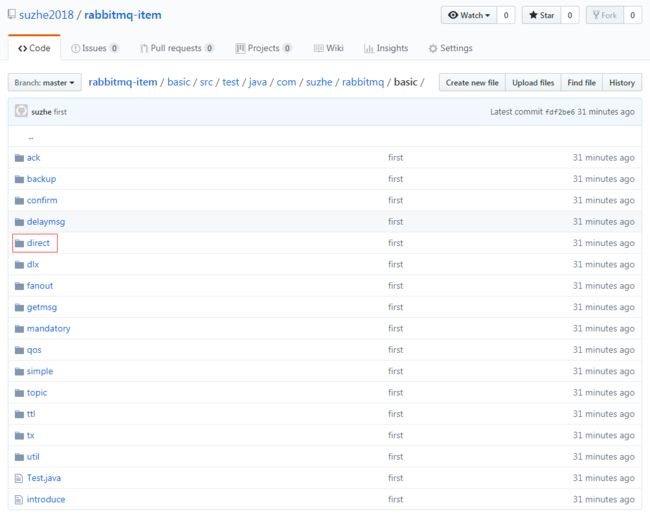
详细源码地址
https://github.com/suzhe2018/rabbitmq-item


