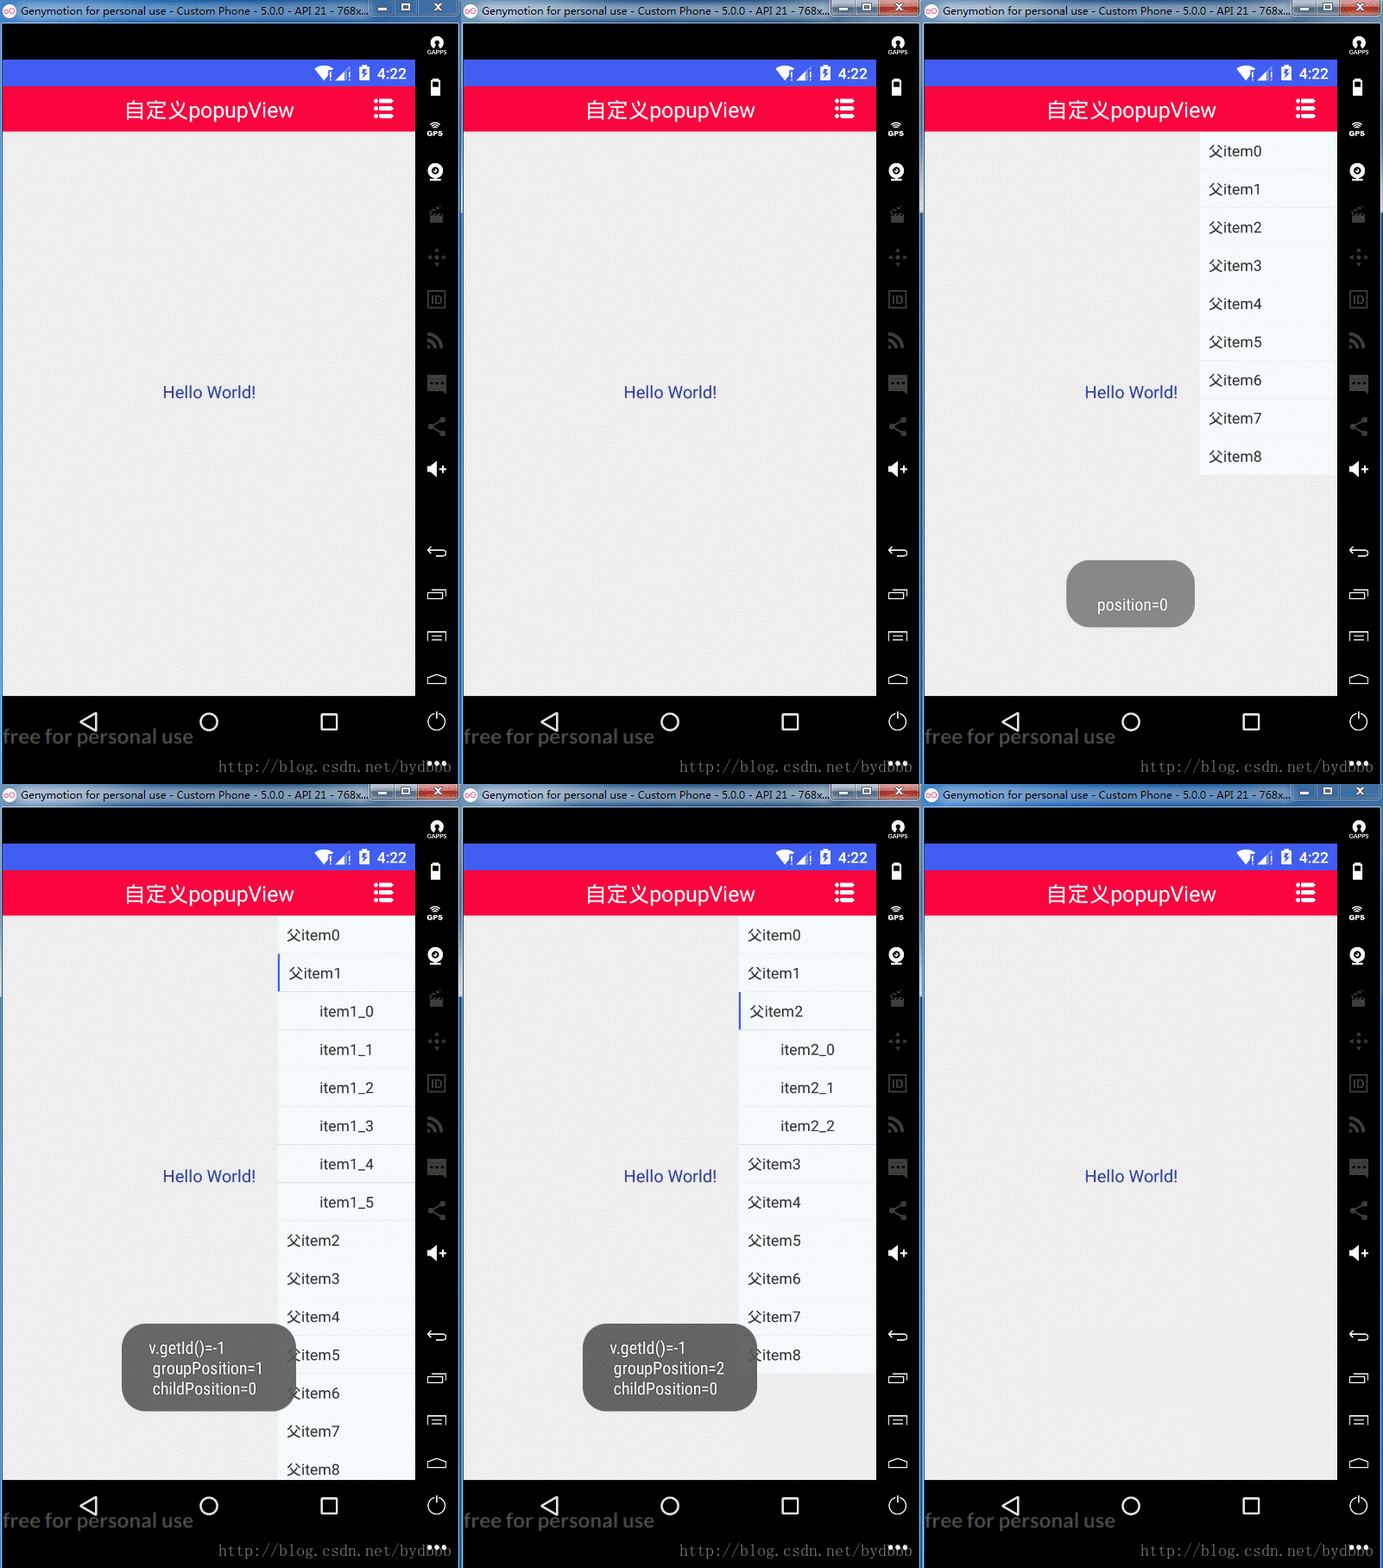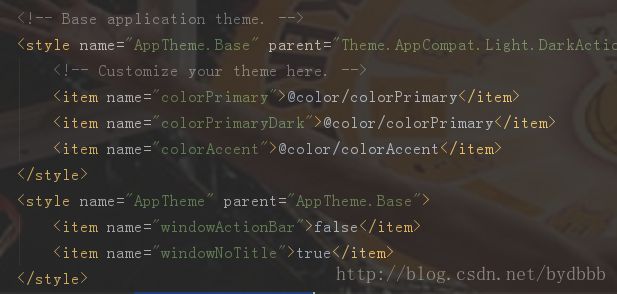
1.首先我在清单文件中去掉了系统自带的titilebar,自定义了一个布局作为标题栏,让此app的主题继承没有actionbar的这个。

2.接下里自己重新布局一个你想要的标题栏,引入到你的MainActivity的布局文件中。这是toolbar_rollback.xml
<LinearLayout xmlns:android="http://schemas.android.com/apk/res/android"
    android:layout_width="match_parent"
    android:layout_height="42dp"
    android:background="@color/colorAccent"
    android:orientation="horizontal">

    <TextView
        android:id="@+id/rollback"
        android:layout_width="60dp"
        android:layout_height="match_parent"
        android:gravity="center"
        android:padding="4dp"
        android:text="返回"
        android:visibility="invisible"
        android:textColor="@color/white"
        android:textSize="12sp"/>

    <TextView
        android:id="@+id/title"
        android:layout_width="0dp"
        android:layout_height="match_parent"
        android:layout_weight="1"
        android:gravity="center"
        android:textColor="@color/white"
        android:textSize="20sp" />

    <ImageView
        android:id="@+id/menu"
        android:layout_width="60dp"
        android:layout_height="match_parent"
        android:gravity="center"
        android:scaleType="centerInside"
        android:src="@drawable/ic_more"
        android:visibility="invisible" />
LinearLayout>
3.将其引入activity_main.xml文件中,activity_main如下:
.support.constraint.ConstraintLayout
    xmlns:android="http://schemas.android.com/apk/res/android"
    xmlns:app="http://schemas.android.com/apk/res-auto"
    xmlns:tools="http://schemas.android.com/tools"
    android:layout_width="match_parent"
    android:layout_height="match_parent"
    tools:context="byd.com.byd.popupview.MainActivity">
    "@layout/toolbar_rollback" />
    "wrap_content"
        android:layout_height="wrap_content"
        android:text="你自己想要的布局"
        android:textSize="16sp"
        android:textColor="@color/colorPrimaryDark"
        app:layout_constraintBottom_toBottomOf="parent"
        app:layout_constraintLeft_toLeftOf="parent"
        app:layout_constraintRight_toRightOf="parent"
        app:layout_constraintTop_toTopOf="parent" />
.support.constraint.ConstraintLayout>
public class PopupView {
private PopupWindow popupWindow;
private Activity activity;
private View contentView;
private boolean flag = false;
public PopupView(Activity activity, View contentView) {
this.activity = activity;
this.contentView = contentView;
init();
}
public boolean getFlag() {
return flag;
}
/**
* 初始化布局
*/
private void init() {
LinearLayout r = new LinearLayout(activity);
r.setOrientation(LinearLayout.VERTICAL);
Point point = new Point();
activity.getWindowManager().getDefaultDisplay().getSize(point);
LinearLayout.LayoutParams rl = new LinearLayout.LayoutParams(LinearLayout.LayoutParams.WRAP_CONTENT, LinearLayout.LayoutParams.WRAP_CONTENT);
rl.gravity = Gravity.RIGHT | Gravity.TOP;
r.addView(contentView, rl);
popupWindow = new PopupWindow(r, ViewGroup.LayoutParams.WRAP_CONTENT, ViewGroup.LayoutParams.WRAP_CONTENT);
ColorDrawable dw = new ColorDrawable(0xb0000000);
popupWindow.setBackgroundDrawable(dw);
popupWindow.setAnimationStyle(R.style.PopupWindowAnimation);
popupWindow.setFocusable(false);
popupWindow.setOutsideTouchable(true);
}
/**
* 消失的方法
*/
public void dismiss() {
flag = false;
if (popupWindow.isShowing()) {
popupWindow.dismiss();
}
}
/**
* 展示的方法
* @param v
*/
public void show(View v) {
flag = true;
hideSoftInput();
if (popupWindow.isShowing()) {
return;
}
popupWindow.showAsDropDown(v, 0, 0);
}
/**
* 隐藏软键盘
*/
private void hideSoftInput() {
InputMethodManager imm = (InputMethodManager) activity.getSystemService(Context.INPUT_METHOD_SERVICE);
if (imm != null) {
imm.hideSoftInputFromWindow(activity.getWindow().getDecorView().getWindowToken(), 0);
}
}
/**
* 设置弹出的位置
* @param v
*/
public void auto(View v) {
if (popupWindow.isShowing()) {
popupWindow.dismiss();
} else {
popupWindow.showAsDropDown(v, 0, 0);
}
}
}

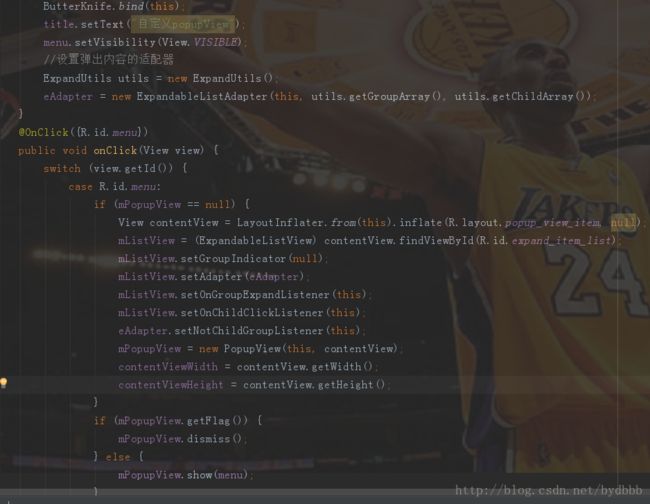
这里我对activity_main.xml中引入的tollbar_rollback.xml中的menu进行了监听,mPopupView是一个PopupView的全局对象,当mPopupView为null时,通过布局管理器LayoutInflater将布局动态加入:popup_view_item.xml如下:
"http://schemas.android.com/apk/res/android"
    android:layout_width="wrap_content"
    android:layout_height="wrap_content"
    android:background="@color/white"
    android:divider="@drawable/divider"
    android:orientation="vertical"
    android:showDividers="middle">
    "@+id/expand_item_list"
        android:layout_width="128dp"
        android:layout_height="match_parent"
        android:background="@drawable/popup_bg"
        android:cacheColorHint="#00000000"
        android:listSelector="#00000000"
        android:divider="@color/divider"
        android:dividerHeight="@dimen/dp_1"/>
</LinearLayout>
很简单,他的布局只有一个ExpandableListView,他的数据我是通过自己来封装对象来完成,他用到的适配器adapter如下:ExpandableListAdapter.class
package byd.com.byd.popupview.adapter;
import android.content.Context;
import android.view.LayoutInflater;
import android.view.View;
import android.view.ViewGroup;
import android.widget.BaseExpandableListAdapter;
import android.widget.ImageView;
import android.widget.TextView;
import java.util.List;
import byd.com.byd.popupview.R;
import byd.com.byd.popupview.myinterface.NotChildGroupListener;
/**
* Created by byd666 on 2017/9/14.
*/
public class ExpandableListAdapter extends BaseExpandableListAdapter {
private List groupArray;
private List> childArray;
private Context mContext;
private NotChildGroupListener listener;
public void setNotChildGroupListener(NotChildGroupListener listener) {
this.listener=listener;
}
public ExpandableListAdapter(Context context, List groupArray, List> childArray) {
mContext = context;
this.groupArray = groupArray;
this.childArray = childArray;
}
@Override
public int getGroupCount() {
return groupArray != null ? groupArray.size() : 0;
}
@Override
public int getChildrenCount(int groupPosition) {
return childArray != null ? childArray.get(groupPosition).size() : 0;
}
@Override
public Object getGroup(int groupPosition) {
return groupArray.get(groupPosition);
}
@Override
public Object getChild(int groupPosition, int childPosition) {
return childArray.get(groupPosition).get(childPosition);
}
@Override
public long getGroupId(int groupPosition) {
return groupPosition;
}
@Override
public long getChildId(int groupPosition, int childPosition) {
return childPosition;
}
@Override
public boolean hasStableIds() {
return true;
}
@Override
public View getGroupView(final int groupPosition, boolean isExpanded, View convertView, ViewGroup parent) {
GroupHolder holder = null;
if (convertView == null) {
holder = new GroupHolder();
convertView = LayoutInflater.from(mContext).inflate(R.layout.expandlist_group, null);
holder.groupName = (TextView) convertView.findViewById(R.id.tv_group_name);
holder.arrow = (ImageView) convertView.findViewById(R.id.iv_arrow);
convertView.setTag(holder);
} else {
holder = (GroupHolder) convertView.getTag();
}
if (groupPosition==0|| groupPosition==4 || groupPosition == 5 || groupPosition==8) {
holder.arrow.setVisibility(View.GONE);
holder.groupName.setOnClickListener(new View.OnClickListener() {
@Override
public void onClick(View v) {
listener.onNotChildGroupClick(groupPosition);
}
});
}
if (isExpanded) {
holder.arrow.setVisibility(View.VISIBLE);
} else {
holder.arrow.setVisibility(View.GONE);
}
holder.groupName.setText(groupArray.get(groupPosition));
return convertView;
}
@Override
public View getChildView(int groupPosition, int childPosition, boolean isLastChild, View convertView, ViewGroup parent) {
ChildHolder holder = null;
if (convertView == null) {
holder = new ChildHolder();
convertView = LayoutInflater.from(mContext).inflate(R.layout.expandlist_item, null);
holder.childName = (TextView) convertView.findViewById(R.id.tv_child_name);
convertView.setTag(holder);
} else {
holder = (ChildHolder) convertView.getTag();
}
holder.childName.setText(childArray.get(groupPosition).get(childPosition));
return convertView;
}
@Override
public boolean isChildSelectable(int groupPosition, int childPosition) {
return true;
}
class GroupHolder {
public TextView groupName;
public ImageView arrow;
}
class ChildHolder {
public TextView childName;
}
}
这里写代码片
ExpandUtils.class
package byd.com.byd.popupview.weiget;

import java.util.ArrayList;
import java.util.List;

/**
 * Created by byd666 on 2017/9/14.
 */

public class ExpandUtils {
    private static List groupArray;
    private static List> childArray;
    public ExpandUtils() {
        groupArray=new ArrayList<>();
        childArray =new ArrayList<>();
        initDate();
    }
    private void initDate()
    {
        addInfo("父item0", new String[]{});
        addInfo("父item1", new String[]{"item1_0","item1_1","item1_2","item1_3","item1_4","item1_5"});
        addInfo("父item2", new String[]{"item2_0","item2_1","item2_2"   });
        addInfo("父item3", new String[]{"item3_0","item3_1","item3_2","item3_3"});
        addInfo("父item4", new String[]{});
        addInfo("父item5", new String[]{});
        addInfo("父item6", new String[]{"item6_0","item6_1"});
        addInfo("父item7", new String[]{"item7_0","item7_1","item7_2"});
        addInfo("父item8", new String[]{});
    }
    private void addInfo(String group, String[] child) {
        groupArray.add(group);
        List childItem =new ArrayList<>();
        for(int index=0;indexpublic  List getGroupArray()
    {
        return groupArray;
    }
    public  List>  getChildArray()
    {
        return childArray;
    }
}
6.到这里基本上就已经快结束了,最后就是相应的监听事件以及列表打开或者关闭方面的事件处理,我这里是实现当打开下一个父item时,上一个父item自动关闭,于是有了下面一点处理,只需要设置监听setOnGroupExpandListener即可,实现onGroupExpand(int groupPosition)方法:
@Override
public void onGroupExpand(int groupPosition) {
if(lastItem>0)
{
mListView.collapseGroup(lastItem);
lastItem = groupPosition;
}else{
int count = mListView.getExpandableListAdapter().getGroupCount();
for(int j = 0; j < count; j++){
if(j != groupPosition){
mListView.collapseGroup(j);
}
}
}
}
可能写的稍微有点乱。这里有demo的代码链接,大家可以下下来自己再看看。献丑了(苦笑。。。)点此跳转到clone位置


