Android Imageview使用技巧详解
简介
ImageView作为Android开发中的基础组件,有很多技巧需要我们好好记录。
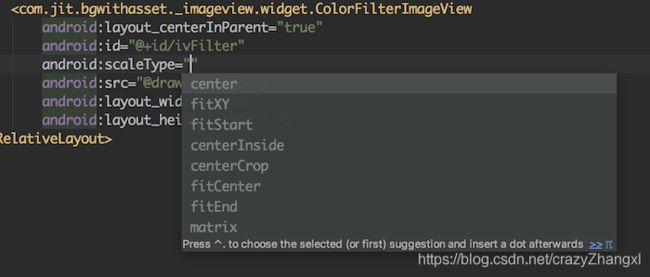
1.scaleType属性
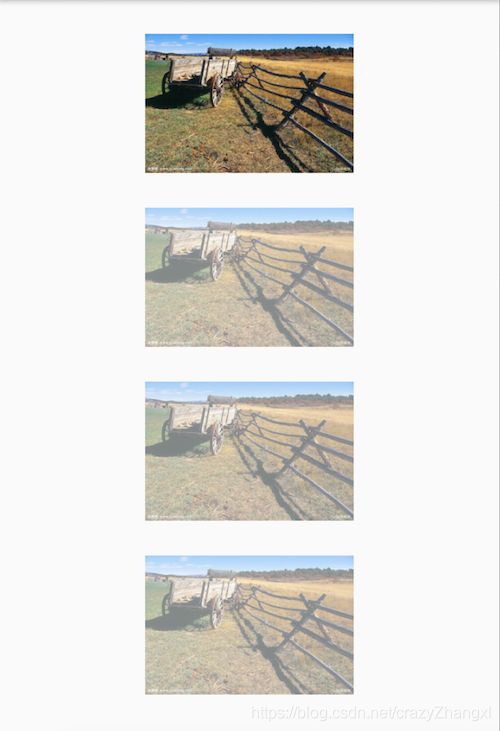
2.实现图像的半透明
    <ImageView
        android:layout_marginTop="25dp"
        android:layout_gravity="center_horizontal"
        android:src="@drawable/beauty"
        android:layout_width="150dp"
        android:layout_height="100dp" />

    <ImageView
        android:id="@+id/ivOrigin"
        android:layout_marginTop="25dp"
        android:layout_gravity="center_horizontal"
        android:src="@drawable/beauty"
        android:layout_width="150dp"
        android:layout_height="100dp" />


    <ImageView
        android:alpha="0.5"
        android:layout_marginTop="25dp"
        android:layout_gravity="center_horizontal"
        android:src="@drawable/beauty"
        android:layout_width="150dp"
        android:layout_height="100dp" />


    <FrameLayout
        android:layout_marginTop="25dp"
        android:layout_gravity="center_horizontal"
        android:layout_width="150dp"
        android:layout_height="100dp">
        <ImageView
            android:src="@drawable/beauty"
            android:layout_width="match_parent"
            android:layout_height="match_parent" />
        <ImageView
            android:background="#80ffffff"
            android:layout_width="match_parent"
            android:layout_height="match_parent" />
    FrameLayout>
// canvas.drawBitmap() 设置图片相对于左上角的位置
    public void drawBitmap(@NonNull Bitmap bitmap, float left, float top, @Nullable Paint paint) {
        super.drawBitmap(bitmap, left, top, paint);
    }
    /*
     * @param bitmap The bitmap to be drawn
     * @param src May be null. The subset of the bitmap to be drawn
     * @param dst The rectangle that the bitmap will be scaled/translated to fit into
     * @param paint May be null. The paint used to draw the bitmap
     * */
        public void drawBitmap(@NonNull Bitmap bitmap, @Nullable Rect src, @NonNull RectF dst,
            @Nullable Paint paint) {
        super.drawBitmap(bitmap, src, dst, paint);
    }
3.图片加边框
这里给个简单的思路: 首先做一个带边框的.9背景图,然后在通过ImageView的 android:background 设置进去。
4.setColorFilter实现触摸图片灰度效果
/**
 * des:setColorFilter实现图片触摸灰度效果
 * @author zxl
 */
public class ColorFilterImageView extends
        android.support.v7.widget.AppCompatImageView
        implements OnTouchListener {
    // ... 省略构造函数
    private void init() {
        setOnTouchListener(this);
    }

    @Override
    public boolean onTouch(View v, MotionEvent event) {
        switch (event.getAction()) {
            case MotionEvent.ACTION_DOWN:  // 按下时图像变灰
                Log.e("事件","摁下");
                setColorFilter(Color.GRAY, Mode.MULTIPLY);
                break;
            case MotionEvent.ACTION_UP:   // 手指离开或取消操作时恢复原色
                Log.e("事件","抬起");
                setColorFilter(Color.TRANSPARENT);
            case MotionEvent.ACTION_CANCEL:
                Log.e("事件","取消");
                setColorFilter(Color.TRANSPARENT);
                break;
            default:
                break;
        }
        return false;
    }
}
    public final void setColorFilter(int color) {
        setColorFilter(color, PorterDuff.Mode.SRC_ATOP);
    }

    public void setColorFilter(ColorFilter cf) {
        if (mColorFilter != cf) {
            mColorFilter = cf;
            mHasColorFilter = true;
            mColorMod = true;
            applyColorMod();
            invalidate();
        }
    }

    private void applyColorMod() {
        // Only mutate and apply when modifications have occurred. This should
        // not reset the mColorMod flag, since these filters need to be
        // re-applied if the Drawable is changed.
        if (mDrawable != null && mColorMod) {
            mDrawable = mDrawable.mutate();
            if (mHasColorFilter) {
                mDrawable.setColorFilter(mColorFilter);
            }
            mDrawable.setXfermode(mXfermode);
            mDrawable.setAlpha(mAlpha * mViewAlphaScale >> 8);
        }
    }
记录一个问题:
当我如上方重写的ImageView的onTouch方法,默认返回了false, 当我不设置点击事件,那么只会响应down方法,而不会响应后面的方法。只有当我设置了点击事件那么才能正常的进行切换。这个问题需要解释。
5. bitmap以及drawable相互转换
主要通过 bitmapDrawable
    private void  bitmapToDrawable(){
        Bitmap bitmap = BitmapFactory.decodeResource(getResources(), R.drawable.beauty);
        //BitmapDrawable 继承自 bitmap
        BitmapDrawable drawable= new BitmapDrawable(getResources(), bitmap);
        ivOne.setImageDrawable(drawable);
    }

    private void drawableToBitmap(){
        Drawable drawable = ContextCompat.getDrawable(this, R.drawable.beauty);
        BitmapDrawable bd = (BitmapDrawable) drawable;
        Bitmap bm= bd.getBitmap();
        ivTwo.setImageBitmap(bm);
    }
6.使用Matrix对象旋转和缩放图片
    /**
     * matrix 实现旋转
     * @param degrees
     */
    private void rotateImage(float degrees){
        Bitmap bitmap = BitmapFactory.decodeResource(getResources(), R.mipmap.ic_launcher);
        Matrix matrix = new Matrix();
        matrix.setRotate(degrees);
        Bitmap bitmap2 = Bitmap.createBitmap(bitmap, 0, 0, bitmap.getWidth(), bitmap.getHeight(), matrix, true);
        ivRotate.setImageBitmap(bitmap2);
    }

    /**
     * 设置缩放
     * @param x 横向倍数
     * @param y 纵向倍数
     */
    private void  scaleImage(float x,float y){
        Bitmap bitmap = BitmapFactory.decodeResource(getResources(), R.mipmap.ic_launcher);
        Matrix matrix = new Matrix();
        matrix.setScale(x,y);
        Bitmap bitmap1 = Bitmap.createBitmap(bitmap, 0, 0, bitmap.getWidth(), bitmap.getHeight(), matrix, true);
        ivScale.setImageBitmap(bitmap1);
    }

    /**
     * 设置斜切
     * @param x
     * @param y
     */
    private void skewImage(float x,float y){
        Bitmap bitmap = BitmapFactory.decodeResource(getResources(), R.mipmap.ic_launcher);
        Matrix matrix = new Matrix();
        matrix.setSkew(x,y);
        Bitmap bitmap3 = Bitmap.createBitmap(bitmap, 0, 0, bitmap.getWidth(), bitmap.getHeight(), matrix, true);
        ivSkew.setImageBitmap(bitmap3);
    }
7.Glide实现圆角图片以及毛玻璃效果
附属
CardView可用于 设置圆角以及阴影


