iOS 数据库篇(二) CoreData创建与使用
在上一篇博客iOS 数据库篇(一) CoreData 认识与入门—原理讲解篇,我们了解CoreData是什么,CoreData 的原理,结构以及它的优缺点.这篇文章,我们将会学习 CoreData 的创建以及使用方法
1.创建:
创建有两种形式:
- (1)创建工程的时候勾选 UserCoreData选项 如图
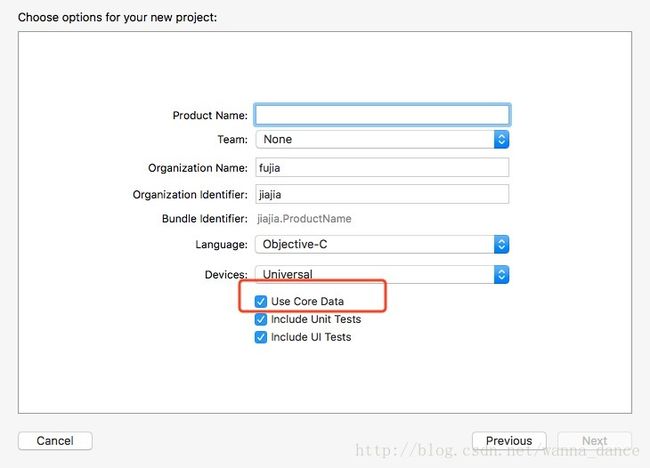
我们会发现,系统已经帮我们创建了一个后缀名为”.xcdatamodeld”的文件
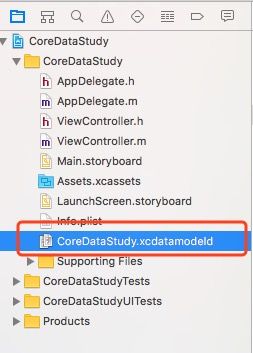
这个待会再介绍
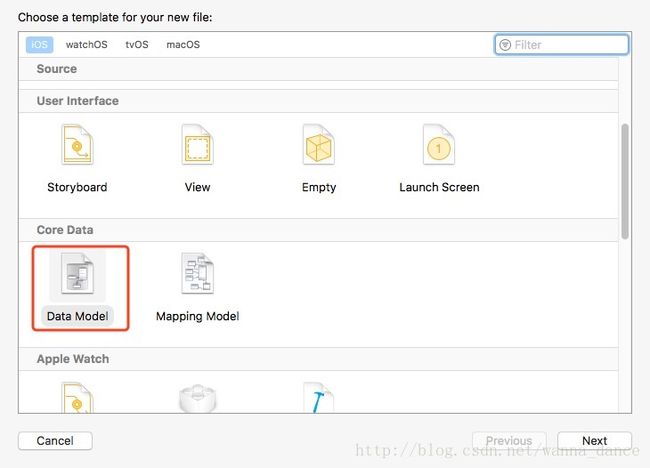
- (2)新建一个DataModel 文件
名字自己定,创建一个xcdatamodeld文件
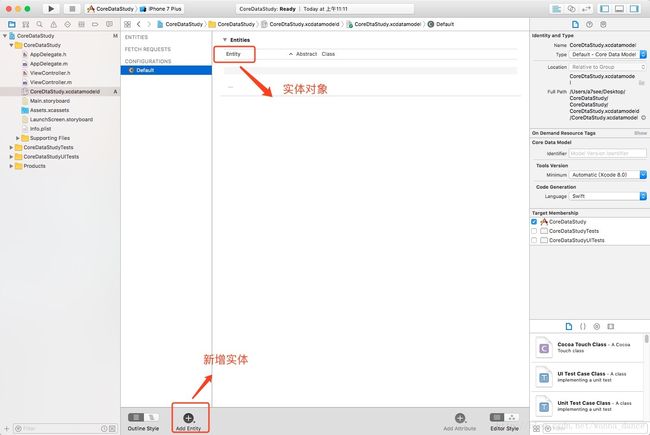
我们打开这个可以看到是一个这样的文件
现在我们来新建一个实体 点击 Add Entity
这里说明一下 一个 Entity 是一个数据实体 相当于数据库的一个表
这里增加了一个 Student
好了我们的可视化操作就是这些了,下面来创建模型文件
在创建之前我要特别说一下
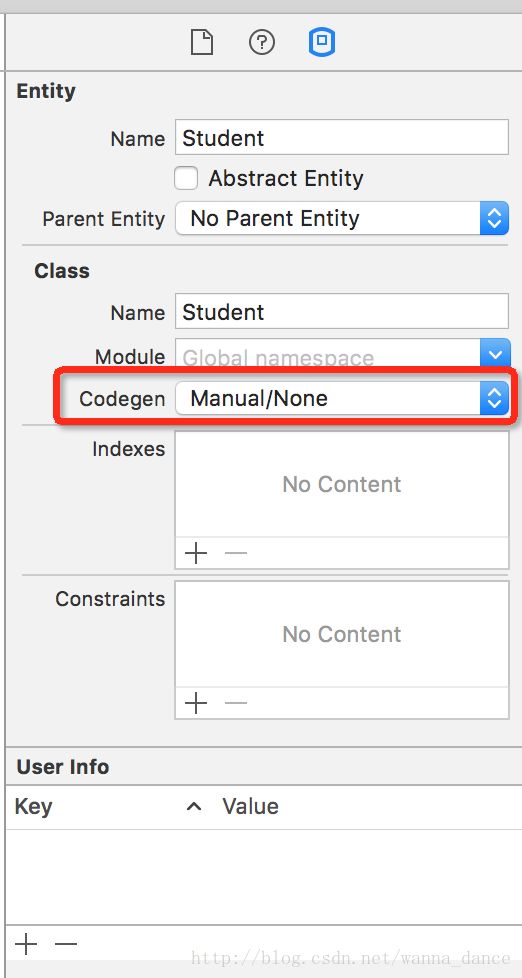
对于每一个 entity 实体类,Build 过后 Xcode 都会自动帮我们生成相应的实体类代码,生成的代码不会在工程目录中显示出来,但是可以通过导入头文件索引到;当然也可以配置成手动生成的,选中对应的 Entity 然后点击右侧面板的 Codegen,把 ClassDefinition 修改成 Manual/None,然后 Xcode 就不会再自动生成了。 如图所示
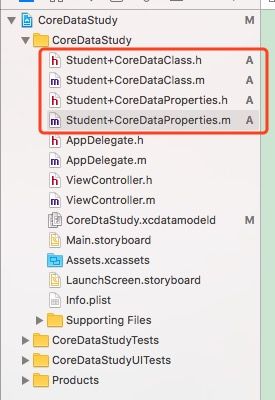
Editor ->Create NSManagedObject Subclass
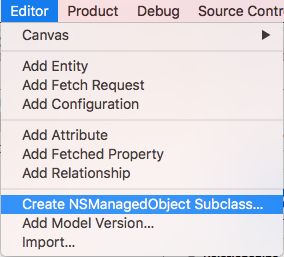
勾选我们生成的 DataModel 即可
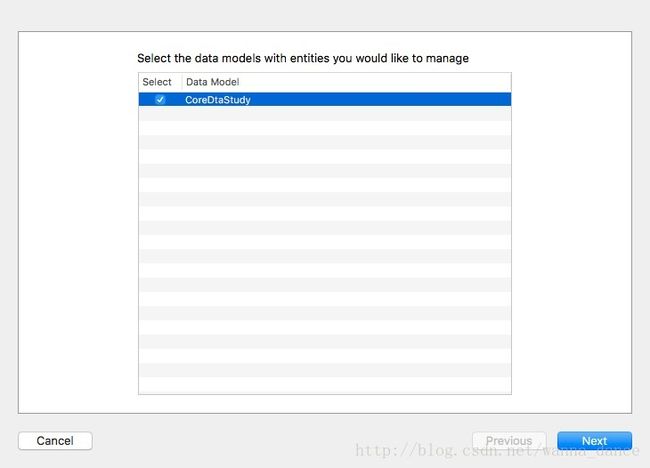
生成了我们显示这四个文件
这里贴出部分主要代码
- (void)viewDidLoad {
    [super viewDidLoad];

    ///拿到appDelegate
    appDelegate = (AppDelegate *)[UIApplication sharedApplication].delegate;

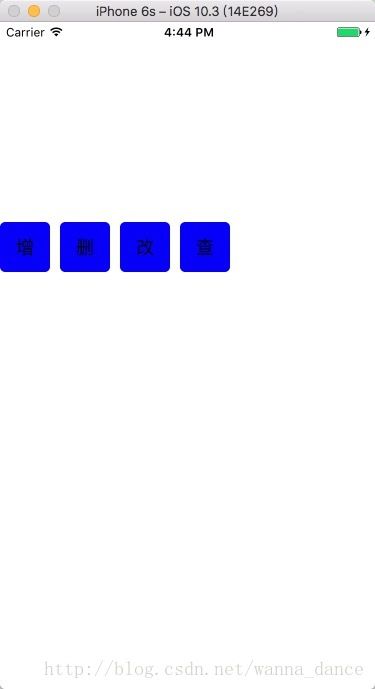
    ///创建增删改查按钮
    [self createBtns];
}
下面是创建按钮的代码
-(void)createBtns
{
    NSArray *butsNameArray = @[@"增",@"删",@"改",@"查"];
    int butW = 50;
    for (int i = 0; i < butsNameArray.count; i++) {
        ///btn name
        NSString * btnName = butsNameArray[i];
        UIButton *button = [UIButton buttonWithType:UIButtonTypeCustom];
        button.frame = CGRectMake(i * butW + 10 * i, 200, butW, butW);
        button.backgroundColor = [UIColor blueColor];
        button.layer.cornerRadius = 5;
        button.layer.masksToBounds = YES;
        [button setTitle:btnName forState:UIControlStateNormal];
        [button setTitleColor:[UIColor blackColor] forState:UIControlStateNormal];
        [button addTarget:self
                   action:@selector(clickBtnAction:)
         forControlEvents:UIControlEventTouchUpInside];
        button.tag = 1000 + i;
        [self.view addSubview:button];
    }
}
点击按钮的代码
-(void)clickBtnAction:(UIButton *)btn
{
    NSInteger tag = btn.tag - 1000;
    switch (tag) {
        case 0:
            [self addAction];       ///增
            break;
        case 1:
            [self deleteAction];    ///删
            break;
        case 2:
            [self updateAction];    ///改
            break;
        case 3:
            [self selectAtion];     ///查

        default:
            break;
    }

}
让我们来看一下 增加一个实体的代码
让我们点击 按钮 “增”
///增
-(void)addAction
{
    ///此代码等价于 ==  类的 alloc init
    Student *stu = [NSEntityDescription insertNewObjectForEntityForName:@"Student"
                                                 inManagedObjectContext:appDelegate.persistentContainer.viewContext];

    ///赋值
    stu.name = [NSString stringWithFormat:@"学生%d",arc4random()%10];
    stu.sex = arc4random()%2 == 0 ? YES:NO;
    stu.age = arc4random()%15;

    ///打印
    NSLog(@"增加了一个学生 名字是:%@ 性别是:%@ 年龄是:%hd",stu.name,stu.sex == YES ? @"男":@"女",stu.age);

    [appDelegate saveContext];

}下面我们来执行查询的代码
///查
-(void)selectAtion
{
    ///先读取这个类 这里有点像字典里面根据 key 查找 value 的意思
    NSEntityDescription *entity = [NSEntityDescription entityForName:@"Student"
                                              inManagedObjectContext:appDelegate.persistentContainer.viewContext];
    ///创建查询请求
    NSFetchRequest *request = [[NSFetchRequest alloc]init];
    ///设置查询请求的 实体
    [request setEntity:entity];
    ///获取查询的结果
    NSArray *resultArray = [appDelegate.persistentContainer.viewContext executeFetchRequest:request
                                                                                      error:nil];
    ///打印查询结果
    for (Student *stu in resultArray) {
        NSLog(@"查询到一个学生 名字是:%@ 性别是:%@ 年龄是:%hd",stu.name,stu.sex == YES ? @"男":@"女",stu.age);
    }

}我们也可以通过条件查询 这里的条件查询是用的 NSPredicate 谓词查询,至于谓词查询的语法,这里不做一一赘述,有时间博主会奉上谓词查询语法
我们通过添加
///这是查询条件
    NSPredicate *predicate = [NSPredicate predicateWithFormat:@"age=10"];
    [request setPredicate:predicate];
这两行代码 查询 整体代码如下
///查
-(void)selectAtion
{
    ///先读取这个类 这里有点像字典里面根据 key 查找 value 的意思
    NSEntityDescription *entity = [NSEntityDescription entityForName:@"Student"
                                              inManagedObjectContext:appDelegate.persistentContainer.viewContext];
    ///创建查询请求
    NSFetchRequest *request = [[NSFetchRequest alloc]init];
    ///设置查询请求的 实体
    [request setEntity:entity];

    ///这是查询条件
    NSPredicate *predicate = [NSPredicate predicateWithFormat:@"age=10"];
    [request setPredicate:predicate];

    ///获取查询的结果
    NSArray *resultArray = [appDelegate.persistentContainer.viewContext executeFetchRequest:request
                                                                                      error:nil];
    ///打印查询结果
    for (Student *stu in resultArray) {
        NSLog(@"查询到一个学生 名字是:%@ 性别是:%@ 年龄是:%hd",stu.name,stu.sex == YES ? @"男":@"女",stu.age);
    }

}接下来我们来看删除
删除的代码如下,我这里示范的删除年龄为10 的学生
///删
-(void)deleteAction
{
    ///读取所有学生的实体
    NSEntityDescription *entity = [NSEntityDescription entityForName:@"Student"
                                              inManagedObjectContext:appDelegate.persistentContainer.viewContext];
    ///创建请求
    NSFetchRequest *request = [[NSFetchRequest alloc]init];
    [request setEntity:entity];

    ///创建条件 年龄 = 10 的学生
    NSPredicate *predicate = [NSPredicate predicateWithFormat:@"age=10"];
    [request setPredicate:predicate];

    ///获取符合条件的结果
    NSArray *resultArray = [appDelegate.persistentContainer.viewContext executeFetchRequest:request
                                                                                      error:nil];
    if (resultArray.count>0) {
        for (Student *stu in resultArray) {
            ///删除实体
            [appDelegate.persistentContainer.viewContext deleteObject:stu];
        }
        ///保存结果并且打印
        [appDelegate saveContext];
        NSLog(@"删除年龄为10的学生完成");
    }else{
        NSLog(@"没有符合条件的结果");
    }

}
紧接着删除完后我们查询所有的学生 打印结果如下
接着我们来看改的代码
///改
-(void)updateAction
{
    ///读取所有学生的实体
    NSEntityDescription *entity = [NSEntityDescription entityForName:@"Student"
                                              inManagedObjectContext:appDelegate.persistentContainer.viewContext];
    ///创建请求
    NSFetchRequest *request = [[NSFetchRequest alloc]init];
    [request setEntity:entity];

    ///创建条件 年龄 < 10 的学生
    NSPredicate *predicate = [NSPredicate predicateWithFormat:@"age<10"];
    [request setPredicate:predicate];

    ///获取符合条件的结果
    NSArray *resultArray = [appDelegate.persistentContainer.viewContext executeFetchRequest:request
                                                                                      error:nil];
    if (resultArray.count>0) {
        for (Student *stu in resultArray) {
            ///把年龄 + 10岁
            stu.age = stu.age + 10;
            ///并且把名字添加一个修
            stu.name = [NSString stringWithFormat:@"%@修",stu.name];
        }
        ///保存结果并且打印
        [appDelegate saveContext];
        NSLog(@"修改学生信息完成");
    }else{
        NSLog(@"没有符合条件的结果");
    }
}
我们查询年龄< 10 的学生 把年龄+10 并且在名字后面 添加一个修

我们今天 CoreData 的创建和初步使用就到这了 辛苦大家观看啦
另外附上代码一份
点击这里下载
