centos7.6 nginx+MySQL+ PHP+git 环境搭建
用centos自带的yum源来安装最新版本nginx,mysql,php和git
- nginx 安装最新版本
- 基础配置
- MySQL 安装最新版本
- mariadb 安装最新版本
- PHP 安装最新版本
- git 安装最新版本
- 配置 nginx 解析 php
用centos自带的yum源来安装nginx,mysql,php和git,超级方便,省去编译的麻烦,省去自己配置的麻烦,还能节省非常多的时间。
nginx 安装最新版本
//安装中文文档 说明http://www.nginx.cn/install
sudo yum -y install nginx
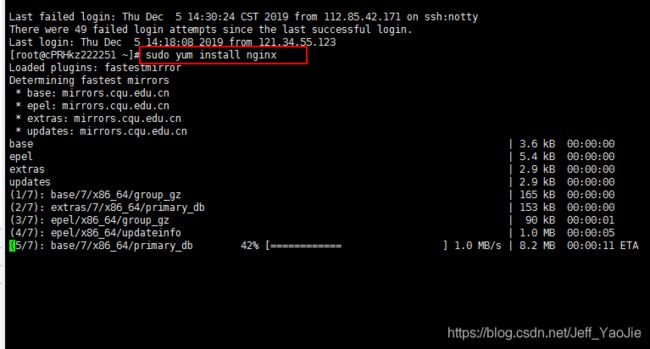
在提示再次输入确定输入y就可以了

这样nginx的最新官网版本就安装好了!
//安装完毕后,启动nginx服务:
sudo systemctl start nginx
//保证nginx服务每次重启服务器的时候会自行启动:
sudo systemctl enable nginx
基础配置
//将nginx网站根目录/usr/share/nginx/html 设置selinux可读写权限
chcon -R -t httpd_sys_rw_content_t  /usr/share/nginx/html

//仅把/var/www/html 目录的权限设置为rwxrwxrwx
chmod 777 -R /usr/share/nginx/html

//删除防火墙规则
firewall-cmd --permanent --remove-port=3306/tcp

//重新启动防火墙firewalld服务:
systemctl restart firewalld
查看版本: firewall-cmd --version
查看帮助: firewall-cmd --help
显示状态: firewall-cmd --state
查看所有打开的端口: firewall-cmd --zone=public --list-ports
更新防火墙规则: firewall-cmd --reload
查看区域信息: firewall-cmd --get-active-zones
查看指定接口所属区域: firewall-cmd --get-zone-of-interface=eth0
拒绝所有包:firewall-cmd --panic-on
取消拒绝状态: firewall-cmd --panic-off
查看是否拒绝: firewall-cmd --query-panic
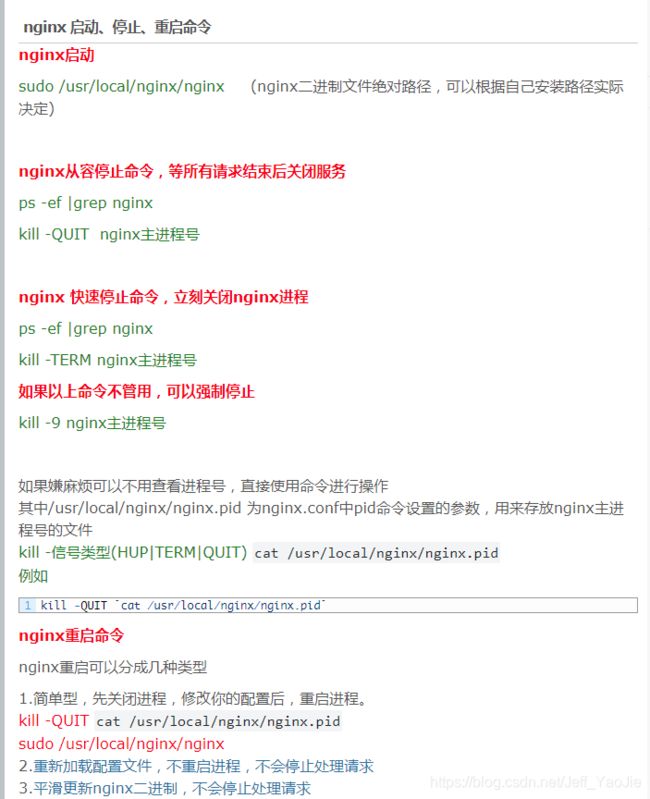
//运行和控制Nginx中文文档说明 http://www.nginx.cn/nginxchscommandline
MySQL 安装最新版本
最新版本官方文档 https://dev.mysql.com/doc/
sudo yum install mysql-community-server
1、方法一:安装mariadb
2、方法二:官网下载安装mysql-server
**使用浏览器下载(下载完上传到服务器上):https://dev.mysql.com/downloads/mysql/ **
**使用wget下载安装:
//1。先安装wget
studo yum -y install wget
//2。再下载数据库
wget http://dev.mysql.com/get/mysql57-community-release-el7-7.noarch.rpm
//3。yum localinstall 命令解决RPM包安装依赖
yum localinstall -y mysql57-community-release-el7-7.noarch.rpm
//4。执行安装
yum install -y mysql-community-server
**
注:使用方法1,安装mariadb,反正都是mysql的分支
mariadb 安装最新版本
//mariadb官网 https://mariadb.com/kb/en/library/yum/
//mariadb中文文档  https://www.w3cschool.cn/mariadb/mariadb_installation.html

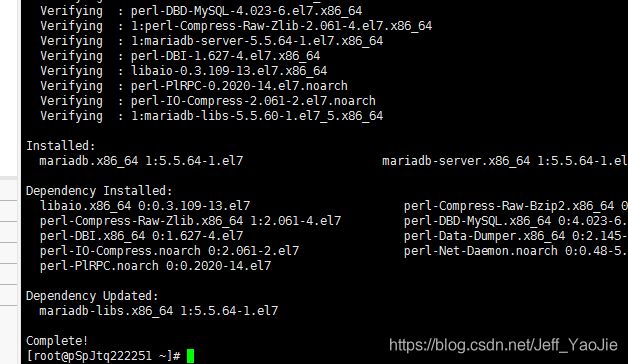
sudo  yum install mariadb-server mariadb
//安装完成启动数据库
sudo systemctl start mariadb
//设置服务开启自启动
sudo systemctl enable mariadb
mariadb数据库的相关命令是:
systemctl start mariadb #启动MariaDB
systemctl stop mariadb #停止MariaDB
systemctl restart mariadb #重启MariaDB
systemctl enable mariadb #设置开机启动
systemctl status mariadb #查看服务状态
现在可以正常使用mysql了

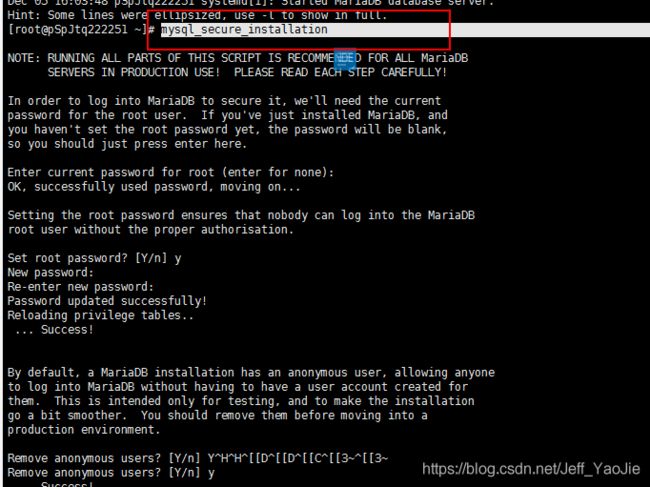
目前我们的 mariadb 用户是没有密码的,是非常不安全的,需要执行以下步骤
//设置密码
mysql_secure_installation
在
New password:
Re-enter new password:
时设置你自己的 root 密码
使用命令行客户端尝试连接(带密码)
//进入数据库
mysql -uroot -p
//进入到mysql
use mysql
//查看数据库的root用户密码
select user,password,host from user;

通过以上输出可以看出数据库默认只允许用户root在本地服务器(localhost)上登录,不允许其他主机远程连接。
//允许用户root使用密码(mycisco.cc)在任何主机上连接该数据库,并赋予该用户所有权限。
grant all privileges on *.* to root@"%" identified by "mycisco.cc";

如果还连接不上,那可能是你的防火强没有关,可通过指令systemctl disable firewalld 关闭firewalld 并重启系统。
 //关闭firewalld
systemctl disable firewalld
PHP 安装最新版本
//1。首先查看一下自己的系统可安装的版本
 yum provides php
//2。删除原来的版本,执行以下的3步操作
yum -y remove httpd-tools.x86_64

whereis  php

rm -rf /usr/lib64/php /etc/php /etc/php.d/ /etc/php.ini /usr/local/php /usr/share/php /usr/local/php

yum -y remove php*

2。 升级升级PHP更新源el7  如果是CentOS 7.+

rpm -Uvh https://mirror.webtatic.com/yum/el7/epel-release.rpm

rpm -Uvh https://mirror.webtatic.com/yum/el7/webtatic-release.rpm
//php安装与配置 https://www.php.net/manual/zh/install.php
//php官网 https://www.php.net/downloads.php
//安装php7.2.24及相关模块(下面的72修改为你在官网上查看到的最新版本)
#安装php7.2.24  和安装依赖包
 sudo yum -y install php72w php72w-cli php72w-common php72w-devel php72w-embedded php72w-fpm php72w-gd php72w-mbstring php72w-mysqlnd php72w-opcache php72w-pdo php72w-xml

//启动 php-fpm
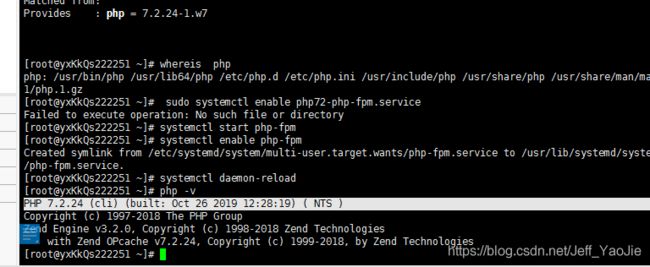
systemctl start php-fpm
//设置开机启动
systemctl enable php-fpm
systemctl daemon-reload
git 安装最新版本
//使用wget下载make安装的辅助包先安装
# yum install curl-devel expat-devel gettext-devel openssl-devel zlib-devel
#yum install gcc perl-ExtUtils-MakeMaker

//git 官网地址  https://git-scm.com/

//下载地址  https://mirrors.edge.kernel.org/pub/software/scm/git/
           或
           https://git-scm.com/download/linux
//这个yum安装的不一定是最新包
sudo yum install -y git
1。直接使用 wget命令下载
cd /etc/git
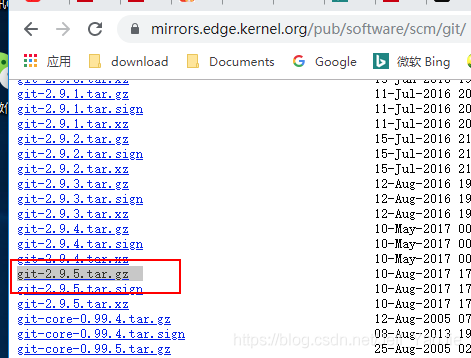
wget https://mirrors.edge.kernel.org/pub/software/scm/git/git-2.9.5.tar.gz
2。解压
tar -xzvf git-2.9.5.tar.gz
3。进入到解压目录,进行安装
cd git-2.9.5
4。安装到目录下
autoconf
./configure prefix=/usr/local/git
make prefix=/usr/local/git all
make prefix=/usr/local/git install
// 创建软连接
cd /usr/bin
ln -s /usr/local/git/bin/git git
出现如下问题
./configure: No such file or directory

//1、目录下没有configure,但有configure.am或configure.in时,需要用autoconf命令来生成configure。代码如下:
$cd (软件名)-(版本号)
$autoconf

//2、此软件或库安装方式不是按以下套路来安装,
$cd (软件名)-(版本号)
$./configure
$make
$sudo make install
如果出现问题请直接清除
make clean
使用yum安装,现在centos系统会自带
yum install git yum
查看下git版本号
git --version
//更新版本
sudo apt-get install python-software-properties
sudo add-apt-repository ppa:git-core/ppa
sudo apt-get update
sudo apt-get install git
安装到此结束。。。祝大家好运!
配置 nginx 解析 php
未完。。。

