Spring整合sharding-jdbc实现分库分表
-
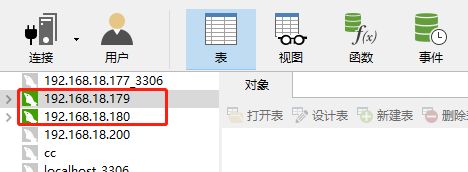
准备两台数据库服务器 192.168.18.179 和 192.168.18.180,如下图
-
对于不知道怎么在Linux服务器中安装MySQL的,可以参考 CentOS下安装MySQL5.7(图文)
-
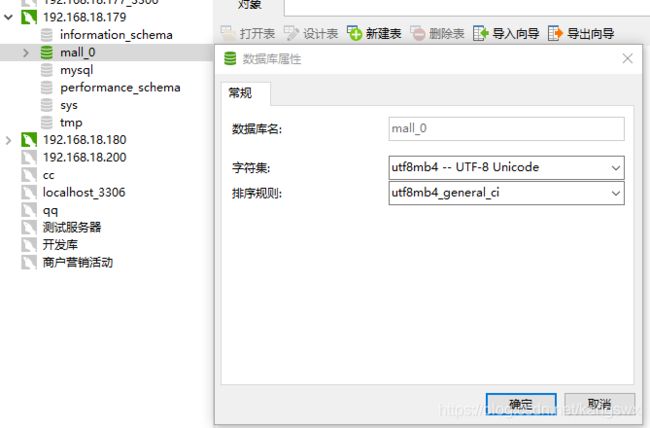
在192.168.18.179中新建一个数据库mall_0,如下图
-
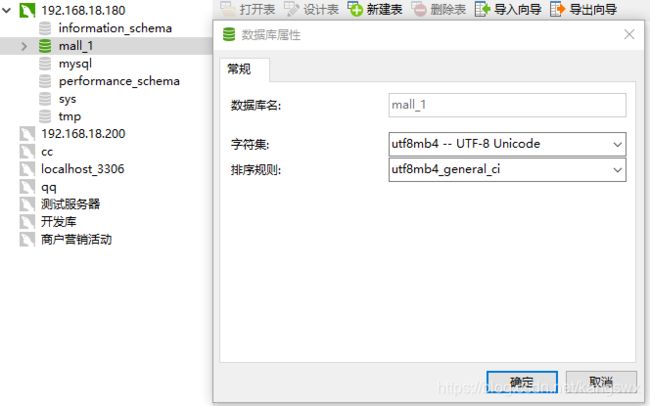
在192.168.18.180中新建一个数据库mall_1,如下图
-
在mall_0和mall_1中分别运行下面的sql脚本(在每个库中新建两张表分别为t_order_0,t_order_1)
SET NAMES utf8mb4; SET FOREIGN_KEY_CHECKS = 0; DROP TABLE IF EXISTS `t_order_0`; CREATE TABLE `t_order_0` ( `order_id` bigint(20) NOT NULL, `user_id` int(11) NOT NULL, `status` varchar(50) CHARACTER SET utf8mb4 COLLATE utf8mb4_unicode_ci NULL DEFAULT NULL, PRIMARY KEY (`order_id`) USING BTREE ) ENGINE = InnoDB CHARACTER SET = utf8mb4 COLLATE = utf8mb4_unicode_ci ROW_FORMAT = Dynamic; DROP TABLE IF EXISTS `t_order_1`; CREATE TABLE `t_order_1` ( `order_id` bigint(20) NOT NULL, `user_id` int(11) NOT NULL, `status` varchar(50) CHARACTER SET utf8mb4 COLLATE utf8mb4_unicode_ci NULL DEFAULT NULL, PRIMARY KEY (`order_id`) USING BTREE ) ENGINE = InnoDB CHARACTER SET = utf8mb4 COLLATE = utf8mb4_unicode_ci ROW_FORMAT = Dynamic; SET FOREIGN_KEY_CHECKS = 1; -
接下来新建一个maven工程 spring-shardingjdbc
-
在pom.xml文件中引入依赖
<dependencies> <dependency> <groupId>org.apache.shardingspheregroupId> <artifactId>sharding-jdbc-coreartifactId> <version>4.0.0-RC1version> dependency> <dependency> <groupId>org.apache.shardingspheregroupId> <artifactId>sharding-jdbc-spring-namespaceartifactId> <version>4.0.0-RC1version> dependency> <dependency> <groupId>org.springframeworkgroupId> <artifactId>spring-contextartifactId> <version>5.1.6.RELEASEversion> dependency> <dependency> <groupId>mysqlgroupId> <artifactId>mysql-connector-javaartifactId> <version>5.1.47version> dependency> <dependency> <groupId>com.zaxxergroupId> <artifactId>HikariCPartifactId> <version>3.2.0version> dependency> <dependency> <groupId>org.springframeworkgroupId> <artifactId>spring-testartifactId> <version>5.1.6.RELEASEversion> dependency> <dependency> <groupId>junitgroupId> <artifactId>junitartifactId> <version>4.12version> dependency> dependencies> -
在 main\resource 下新建一个spring配置文件applicationContext.xml,并配置spring与shardingJDBC整合的配置项
<beans xmlns="http://www.springframework.org/schema/beans" xmlns:xsi="http://www.w3.org/2001/XMLSchema-instance" xmlns:sharding="http://shardingsphere.apache.org/schema/shardingsphere/sharding" xsi:schemaLocation="http://www.springframework.org/schema/beans http://www.springframework.org/schema/beans/spring-beans.xsd http://shardingsphere.apache.org/schema/shardingsphere/encrypt http://shardingsphere.apache.org/schema/shardingsphere/encrypt/encrypt.xsd http://shardingsphere.apache.org/schema/shardingsphere/sharding http://shardingsphere.apache.org/schema/shardingsphere/sharding/sharding.xsd"> <bean id="ds0" class="com.zaxxer.hikari.HikariDataSource"> <property name="driverClassName" value="com.mysql.jdbc.Driver"/> <property name="jdbcUrl" value="jdbc:mysql://192.168.18.179:3306/mall_0?useSSL=false"/> <property name="username" value="root"/> <property name="password" value="root"/> bean> <bean id="ds1" class="com.zaxxer.hikari.HikariDataSource"> <property name="driverClassName" value="com.mysql.jdbc.Driver"/> <property name="jdbcUrl" value="jdbc:mysql://192.168.18.180:3306/mall_1?useSSL=false"/> <property name="username" value="root"/> <property name="password" value="root"/> bean> <sharding:inline-strategy id="databaceStrategy" sharding-column="user_id" algorithm-expression="ds$->{user_id % 2}"/> <sharding:inline-strategy id="orderTableStrategy" sharding-column="order_id" algorithm-expression="t_order_$->{order_id % 2}"/> <sharding:data-source id="shardingDataSource"> <sharding:sharding-rule data-source-names="ds0,ds1"> <sharding:table-rules> <sharding:table-rule logic-table="t_order" actual-data-nodes="ds$->{0..1}.t_order_$->{0..1}" database-strategy-ref="databaceStrategy" table-strategy-ref="orderTableStrategy" /> sharding:table-rules> sharding:sharding-rule> sharding:data-source> beans> -
编写插入的测试代码
import org.junit.Test; import org.junit.runner.RunWith; import org.springframework.test.context.ContextConfiguration; import org.springframework.test.context.junit4.SpringJUnit4ClassRunner; import javax.annotation.Resource; import javax.sql.DataSource; import java.sql.Connection; import java.sql.PreparedStatement; import java.sql.ResultSet; import java.sql.SQLException; @RunWith(SpringJUnit4ClassRunner.class) @ContextConfiguration(locations = {"classpath:applicationContext.xml"}) public class ShardingTest { @Resource(name = "shardingDataSource") //此处引入的是配置文件中定义的shardingDataSource private DataSource dataSource; @Test public void testInsert() throws SQLException { Connection connection = dataSource.getConnection(); //t_order为逻辑表 String sql = "insert into t_order(order_id, user_id, status) values(2, 2, 'N')"; PreparedStatement preparedStatement = connection.prepareStatement(sql); preparedStatement.executeUpdate(); preparedStatement.close(); connection.close(); } } -
插入数据测试一
insert into t_order(order_id, user_id, status) values(1, 2, 'N')数据成功插入到了mall0的t_order_1表中
-
插入数据测试二
insert into t_order(order_id, user_id, status) values(2, 2, 'N')数据成功插入到了mall0的t_order_0表中
-
插入数据测试三
insert into t_order(order_id, user_id, status) values(3, 1, 'N')数据成功插入到了mall1的t_order_1表中
-
插入数据测试四
insert into t_order(order_id, user_id, status) values(4, 1, 'N')数据成功插入到了mall1的t_order_0表中
-
编写查询的测试代码
@Test public void testQuery() throws SQLException { Connection connection = dataSource.getConnection(); /** * select * from t_order * 分解sql * select * from ds0.t_order_0 * select * from ds0.t_order_1 * select * from ds1.t_order_0 * select * from ds1.t_order_1 * 最后将结果合并 */ String sql = "select * from t_order order by order_id"; PreparedStatement preparedStatement = connection.prepareStatement(sql); ResultSet resultSet = preparedStatement.executeQuery(); while (resultSet.next()){ System.out.println("order_id: "+resultSet.getLong("order_id") +", user_id: "+ resultSet.getLong("user_id") + " status: "+resultSet.getString("status")); } resultSet.close(); preparedStatement.close(); connection.close(); } /** 测试结果(一次性将四张表中的数据都查询出来了) order_id: 2, user_id: 2 status: N order_id: 1, user_id: 2 status: N order_id: 4, user_id: 1 status: N order_id: 3, user_id: 1 status: N */ -
分库分表后,不能使用自动生成的主键,否则在查询的结果中会出现大量的重复的主键,所以在分库分表后需要使用分布式主键生成策略。
-
分布式主键生成策略为主键生成全局唯一的值,将主键放在任何一台数据库中都是唯一的。
-
shardingsphere支持多种分布式主键生成策略,包括UUID,SNOWFLAKE(雪花算法,能保证不同进程的主键不重复,以及相同进程的主键的有序性),时钟回拨,LEAF(借助注册中心生成分布式自增主键)
-
shardingJDBC整合SNOWFLAKE,在配置文件中加入
<sharding:key-generator id="orderKeyGenerator" type="SNOWFLAKE" column="order_id"/> <sharding:table-rule logic-table="t_order" actual-data-nodes="ds$->{0..1}.t_order_$->{0..1}" database-strategy-ref="databaceStrategy" table-strategy-ref="orderTableStrategy" key-generator-ref="orderKeyGenerator" /> -
新增分布式主键生成测试代码
/** * 测试批量插入(分布式主键) * @throws SQLException */ @Test public void testBatchInsert() throws SQLException { Connection connection = dataSource.getConnection(); for (int i = 0; i < 10; i++) { String sql = "insert into t_order(user_id, status) values(?, 'N')"; PreparedStatement preparedStatement = connection.prepareStatement(sql); preparedStatement.setLong(1, i); preparedStatement.executeUpdate(); preparedStatement.close(); } connection.close(); } /** 测试结果,发现所有的数据均匀的分布在两个库中 */ -
具体的代码见 Spring整合sharding-jdbc实现分库分表


