通过TigerVNCServer + noVNC构建基于HTML的VNC环境
搭建TigerVNCServer服务器
TigerVNC is a high-performance, platform-neutral implementation of VNC.
下载
官方地址: https://tigervnc.org
GitHub地址:https://github.com/TigerVNC/tigervnc
采用版本:TigerVNC 1.9.0
安装
查看BUILDING.txt,TigerVNC 的相关依赖
================================
Build Requirements (All Systems)
================================

-- CMake (http://www.cmake.org) v2.8 or later

-- zlib

-- FLTK 1.3.3 or later

-- If building TLS support:
   * GnuTLS 3.x
   * See "Building TLS Support" below.

-- If building native language support (NLS):
   * Gnu gettext 0.14.4 or later
   * See "Building Native Language Support" below.

-- libjpeg-turbo
   * "Normal" libjpegv6 is also supported, although it is not
     recommended as it is much slower.


=========================
Build Requirements (Unix)
=========================

-- Non-Mac platforms:
   * X11 development kit

-- If building Xvnc/libvnc.so:
   * Xorg server source code, 1.7 or never
* All build requirements Xorg imposes (see its documentation)
1、依赖FLTK库
官方下载地址: http://www.fltk.org/index.php
进入源码文件,依次执行如下操作:
mkdir build
cd build
cmake ..
make
make install
相关的libfltk*.a的库均安装在/usr/local/lib64/目录下
2、安装TigerVNC
进入源码文件,修改CMakeLists.txt文件 ,增加如下内容:
# Install fltk
set(FLTK_BASE_LIBRARY "/usr/local/lib64/libfltk.a")
set(FLTK_IMAGES_LIBRARY "/usr/local/lib64/libfltk_images.a")
set(FLTK_INCLUDE_DIR "/usr/local/include/")
依次执行如下操作:
mkdir build
cd build
cmake -G "Unix Makefiles" -DCMAKE_INSTALL_PREFIX=/usr -DCMAKE_BUILD_TYPE=Release -Wno-dev ..
make
make install
undefined reference to symbol ‘dlsym@@GLIBC_2.2.5’ 错误处理:
/usr/bin/ld: /usr/local/lib64/libfltk.a(Fl_Window_shape.cxx.o): undefined reference to symbol 'dlsym@@GLIBC_2.2.5'
/usr/lib64/libdl.so.2: error adding symbols: DSO missing from command line
collect2: 错误:ld 返回 1
make[2]: *** [vncviewer/vncviewer] 错误 1
make[1]: *** [vncviewer/CMakeFiles/vncviewer.dir/all] 错误 2
make: *** [all] 错误 2
这个错误在GitHUB的ISSUE中有人提出:
https://github.com/TigerVNC/tigervnc/issues/7
作者的建议如下:
I'm afraid that your use case is impossible to solve in any general way.

The problem is that you are trying to link FLTK statically. For any static linking to work, you then need to know every dependency that static library has. But unfortunately there is no good way to determine this. And we cannot have a hard coded list as the dependencies change depending on the platform, versions and even how the other library was built.

So I'm sorry, but I'm going to have to refuse this request.
解决方案:
编译时增加 -ldl
我通过修改编译代码的方式编译成功,但是不同的运行环境需要修改的地方不一样,如果遇到相同问题的读者可以在下面留言,我会针对特定环境给出特定的方法。
png_*未引用错误处理:
/usr/local/lib64/libfltk_images.a(Fl_PNG_Image.cxx.o):在函数‘png_read_data_from_mem’中:
Fl_PNG_Image.cxx:(.text+0x1c):对‘png_get_io_ptr’未定义的引用
Fl_PNG_Image.cxx:(.text+0x50):对‘png_error’未定义的引用
/usr/local/lib64/libfltk_images.a(Fl_PNG_Image.cxx.o):在函数‘Fl_PNG_Image::load_png_(char const*, unsigned char const*, int)’中:
Fl_PNG_Image.cxx:(.text+0x24c):对‘png_create_read_struct’未定义的引用
Fl_PNG_Image.cxx:(.text+0x265):对‘png_create_info_struct’未定义的引用
Fl_PNG_Image.cxx:(.text+0x29e):对‘png_destroy_read_struct’未定义的引用
Fl_PNG_Image.cxx:(.text+0x335):对‘png_set_longjmp_fn’未定义的引用
Fl_PNG_Image.cxx:(.text+0x362):对‘png_destroy_read_struct’未定义的引用
Fl_PNG_Image.cxx:(.text+0x42b):对‘png_set_read_fn’未定义的引用
Fl_PNG_Image.cxx:(.text+0x440):对‘png_init_io’未定义的引用
Fl_PNG_Image.cxx:(.text+0x453):对‘png_read_info’未定义的引用
Fl_PNG_Image.cxx:(.text+0x466):对‘png_get_color_type’未定义的引用
Fl_PNG_Image.cxx:(.text+0x47b):对‘png_set_expand’未定义的引用
Fl_PNG_Image.cxx:(.text+0x48e):对‘png_get_color_type’未定义的引用
Fl_PNG_Image.cxx:(.text+0x4dc):对‘png_get_tRNS’未定义的引用
Fl_PNG_Image.cxx:(.text+0x4ef):对‘png_get_color_type’未定义的引用
Fl_PNG_Image.cxx:(.text+0x52a):对‘png_get_image_width’未定义的引用
Fl_PNG_Image.cxx:(.text+0x550):对‘png_get_image_height’未定义的引用
Fl_PNG_Image.cxx:(.text+0x58a):对‘png_get_bit_depth’未定义的引用
Fl_PNG_Image.cxx:(.text+0x59f):对‘png_set_packing’未定义的引用
Fl_PNG_Image.cxx:(.text+0x5ab):对‘png_set_expand’未定义的引用
Fl_PNG_Image.cxx:(.text+0x5c0):对‘png_get_bit_depth’未定义的引用
Fl_PNG_Image.cxx:(.text+0x5d5):对‘png_set_strip_16’未定义的引用
Fl_PNG_Image.cxx:(.text+0x5ed):对‘png_get_valid’未定义的引用
Fl_PNG_Image.cxx:(.text+0x602):对‘png_set_tRNS_to_alpha’未定义的引用
Fl_PNG_Image.cxx:(.text+0x663):对‘png_set_longjmp_fn’未定义的引用
Fl_PNG_Image.cxx:(.text+0x784):对‘png_set_interlace_handling’未定义的引用
Fl_PNG_Image.cxx:(.text+0x7b1):对‘png_read_rows’未定义的引用
Fl_PNG_Image.cxx:(.text+0x7e1):对‘png_read_end’未定义的引用
Fl_PNG_Image.cxx:(.text+0x7f9):对‘png_destroy_read_struct’未定义的引用
collect2: 错误:ld 返回 1
make[2]: *** [vncviewer/vncviewer] 错误 1
make[1]: *** [vncviewer/CMakeFiles/vncviewer.dir/all] 错误 2
make: *** [all] 错误 2
解决方案:
编译时增加 -lpng
3、安装成功
在/usr/bin下生成相关可执行文件:
[zhaojq@localhost bin]# vnc
vncconfig  vncpasswd  vncserver  vncviewer
启动
1、设置VNC密码
[root@vio062033 ~]# vncserver

You will require a password to access your desktops.

Password:
Verify:
Would you like to enter a view-only password (y/n)? y
Password:
Verify:

New 'vio062033:1 (root)' desktop is vio062033:1

Creating default startup script /root/.vnc/xstartup
Creating default config /root/.vnc/config
Starting applications specified in /root/.vnc/xstartup
Log file is /root/.vnc/vio062033:1.log
2、 查看该服务是否正确运行
[root@vio062033 ~]# netstat -lntp | grep "5901"
tcp        0      0 0.0.0.0:5901            0.0.0.0:*               LISTEN      6711/Xvnc
tcp6       0      0 :::5901                 :::*                    LISTEN      6711/Xvnc
搭建noVNC客户端
NoVnc Web 端的Vnc软件、可以直接通过网页访问远程主机,采用 HTML5、WebSockets、Canvas和 JavaScript 实现,被普遍用在各大云平台中。
下载
官方地址: http://novnc.com
GitHub地址:https://github.com/novnc/noVNC
采用版本:noVNC 1.0.0
启动(源码下载后无需安装)
[zhaojq@localhost Client]$ cd noVNC
[zhaojq@localhost Client]$ ./utils/launch.sh --vnc localhost:5901          ##第一次会帮我们下载Websokify
Warning: could not find self.pem
Using local websockify at /home/zhaojq/Workspace/VNC/Client/utils/websockify/run
Starting webserver and WebSockets proxy on port 6080


Navigate to this URL:

    http://localhost.localdomain:6080/vnc.html?host=localhost.localdomain&port=6080

Press Ctrl-C to exit


WebSocket server settings:
  - Listen on :6080
  - Web server. Web root: /home/zhaojq/Workspace/VNC/Client
  - No SSL/TLS support (no cert file)
  - proxying from :6080 to 173.0.20.109:5901
localhost.localdomain - - [16/Oct/2018 18:20:32] 127.0.0.1: Plain non-SSL (ws://) WebSocket connection
localhost.localdomain - - [16/Oct/2018 18:20:32] 127.0.0.1: Path: '/websockify'
localhost.localdomain - - [16/Oct/2018 18:20:32] connecting to: 173.0.20.109:5901
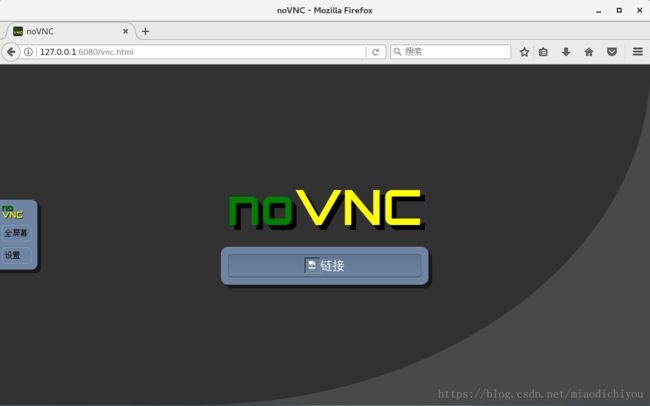
访问
在浏览器打开地址就可以访问
http://127.0.0.1:6080/vnc.html
错误 handler exception: [Errno 111] Connection refused
启动 vncserver -localhost no
点击链接,输入VNC Server端密码:

远程访问成功
