bochs 编译
1、download bochs src from :http://bochs.sourceforge.net/
2、安装必要的库
sudo apt-get install build-essential
sudo apt-get install libgtk2.0-dev
3、运行配置程序 ./conf.linux
  ./configure --enable-smp \
              --enable-cpu-level=6 \
              --enable-all-optimizations \
              --enable-x86-64 \
              --enable-pci \
              --enable-vmx \
              --enable-debugger \
              --enable-disasm \
              --enable-debugger-gui \
              --enable-logging \
              --enable-fpu \
              --enable-3dnow \
              --enable-sb16=dummy \
              --enable-cdrom \
              --enable-x86-debugger \
              --enable-iodebug \
              --disable-plugins \
              --disable-docbook \
              --with-x --with-x11 --with-term
4、编译
make
报错:
/usr/bin/ld: gui/libgui.a(gtk_enh_dbg_osdep.o): undefined reference to symbol 'pthread_create@@GLIBC_2.1'
//lib/i386-linux-gnu/libpthread.so.0: error adding symbols: DSO missing from command line
collect2: error: ld returned 1 exit status
make: *** [bochs] Error 1
解决方法:修改步骤3产生的Makefile文件中LIBS 一行,加上 -lpthread,然后再make
5、安装
make install
报错:
for i in /usr/local/bin; do mkdir -p $i && test -d $i && test -w $i; done
make: *** [install_bin] Error 1
解决方法:是权限不够的原因,使用sudo make install
6、测试
bochs
出现以下文字,说明已经成功安装bochs(未正确配置)
Bochs x86 Emulator 2.6.6
Built from SVN snapshot on June 15, 2014
Compiled on Jul 25 2014 at 13:00:32
========================================================================
00000000000i[ ] reading configuration from .bochsrc
00000000000e[ ] .bochsrc:702: ataX-master/slave CHS set to 0/0/0 - autodetection enabled
00000000000p[ ] >>PANIC<< .bochsrc:868: Bochs is not compiled with lowlevel sound support
00000000000e[SIM ] notify called, but no bxevent_callback function is registered
========================================================================
Bochs is exiting with the following message:
[ ] .bochsrc:868: Bochs is not compiled with lowlevel sound support
========================================================================
00000000000i[SIM ] quit_sim called with exit code 1
7、配置
touch bochsrc ,在当前目录下创建bochsrc文件
文件写入如下内容:
#/home/zhijian/tools/bochs-2.6.6/为编译bochs的目录
romimage: file="/home/zhijian/tools/bochs-2.6.6/bios/BIOS-bochs-latest"
vgaromimage: file="/home/zhijian/tools/bochs-2.6.6/bios/VGABIOS-lgpl-latest"
ata0-master: type=disk, path="disk.img", cylinders=200, heads=16, spt=63
boot: disk
#日志输出
log: bochsout.txt
8、测试,采用上一篇博文“grub启动镜像制作”的disk.img作为启动镜像
bochs 运行bochs
控制台打印:
========================================================================
Bochs x86 Emulator 2.6.6
Built from SVN snapshot on June 15, 2014
Compiled on Jul 25 2014 at 13:00:32
========================================================================
00000000000i[ ] reading configuration from bochsrc
------------------------------
Bochs Configuration: Main Menu
------------------------------
This is the Bochs Configuration Interface, where you can describe the
machine that you want to simulate. Bochs has already searched for a
configuration file (typically called bochsrc.txt) and loaded it if it
could be found. When you are satisfied with the configuration, go
ahead and start the simulation.
You can also start bochs with the -q option to skip these menus.
1. Restore factory default configuration
2. Read options from...
3. Edit options
4. Save options to...
5. Restore the Bochs state from...
6. Begin simulation
7. Quit now
Please choose one: [6]
00000000000i[ ] installing x module as the Bochs GUI
00000000000i[ ] using log file bochsout.txt
Next at t=0
(0) [0x0000fffffff0] f000:fff0 (unk. ctxt): jmpf 0xf000:e05b ; ea5be000f0
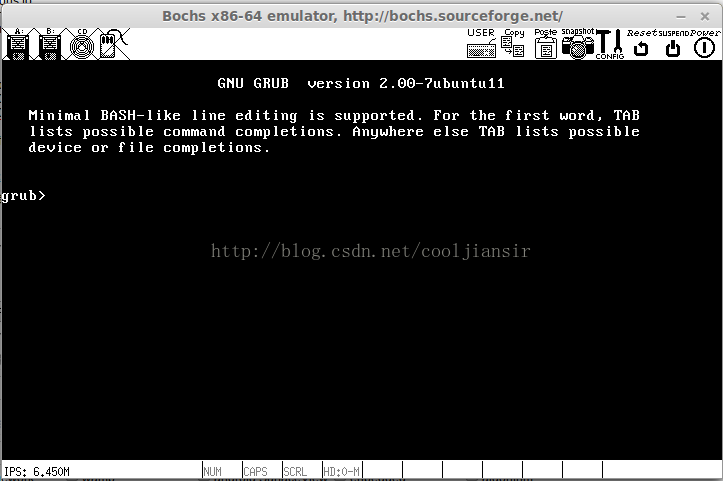
输入c,(运行)
看到grub2启动界面
