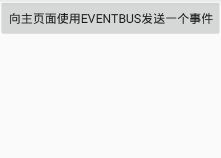
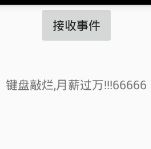
EventBus发送黏性事件到接收页面
例:
创建Module,关联EventBus框架,创建第2个Activity
完成Module的布局及控件的初始化
创建EventBus消息类,设置属性
使用EventBus的postSticky方法发送黏性事件
根据消息类,接收黏性事件(注意:注解要添加sticky = true)
注册EventBus,解除EventBus黏性事件及注册
加依赖:
dependencies {
    compile 'org.greenrobot:eventbus:3.0.0'
}
加权限:
MainActivity 主要:
/**
 * 创建Module,关联EventBus框架,创建第2个Activity

    完成Module的布局及控件的初始化

    创建EventBus消息类,设置属性

    使用EventBus的postSticky方法发送黏性事件

    根据消息类,接收黏性事件(注意:注解要添加sticky = true)

    注册EventBus,解除EventBus黏性事件及注册
 */
public class MainActivity extends AppCompatActivity {

    public String mag="键盘敲烂,月薪过万!!!66666";

    @Override
    protected void onCreate(Bundle savedInstanceState) {
        super.onCreate(savedInstanceState);
        setContentView(R.layout.activity_main);
    }

    //发送黏性事件到接收页面,注意关键点,通讯
    public void send(View view){
        //发送黏性事件
        EventBus.getDefault().postSticky(new EventBusStickyMessage(mag));
        //跳转到接收的Activity上
        startActivity(new Intent(this,EventBusReceiveActivity.class));
    }
}
activity_main 布局:
xml version="1.0" encoding="utf-8"?>
<RelativeLayout
    xmlns:android="http://schemas.android.com/apk/res/android"
    android:layout_width="match_parent"
    android:layout_height="match_parent">

    <Button
        android:onClick="send"
        android:text="向主页面使用EventBus发送一个事件"
        android:layout_width="wrap_content"
        android:layout_height="wrap_content"/>

RelativeLayout>
EventBusStickyMessage 创建EventBus消息类,设置属性
/**
* 消息类,一个容器,负责存放一些数据,方便我们传到另一个地方,获取信息
*/
public class EventBusStickyMessage {
    public String message;
    public EventBusStickyMessage(String message) {
        this.message = message;
    }
}
EventBusReceiveActivity 接收黏性事件
public class EventBusReceiveActivity extends AppCompatActivity implements View.OnClickListener {
    private Button button;
    private TextView tv_title;
    @Override
    protected void onCreate(Bundle savedInstanceState) {
        super.onCreate(savedInstanceState);
        setContentView(R.layout.activity_event_bus_receive);
        initView();
    }

    @Override
    public void onClick(View v) {
        switch (v.getId()) {
            case R.id.button:
                if(!EventBus.getDefault().isRegistered(this)){//加上判断
                    EventBus.getDefault().register(this);
                }
                break;
        }
    }

    //1.接收黏性事件,多了个属性sticky,改为true方式启动黏性事件
    @Subscribe(threadMode = ThreadMode.MAIN,sticky = true)
    public void EventBusSticky(EventBusStickyMessage eventBusStickyMessage){
        tv_title.setText(eventBusStickyMessage.message);
    }

    //优化资源,内存溢出,AIDL
    @Override
    protected void onDestroy() {
        super.onDestroy();
        //移除所有的黏性事件
        EventBus.getDefault().removeAllStickyEvents();
        //避免内存泄漏,防止OOM,优化内存
        EventBus.getDefault().unregister(this);
    }

    private void initView() {
        button = (Button) findViewById(R.id.button);
        tv_title = (TextView) findViewById(R.id.tv_title);

        button.setOnClickListener(this);
    }
}
activity_event_bus_receive 布局:
xml version="1.0" encoding="utf-8"?>
<RelativeLayout
    xmlns:android="http://schemas.android.com/apk/res/android"
    android:layout_width="match_parent"
    android:layout_height="match_parent">
    <Button
        android:id="@+id/button"
        android:text="接收事件"
        android:layout_width="wrap_content"
        android:layout_height="wrap_content"
        android:layout_centerHorizontal="true"/>
    <TextView
        android:id="@+id/tv_title"
        android:layout_width="wrap_content"
        android:layout_height="wrap_content"
        android:layout_below="@+id/button"
        android:layout_centerHorizontal="true"
        android:layout_marginTop="35dp"/>
RelativeLayout>

