传统意义上来说,想给微信公众号增加更多的功能,需要我们有一台服务器,搭建一个微信公众号的后台服务。那么在Serverless架构下,我们是否有超简便的方法来实现一个简单的微信公众号后台呢?
我说可以:我们只用一个函数,就可以初步的搭建一个公众号后台的雏形。
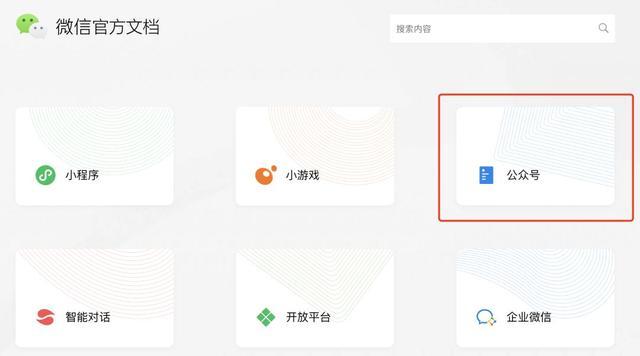
首先我们要有一个微信公众号,这一段我就Pass了;然后我们要学习看文档:c https://developers.weixin.qq....
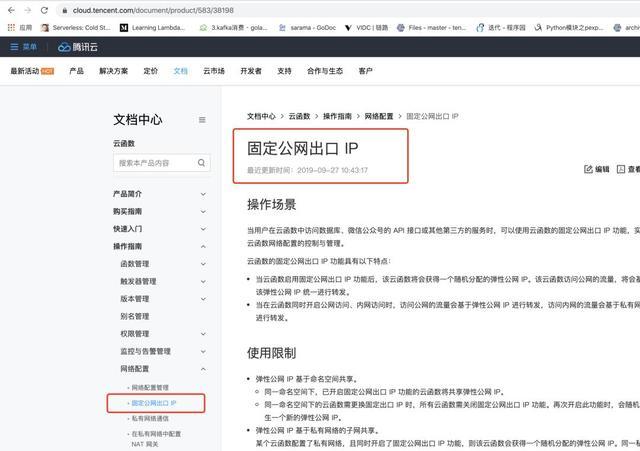
再然后,我们还要做一个有趣的小操作,那就是为我们的函数申请固定IP:https://cloud.tencent.com/doc...
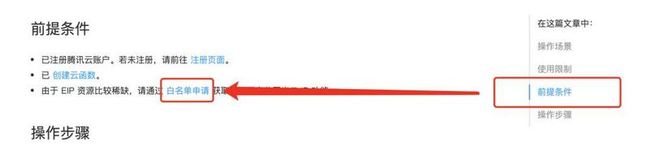
进入到白名单之后,我们可以填写表单,完成固定公网出口IP的申请,这里可能要几个工作日才能完成。
最后就是我们的代码开发。
1: 想要将函数绑定到公众号后台,需要我们参考文档:https://developers.weixin.qq....
我们可以先在函数中按照文档完成一个基本的鉴定功能:
def checkSignature(param):
    '''
    文档地址:https://developers.weixin.qq.com/doc/offiaccount/Basic_Information/Access_Overview.html
    :param param:
    :return:
    '''
    signature = param['signature']
    timestamp = param['timestamp']
    nonce = param["nonce"]
    tmparr = [wxtoken, timestamp, nonce]
    tmparr.sort()
    tmpstr = ''.join(tmparr)
    tmpstr = hashlib.sha1(tmpstr.encode("utf-8")).hexdigest()
    return tmpstr == signature
再定义一个基本的回复方法:
def response(body, status=200):
    return {
        "isBase64Encoded": False,
        "statusCode": status,
        "headers": {"Content-Type": "text/html"},
        "body": body
    }
然后在函数入口处:
def main_handler(event, context):
    if 'echostr' in event['queryString']:  # 接入时的校验
        return response(event['queryString']['echostr'] if checkSignature(event['queryString']) else False)
我们接着配置我们Yaml:
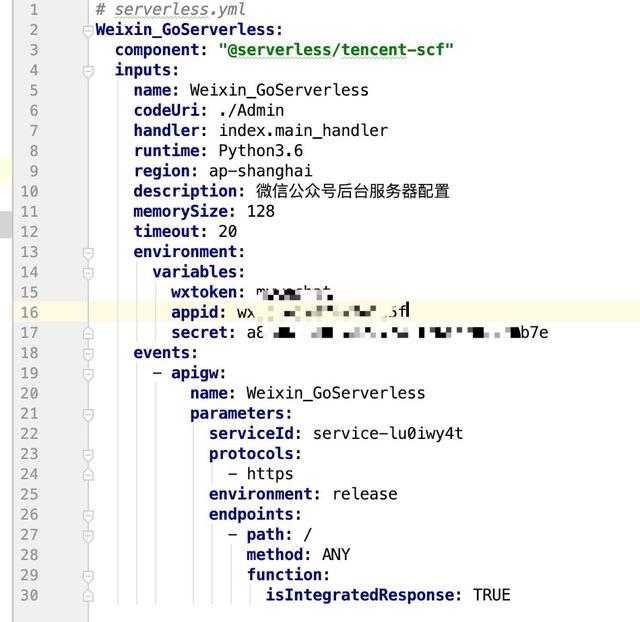
# serverless.yml
Weixin_GoServerless:
  component: "@serverless/tencent-scf"
  inputs:
    name: Weixin_GoServerless
    codeUri: ./Admin
    handler: index.main_handler
    runtime: Python3.6
    region: ap-shanghai
    description: 微信公众号后台服务器配置
    memorySize: 128
    timeout: 20
    environment:
      variables:
        wxtoken: 自定义一个字符串
        appid: 暂时不写
        secret: 暂时不写
    events:
      - apigw:
          name: Weixin_GoServerless
          parameters:
            protocols:
              - https
            environment: release
            endpoints:
              - path: /
                method: ANY
                function:
                  isIntegratedResponse: TRUE
我们执行代码,完成部署:
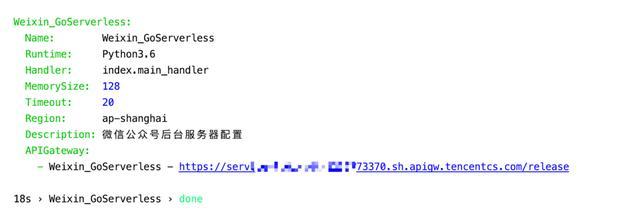
接下来在我们的公众号后台,选择基本配置:
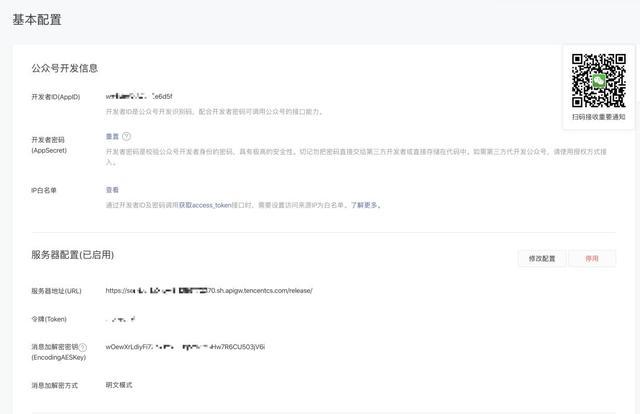
然后选择修改配置:

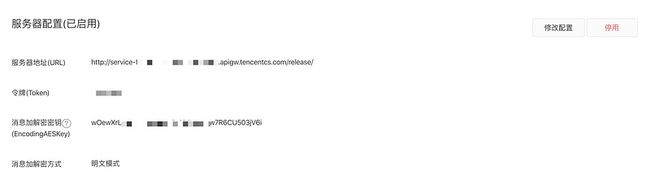
在这里我们要注意:
- URL,写我们刚才部署完成返回给我们的地址,并且在最后加一个/
- Token,写我们Yaml中的wxtoken,两个地方要保持一样的字符串
- EncodingAESKey,可以点击随机生成
- 消息加密方法可以选择明文
完成之后,我们可以点击提交:

看到提交成功,就说明我们已经完成了第一步骤的绑定,接下来,我们到函数的后台:
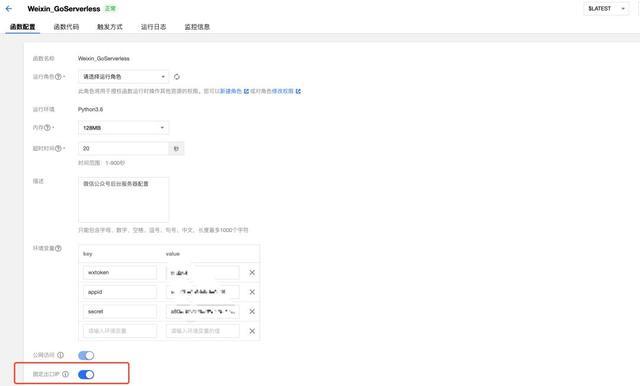
打开这个固定出口IP,然后看到IP地址之后,复制IP地址:
点击查看->修改,并将IP地址复制粘贴进来,保存。
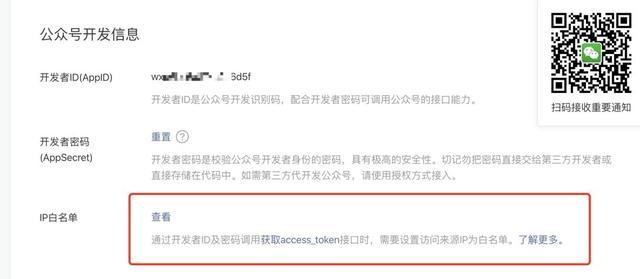
同时我们查看开发者ID和密码:
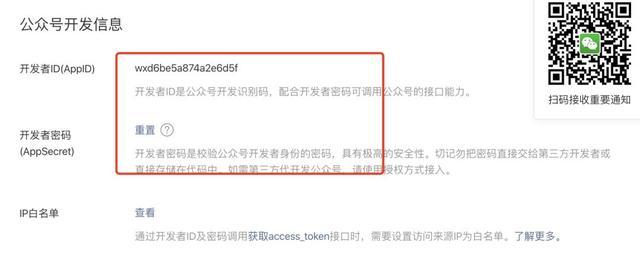
并将这两个内容复制粘贴,放到我们环境变量中:
至此,我们完成了一个公众号后台服务的绑定。为了方便之后的操作,我先获取一下全局变量:
wxtoken = os.environ.get('wxtoken')
appid = os.environ.get('appid')
secret = os.environ.get('secret')
1: 接下来对各个模块进行编辑(本文只提供部分简单基础的模块,更多功能实现可以参考微信公众号文档实现)1: 获取AccessToken模块:
def getAccessToken():
    '''
    文档地址:https://developers.weixin.qq.com/doc/offiaccount/Basic_Information/Get_access_token.html
    正常返回:{"access_token":"ACCESS_TOKEN","expires_in":7200}
    异常返回:{"errcode":40013,"errmsg":"invalid appid"}
    :return:
    '''
    url = "https://api.weixin.qq.com/cgi-bin/token?grant_type=client_credential&appid=%s&secret=%s" % (appid, secret)
    accessToken = json.loads(urllib.request.urlopen(url).read().decode("utf-8"))
    print(accessToken)
    return None if "errcode" in accessToken else accessToken["access_token"]
2: 创建自定义菜单模块:
def setMenu(menu):
    '''
    文档地址:https://developers.weixin.qq.com/doc/offiaccount/Custom_Menus/Creating_Custom-Defined_Menu.html
    正确返回:{"errcode":0,"errmsg":"ok"}
    异常返回:{"errcode":40018,"errmsg":"invalid button name size"}
    :return:
    '''
    accessToken = getAccessToken()
    if not accessToken:
        return "Get Access Token Error"

    url = "https://api.weixin.qq.com/cgi-bin/menu/create?access_token=%s" % accessToken
    postData = urllib.parse.urlencode(menu).encode("utf-8")
    requestAttr = urllib.request.Request(url=url, data=postData)
    responseAttr = urllib.request.urlopen(requestAttr)
    responseData = json.loads(responseAttr.read())
    return responseData['errmsg'] if "errcode" in responseData else "success"
3: 常见消息回复模块:
def textXML(body, event):
'''
:param body: {"msg": "test"}
msg: 必填,回复的消息内容(换行:在content中能够换行,微信客户端就支持换行显示)
:param event:
:return:
'''
return """{time}
{time}
{time}
{time}
{time}
<![CDATA[{title}]]>
-
<![CDATA[{title}]]>
"""
return """{time}
{count}
{articles}
4: 对main_handler进行修改,使其:
- 识别绑定功能
- 识别基本信息
- 识别特殊额外请求(例如通过url触发自定义菜单的更新)
整体代码:
def main_handler(event, context):
    print('event: ', event)

    if event["path"] == '/setMenu':  # 设置菜单接口
        menu = {
            "button": [
                {
                    "type": "view",
                    "name": "精彩文章",
                    "url": "https://mp.weixin.qq.com/mp/homepage?__biz=Mzg2NzE4MDExNw==&hid=2&sn=168bd0620ee79cd35d0a80cddb9f2487"
                },
                {
                    "type": "view",
                    "name": "开源项目",
                    "url": "https://mp.weixin.qq.com/mp/homepage?__biz=Mzg2NzE4MDExNw==&hid=1&sn=69444401c5ed9746aeb1384fa6a9a201"
                },
                {
                    "type": "miniprogram",
                    "name": "在线编程",
                    "appid": "wx453cb539f9f963b2",
                    "pagepath": "/page/index"
                }]
        }
        return response(setMenu(menu))

    if 'echostr' in event['queryString']:  # 接入时的校验
        return response(event['queryString']['echostr'] if checkSignature(event['queryString']) else False)
    else:  # 用户消息/事件
        event = getEvent(event)
        if event["MsgType"] == "text":
            # 文本消息
            return response(body=textXML({"msg": "这是一个文本消息"}, event))
        elif event["MsgType"] == "image":
            # 图片消息
            return response(body=textXML({"msg": "这是一个图片消息"}, event))
        elif event["MsgType"] == "voice":
            # 语音消息
            pass
        elif event["MsgType"] == "video":
            # 视频消息
            pass
        elif event["MsgType"] == "shortvideo":
            # 小视频消息
            pass
        elif event["MsgType"] == "location":
            # 地理位置消息
            pass
        elif event["MsgType"] == "link":
            # 链接消息
            pass
        elif event["MsgType"] == "event":
            # 事件消息
            if event["Event"] == "subscribe":
                # 订阅事件
                if event.get('EventKey', None):
                    # 用户未关注时,进行关注后的事件推送(带参数的二维码)
                    pass
                else:
                    # 普通关注
                    pass
            elif event["Event"] == "unsubscribe":
                # 取消订阅事件
                pass
            elif event["Event"] == "SCAN":
                # 用户已关注时的事件推送(带参数的二维码)
                pass
            elif event["Event"] == "LOCATION":
                # 上报地理位置事件
                pass
            elif event["Event"] == "CLICK":
                # 点击菜单拉取消息时的事件推送
                pass
            elif event["Event"] == "VIEW":
                # 点击菜单跳转链接时的事件推送
                pass
在上述代码中可以看到:
if event["MsgType"] == "text":
    # 文本消息
    return response(body=textXML({"msg": "这是一个文本消息"}, event))
elif event["MsgType"] == "image":
    # 图片消息
    return response(body=textXML({"msg": "这是一个图片消息"}, event))
这里就是说,当用户发送了文本消息时候,我们给用户回复一个文本消息:这是一个文本消息,当用户发送了一个图片,我们给用户返回这是一个图片消息,用这两个功能测试我们这个后台的连通性:

可以看到,系统已经可以正常返回。
这样一个简单的小框架或者小Demo的意义是什么呢?
- 可以告诉大家,我们可以很轻量的,通过一个函数来实现微信公众号的后端服务;
-
这里都是基础能力,我们可以在这个基础能力基础上,“肆无忌惮”的添加创新力,例如:
- 用户传过来的是图片消息,我们可以通过一些识图API告诉用户这个图片包括了什么(接下来的文章分享中会涉及这部分内容)
- 用户传过来的是文字消息,我们可以先设定一些帮助信息/检索信息进行对比,如果没找到就给用户开启聊天功能(这里涉及到人工智能中的自然语言处理,例如对话、文本相似度检测,之后分享也会和大家举例说明)
- 如果用户发送到是语音我们还可以将其转成文本,生成对话消息,然后再转换成语音返回给用户
- 如果用户发送了地理位置信息,我们可以返回给用户所在经纬度的街景信息或者周边的信息/生活服务信息等
- .........
这些能力都可以自行添加。
当然,如果你觉得上面的实现比较Low,也没有问题,因为这里还有一个Werobot的框架,有的人比较疑惑:Werobot也能部署在云函数上?Of
Course!
Weixin_Werobot:
  component: "@serverless/tencent-werobot"
  inputs:
    functionName: Weixin_Werobot
    code: ./test
    werobotProjectName: app
    werobotAttrName: robot
    functionConf:
      timeout: 10
      memorySize: 256
      environment:
        variables:
          wxtoken: 你的token
      apigatewayConf:
        protocols:
          - http
        environment: release
然后新建代码:
import os
import werobot

robot = werobot.WeRoBot(token=os.environ.get('wxtoken'))

robot.config['SESSION_STORAGE'] = False
robot.config["APP_ID"] = os.environ.get('appid')
robot.config["APP_SECRET"] = os.environ.get('secret')

# @robot.handler 处理所有消息
@robot.handler
def hello(message):
    return 'Hello World!'

if __name__ == "__main__":
    # 让服务器监听在 0.0.0.0:80
    robot.config['HOST'] = '0.0.0.0'
    robot.config['PORT'] = 80
    robot.run()
并且在本地安装werobot相关依赖,完成之后,执行部署:
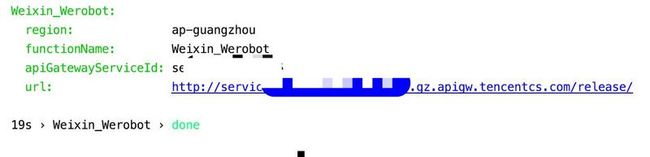
并把下面的这个地址复制到公众号后台:
开启调用即可。参考Git:https://github.com/serverless...
这里需要注意的是,我们一定要关掉Session或者将Session改成云数据库,不能使用本地文件等,例如关闭Session配置:
robot.config['SESSION_STORAGE'] = False