Arduino例子----EdgeDetection
1. 功能描述
一旦你使一个按钮正常工作, 你通常想要基于按钮被按了多少次进行不同的动作。为了完成这个目的,当按钮的状态从关改为开时你需要知道,并统计状态改变发生了多少次。这称为状态改变测试或者边界测试。
2. 需要硬件
ü Arduino 板子
ü 按钮或者开关
ü 10K欧姆电阻
ü 面包板
ü 安装线
3. 电路连接图
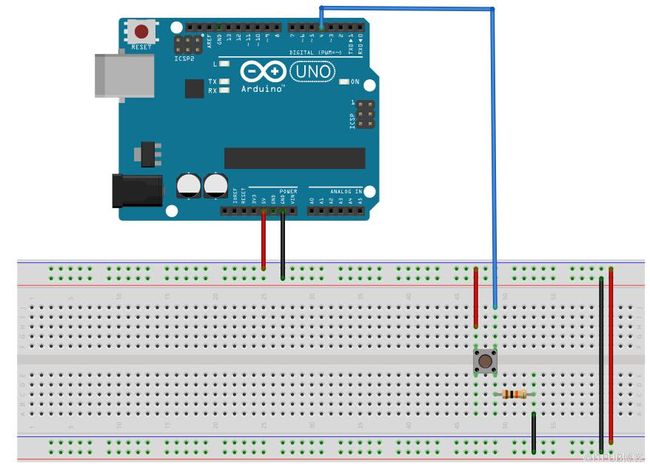
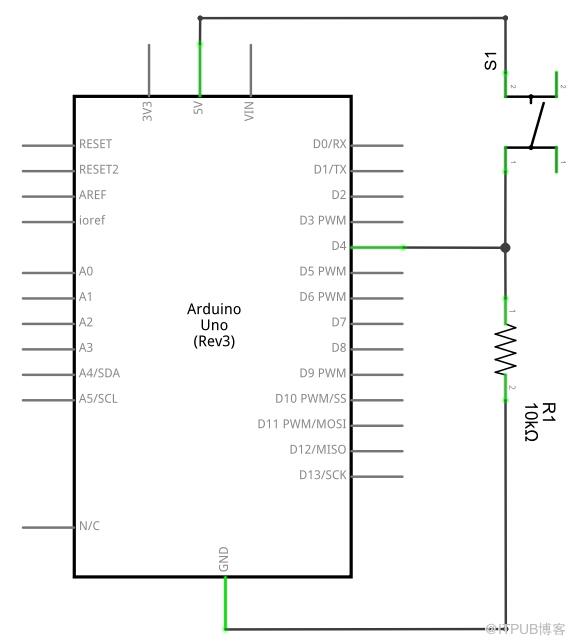
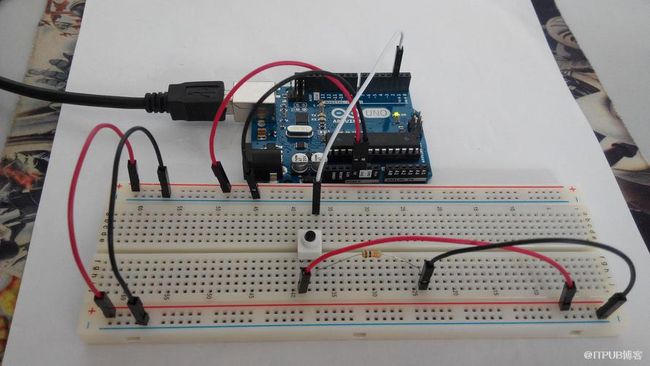
链接三条线到Arduino主板。第一条线链接按钮的一条腿,通过一个下拉电阻(这里是10K欧姆)到地。第二条线从按钮的corresponding leg 链接到5v电压。第三条线链接到一个数字I/O针脚(本例为2号),从这个针脚读取按钮的状态。
当按钮没有按下时,在按钮的两条腿之间没有链接,所以,针脚2号接地(通过一个10K欧姆的下拉电阻),我们读取到一个LOW。当按下按钮时,在按钮的两条腿之间形成一个链接,链接针脚2号到5v电压,所以,我们读取到一个HIGH(这个针脚依然链接到地,但是这个电阻阻值了电流的流动,所以最小阻力的路径是链接到+5v电压。)
4. 原理图
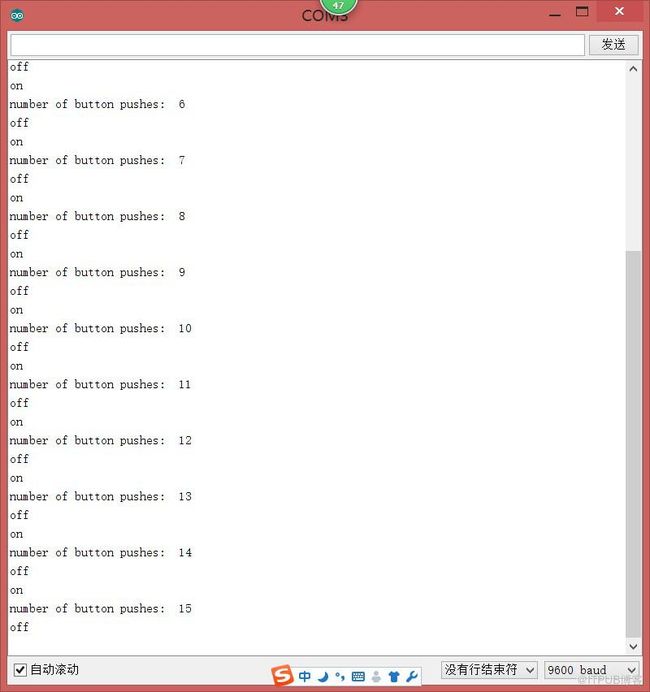
下面程序持续不断地读取按钮的状态。然后它通过主loop()循环不断地比较按钮的状态和上次的状态。如果当前状态不同于上一次的状态,且当前状态为HIGH,则按钮有关改为开。然后程序吧按钮的计算器加1。
本程序也可以检测按钮计数器的值,如果它是4的偶数倍,程序打开13号针脚的LED灯。否则,程序关闭这个LED灯。
5. 程序
/*
State change detection (edge detection)
Often, you don't need to know the state of a digital input all the time,
but you just need to know when the input changes from one state to another.
For example, you want to know when a button goes from OFF to ON. This is called
state change detection, or edge detection.
This example shows how to detect when a button or button changes from off to on
and on to off.
The circuit:
* pushbutton attached to pin 2 from +5V
* 10K resistor attached to pin 2 from ground
* LED attached from pin 13 to ground (or use the built-in LED on
most Arduino boards)
created 27 Sep 2005
modified 30 Aug 2011
by Tom Igoe
This example code is in the public domain.
http://arduino.cc/en/Tutorial/ButtonStateChange
*/
// this constant won't change:
const int buttonPin = 2; // the pin that the pushbutton is attached to
const int ledPin = 13; // the pin that the LED is attached to
// Variables will change:
int buttonPushCounter = 0; // counter for the number of button presses
int buttonState = 0; // current state of the button
int lastButtonState = 0; // previous state of the button
void setup() {
// initialize the button pin as a input:
pinMode(buttonPin, INPUT);
// initialize the LED as an output:
pinMode(ledPin, OUTPUT);
// initialize serial communication:
Serial.begin(9600);
}
void loop() {
// read the pushbutton input pin:
buttonState = digitalRead(buttonPin);
// compare the buttonState to its previous state
if (buttonState != lastButtonState) {
// if the state has changed, increment the counter
if (buttonState == HIGH) {
// if the current state is HIGH then the button
// wend from off to on:
buttonPushCounter++;
Serial.println("on");
Serial.print("number of button pushes: ");
Serial.println(buttonPushCounter);
}
else {
// if the current state is LOW then the button
// wend from on to off:
Serial.println("off");
}
}
// save the current state as the last state,
//for next time through the loop
lastButtonState = buttonState;
// turns on the LED every four button pushes by
// checking the modulo of the button push counter.
// the modulo function gives you the remainder of
// the division of two numbers:
if (buttonPushCounter % 4 == 0) {
digitalWrite(ledPin, HIGH);
} else {
digitalWrite(ledPin, LOW);
}
}
6. 实验照片
来自 “ ITPUB博客 ” ,链接:http://blog.itpub.net/263104/viewspace-1255866/,如需转载,请注明出处,否则将追究法律责任。
转载于:http://blog.itpub.net/263104/viewspace-1255866/


