【自己的整理】socket.io官方demo|创建简单的聊天应用
socket.io官方demo|创建简单的聊天应用
在socket.io官网上看到了一个很简单的demo应用,自己也跟着做了一遍,并留作纪念。
顺序
首先要在正式工作之前确保已经安装了Node.js
然后要安装express及其依赖项
我们先在服务器里创建一个文件夹名字为chat
选择到这个chat文件夹里面,创建一个package.json,内容为
{
  "name": "socket聊天示例",
  "version": "0.0.1",
  "description": "我的第一个socket.io应用",
  "dependencies": {}
}为了方便起见,用npm install --save安装express及其依赖项目,这里用的是4.15.2版本:
npm install --save [email protected]
然后我们创建一个新的js文件’index.js’,编辑它,index.js文件内容为:
var app = require('express')();
var http = require('http').Server(app);
app.get('/',function(req,res){
res.send('hello world
');
});
http.listen(3000,function(){
console.log('监听端口: xxx.xxx.xxx.xxx:3000');
});保存文件,用node index.js 运行之后在浏览器端中输入ip/域名+端口就能看到页面输出了一个hello world。
当然直接输出的方式并不方便,那么下面用路由的方式来显示一个简单的聊天页面
将index.js进行修改
app.get('/', function(req, res){
res.sendFile(__dirname + '/index.html');
});
这样应用就变成了发送一个文件,__dirname代表的是绝对路径,index.html放在和index.js相同的文件夹下面。
之后我们再创建index.html。
<html>
  <head>
    <title>Socket.IO chattitle>
    <style>
      * { margin: 0; padding: 0; box-sizing: border-box; }
      body { font: 13px Helvetica, Arial; }
      form { background: #000; padding: 3px; position: fixed; bottom: 0; width: 100%; }
      form input { border: 0; padding: 10px; width: 90%; margin-right: .5%; }
      form button { width: 9%; background: rgb(130, 224, 255); border: none; padding: 10px; }
      #messages { list-style-type: none; margin: 0; padding: 0; }
      #messages li { padding: 5px 10px; }
      #messages li:nth-child(odd) { background: #eee; }
    style>
  head>
  <body>
    <ul id="messages">ul>
    <form action="">
      <input id="m" autocomplete="off" /><button>发送button>
    form>
  body>
html>
重新启动index.js输入ip与端口号之后就可以显示一个雏形的聊天页面:

显示是成功了,但是这个页面并没有发送消息并且共享消息的功能。要加入这样的功能,我们先安装socket.io
npm install --save socket.io安装完成之后,文件夹中会多出一个node_modules文件夹。
然后将index.js做一些修改:
var app = require('express')();
var http = require('http').Server(app);
var io = require('socket.io')(http);

app.get('/', function(req, res){
  res.sendFile(__dirname + '/index.html');
});

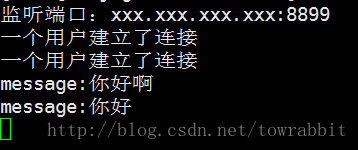
io.on('connection', function(socket){
  console.log('一个用户建立了连接');
});

http.listen(8899, function(){
  console.log('监听端口:xxx.xxx.xxx.xxx:8899');
});
修改index.html文件,在

