wxPython常用控件--wx.RadioButton,wx.CheckBox,wx.Choice,wx.Slider,wx.SpinCtrl,wx.Timer,wx.Dialog
关注公众号“码农帮派”,查看更多系列技术文章:
![]()
wxPython各种控件用法官方手册 : http://xoomer.virgilio.it/infinity77/wxPython/widgets.html
(5)单选项,wx.RadioButton,构造函数:
"""
__init__(self, Window parent, int id=-1, String label=EmptyString,
    Point pos=DefaultPosition, Size size=DefaultSize,
    long style=0, Validator validator=DefaultValidator,
    String name=RadioButtonNameStr) -> RadioButton
"""
radioMale = wx.RadioButton(panle, -1, u'男', pos=(80, 162))
radioMale.SetForegroundColour("#0a74f7")
radioMale.SetFont(font)
self.Bind(wx.EVT_RADIOBUTTON, self.sexChange, radioMale)
radioFemale = wx.RadioButton(panle, -1, u'女', pos=(150, 162))
radioFemale.SetForegroundColour("#f00")
radioFemale.SetFont(font)
self.Bind(wx.EVT_RADIOBUTTON, self.sexChange, radioFemale)效果:
def sexChange(self, event):
    sex = event.GetEventObject().GetLabel() # 获得选中项的Label(男/女)
    pass
(6)多选项,wx.CheckBox,构造函数:
"""
__init__(self, Window parent, int id=-1, String label=EmptyString,
    Point pos=DefaultPosition, Size size=DefaultSize,
    long style=0, Validator validator=DefaultValidator,
    String name=CheckBoxNameStr) -> CheckBox

Creates and shows a CheckBox control
"""
checkBox_chinese = wx.CheckBox(self, -1, u'语文', pos=(10, 10))
self.Bind(wx.EVT_CHECKBOX, self.courseCheckBox, checkBox_chinese)

checkBox_math = wx.CheckBox(self, -1, u'数学', pos=(10, 50))
self.Bind(wx.EVT_CHECKBOX, self.courseCheckBox, checkBox_math)

checkBox_english = wx.CheckBox(self, -1, u'英语', pos=(10, 90))
self.Bind(wx.EVT_CHECKBOX, self.courseCheckBox, checkBox_english)

checkBox_history = wx.CheckBox(self, -1, u'历史', pos=(10, 130))
self.Bind(wx.EVT_CHECKBOX, self.courseCheckBox, checkBox_history)
效果:
wx.CheckBox的事件监听函数:
def courseCheckBox(self, event):
    checkBoxSelected = event.GetEventObject()
    if checkBoxSelected.IsChecked():
        self.courseList.append(checkBoxSelected.GetLabelText())
    else:
        self.courseList.remove(checkBoxSelected.GetLabelText())
    pass
(7)选择器,wx.Choice,构造函数:
"""
__init__(Window parent, int id, Point pos=DefaultPosition, Size size=DefaultSize,
    List choices=EmptyList, long style=0, Validator validator=DefaultValidator,
    String name=ChoiceNameStr) -> Choice

Create and show a Choice control
"""
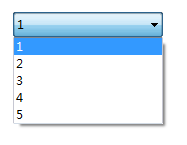
self.scores = ['1','2','3','4','5'] self.chooseScoreChoice = wx.Choice(self, -1, choices=self.scores, pos=(600, 120), size=(150, 30)) self.Bind(wx.EVT_CHOICE, self.chooseScoreFunc, self.chooseScoreChoice) self.chooseScoreChoice.SetSelection(0)效果:
wx.Choice的触发事件:
def chooseScoreFunc(self, event): #设置分数
    index = event.GetEventObject().GetSelection()
    scoreChoosed = int(self.scores[index])
pass【注意】wx.Choice的choices的选项数组的元素只能是str类型。
(8)滑动选择条,wx.Slider,构造函数:
"""
__init__(self, Window parent, int id=-1, int value=0, int minValue=0,
    int maxValue=100, Point pos=DefaultPosition,
    Size size=DefaultSize, long style=SL_HORIZONTAL,
    Validator validator=DefaultValidator,
    String name=SliderNameStr) -> Slider
"""
self.widthSlider = wx.Slider(self, 10, minValue=60, maxValue=800, pos=(190, 140), size=(330, 30), style=wx.SL_LABELS)
self.widthSlider.SetValue(800)
self.Bind(wx.EVT_SCROLL_THUMBRELEASE, self.sliderSubThumbMoveFunc, self.widthSlider)效果:
wx.Slider的事件触发:
def sliderSubThumbMoveFunc(self, event):
    obj = event.GetEventObject()
    objID = obj.GetId()
    width = obj.GetValue()
    pass
(9)微调节器, wx.SpinCtrl,构造函数:
"""
__init__(self, Window parent, int id=-1, String value=EmptyString,
    Point pos=DefaultPosition, Size size=DefaultSize,
    long style=wxSP_ARROW_KEYS|wxALIGN_RIGHT,
    int min=0, int max=100, int initial=0, String name=SpinCtrlNameStr) -> SpinCtrl
"""
self.countSpinCtrl = wx.SpinCtrl(self, -1, pos=(115, 72), size=(222, -1), min=5, max=10)
self.countSpinCtrl.SetForegroundColour('gray')
self.countSpinCtrl.SetFont(self.font)效果:
获得SpinCtrl的值的方法:
count = self.countSpinCtrl.GetValue()
(10)计时器,wx.Timer
self.curTime = 60
self.timer = wx.Timer(self)
self.Bind(wx.EVT_TIMER, self.OnTimerEvent, self.timer)

def OnTimerEvent(self, event):
    self.curTime -= 1
    pass

def StartCountDown(self):
    self.timer.Start(milliseconds=1000, oneShot=False)
    pass
def StopCountDown(self):
    self.timer.Stop()
    pass
【说明】
当需要开启计时器Timer的时候,调用Timer对象的Start()方法,Start()方法有两个参数,milliseconds表示间隔多久的时间触发一次Timer,单位是毫秒,Timer每次被触发的时候,会调用self.OnTimerEvent函数,可以在此函数中进行一定的操作。
(11)对话框,wx.Dialog,构造函数:
"""
__init__(self, Window parent, int id=-1, String title=EmptyString,
    Point pos=DefaultPosition, Size size=DefaultSize,
    long style=DEFAULT_DIALOG_STYLE, String name=DialogNameStr) -> Dialog
"""
(11-1)信息提示对话框,wx.MessageDialog
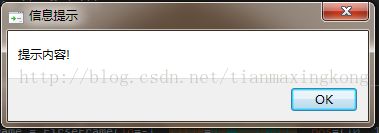
msgDialog = wx.MessageDialog(None, u'提示内容!', u'信息提示', wx.YES_DEFAULT | wx.ICON_QUESTION)
if msgDialog.ShowModal() == wx.ID_YES:
    print '点击了YES'
    pass
效果:
不同style的wx.MessageDialog有:
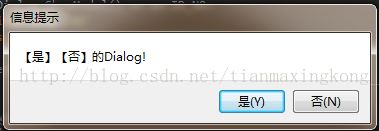
msgDialog = wx.MessageDialog(None, u'【是】【否】的Dialog!', u'信息提示', wx.YES_NO | wx.ICON_QUESTION)
if msgDialog.ShowModal() == wx.ID_NO:
    print '点击了NO'
    pass
效果:
(11-2)自定义的Dialog
自定义的Dialog需要继承自wx.Dialog:
xDialog.py
#coding=utf-8
import wx

class LoginDialog(wx.Dialog):
    def __init__(self, title, loginFunction):
        wx.Dialog.__init__(self, None, -1, title, size=(300, 220))
        self.sureFunction = loginFunction

        self.InitUI()
        pass
    def InitUI(self):
        themeColor = "#0a74f7"
        panle =wx.Panel(self)

        font = wx.Font(14, wx.DEFAULT, wx.NORMAL, wx.NORMAL, False)
        accountLabel = wx.StaticText(panle, -1, u'账号:', pos=(20, 25))
        accountLabel.SetFont(font)
        accountLabel.SetForegroundColour(themeColor)
        self.accountInput = wx.TextCtrl(panle, -1, u'', pos=(80, 25), size=(180, -1))
        self.accountInput.SetForegroundColour('gray')
        self.accountInput.SetFont(font)

        passwordLabel = wx.StaticText(panle, -1, u'密码:', pos=(20, 70))
        passwordLabel.SetForegroundColour(themeColor)
        passwordLabel.SetFont(font)
        self.passwordInput = wx.TextCtrl(panle, -1, u'', pos=(80, 70), size=(180, -1), style=wx.TE_PASSWORD)
        self.passwordInput.SetForegroundColour('gray')

        sureBtn = wx.Button(panle, -1, u'登录', pos=(20, 130), size=(120, 40))
        sureBtn.SetForegroundColour('#ffffff')
        sureBtn.SetBackgroundColour(themeColor)
        self.Bind(wx.EVT_BUTTON, self.sureEvent, sureBtn)

        cancleBtn = wx.Button(panle, -1, u'取消', pos=(160, 130), size=(120, 40))
        cancleBtn.SetBackgroundColour('#000000')
        cancleBtn.SetForegroundColour('#ffffff')
        self.Bind(wx.EVT_BUTTON, self.cancle, cancleBtn)
        pass
    def cancle(self, event):
        self.Destroy()
        pass
    def sureEvent(self, event):
        accunt = self.accountInput.GetValue()
        password = self.passwordInput.GetValue()
        self.sureFunction(accunt, password)
        self.Destroy()
        pass
在需要显示自定义Dialog的地方导入,实例化并显示:
loginDialog = LoginDialog(u'登录Dialog', self.loginFunc)
loginDialog.ShowModal()
为了能够获得Dialog的输入内容,还需要传递一个回调接口,self.loginFunc:
def loginFunc(self, account, password):
    print account, password
    pass
效果:
【说明】
Dialog的显示有两个方法可以调用,Show()和ShowModel(),其中ShowModel()是模态显示Dialog,与Show()的不同在于,模态显示一个Dialog,其他所有的程序会暂时被阻塞,直到你对Dialog进行操作完成之后,其他程序会继续,反之Show()显示Dialog之后,不会影响其他程序的正常进行。


