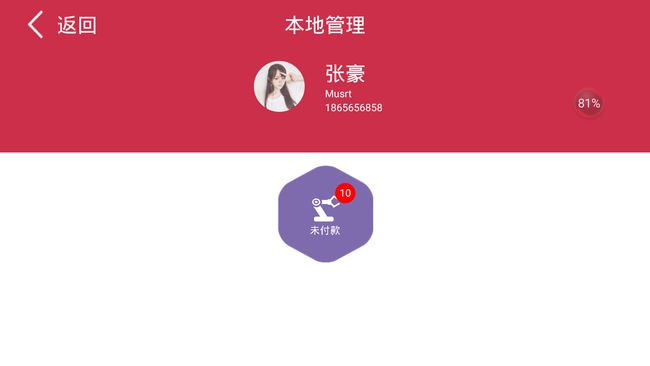
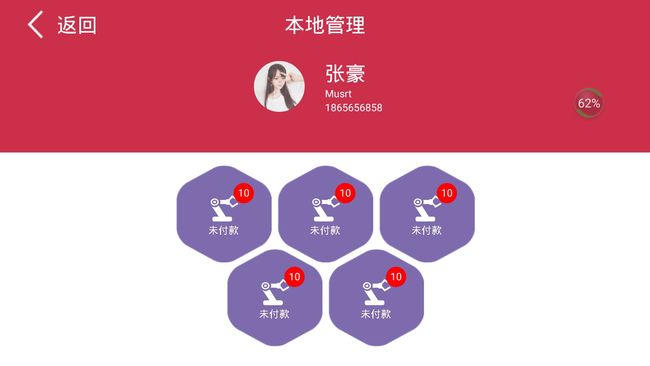
说明
当拿到这张UI的时候就有写个自定义控件的冲动,其中六边形稍加复制,经过分析得知可以自定义一个控制,只用给背景图、图标、和文字就可以,让后加入点击事件和带圆点的控件就可以了。
正文
可以说重载onMeasure(),onLayout(),onDraw()三个函数构建了自定义View的外观形象。再加上onTouchEvent()等重载视图的行为,可以构建任何我们需要的可感知到的自定义View。
代码很简单
public class Hexagon extends ImageView {
    String text = "未付款";
    private Bitmap mAreaBitmap, logobitmap;
    private Paint paint;
    private Paint painttext;
    int textColor;
    float textSize;
    private Paint paintlogo;
    private Paint paintcircle;
    private int number = 10;
    private Paint txtPaint;

    public Hexagon(Context context) {
        this(context, null);
    }

    public Hexagon(Context context, AttributeSet attrs) {
        this(context, attrs, 0);
    }

    public Hexagon(Context context, AttributeSet attrs, int defStyleAttr) {
        super(context, attrs, defStyleAttr);

        TypedArray mArray = context.obtainStyledAttributes(attrs, R.styleable.Hexagonattrs);
        Drawable areaBackground = mArray.getDrawable(R.styleable.Hexagonattrs_HexagonBackground);

        if (null != areaBackground) {
            // 设置了背景
            if (areaBackground instanceof BitmapDrawable) {
                // 设置了一张图片
                mAreaBitmap = ((BitmapDrawable) areaBackground).getBitmap();
            }
        }

        Drawable logoBackground = mArray.getDrawable(R.styleable.Hexagonattrs_logoBackground);
        if (null != logoBackground) {
            // 设置了背景
            if (logoBackground instanceof BitmapDrawable) {
                // 设置了一张图片
                logobitmap = ((BitmapDrawable) logoBackground).getBitmap();
            }
        }
        text = mArray.getString(R.styleable.Hexagonattrs_title);
        textColor = mArray.getColor(R.styleable.Hexagonattrs_titleColor, Color.parseColor("#FFFFFF"));
        textSize = mArray.getDimension(R.styleable.Hexagonattrs_titleSize, 90f);
        init();
    }

    private void init() {
        painttext = new Paint();
        painttext.setColor(textColor);
        painttext.setTextSize(textSize);


        paintcircle = new Paint();
        paintcircle.setAntiAlias(true);
        paintcircle.setColor(Color.RED);


        txtPaint = new Paint();
        txtPaint.setAntiAlias(true);
        txtPaint.setColor(Color.WHITE);
        txtPaint.setTextSize(30);
        //  txtPaint.setStyle(Paint.Style.STROKE); //设置画笔为空心
        // txtPaint.setStrokeWidth(1); //设置线宽

    }


    @Override
    public void draw(Canvas canvas) {
        super.draw(canvas);


        //绘制背景
        if (mAreaBitmap != null) {
            Rect rect1 = new Rect(0, 0, mAreaBitmap.getWidth(), mAreaBitmap.getHeight());
            Rect rect2 = new Rect(0, 0, getWidth(), getHeight());
            canvas.drawBitmap(mAreaBitmap, rect1, rect2, null);
        }

        //绘制logo
        if (logobitmap != null) {
            Rect rect1 = new Rect(0, 0, logobitmap.getWidth(), logobitmap.getHeight());
            Rect rect2 = new Rect(getWidth() / 3, getHeight() / 10 * 3, getWidth() / 3 * 2, getHeight() / 10 * 6);
            canvas.drawBitmap(logobitmap, rect1, rect2, null);
        }


        //拿到字符串的宽度  X轴居中
        float stringWidth = painttext.measureText(text);
        float x = (getWidth() - stringWidth) / 2;
        canvas.drawText(text, x, getHeight() / 10 * 7, painttext);


        //绘制小圆点
        canvas.drawCircle(getWidth() / 10 * 7, getHeight() / 10 * 3, 30, paintcircle);


        //绘制小圆点中的文字
        if (number != 0) {
            canvas.drawText(number + "",
                    getWidth() / 10 * 7 - txtPaint.measureText(number + "") / 2,
                    getHeight() / 10 * 3 + (txtPaint.descent() - txtPaint.ascent()) / 2 - txtPaint.descent(),
                    txtPaint);
        }


    }

    //设置圆点中的数字
    public void setNumber(int number) {
        if (number > 99) {
            this.number = 99;
        } else {
            this.number = number;
        }
        invalidate();
    }
}
Xml引用
attrs(通过自定义属性 将图片资源和文字大小通过XML设置将参数传进自定义六边形中)
单个六边形的效果图
在MainActivity中的用法
public class MainActivity extends AppCompatActivity {
    private int nume = 10;
    private Hexagon hexagon;

    @Override
    protected void onCreate(Bundle savedInstanceState) {
        super.onCreate(savedInstanceState);
        setContentView(R.layout.activity_main);

        hexagon = (Hexagon) findViewById(R.id.hex);

      //点击事件
        hexagon.setOnClickListener(new View.OnClickListener() {
            @Override
            public void onClick(View v) {、
                  //设置数据
                hexagon.setNumber(++nume);
                Toast.makeText(MainActivity.this, "点击了1", Toast.LENGTH_SHORT).show();
            }
        });
    }

    //自动隐藏虚拟按键和状态栏
    @Override
    protected void onResume() {
        super.onResume();
        View view = getWindow().getDecorView();
        //自动隐藏虚拟按键和状态栏
        view.setSystemUiVisibility(View.SYSTEM_UI_FLAG_HIDE_NAVIGATION |
                View.SYSTEM_UI_FLAG_FULLSCREEN |   View.SYSTEM_UI_FLAG_IMMERSIVE_STICKY);
    }
}
设置横屏
通过XML布局就会出现整体效果
Mainactivity的XML代码


