react的开发者都知道使用create-react-app创建项目,这是非常简单的,但不是本文的目的,本文将带你如何一步一步搭建react项目。
1、初始化项目,编写组件
执行下面命令初始化项目
npm init -y安装react、react-dom
npm -i -D react react-dom在根目录下创建src文件夹,并在src文件夹里面创建index.js、index.css文件,他们两分别是组件和组件所需样式
// index.js
import React, { Component } from 'react'
import ReactDOM from 'react-dom'
import './index.css'
class App extends Component {
// 类属性写法是js实验特性
state = {
textInput: null
}
textInputFocus = (element) => {
this.textInput = element
}
// 此箭头函数写法是js实验特性
handleClick = () => {
this.textInput.focus()
}
render () {
return (
)
}
}
ReactDOM.render(
// index.css
.div-box {
  width: 500px;
  height: 500px;
  border: 1px solid #000;
  box-sizing: border-box;
}
2、配置webpack+babel
浏览器是不支持JSX语法,而且上面index.js中还是用了js实验特性,目前还没有被ECMAScript所采纳,也是需要babel转译。我们还需要处理css样式或者其他样式规格,最后打包成js引入到生成的html文件中。
安装相关依赖:
npm i -D webpack
webpack-cli
webpack-dev-server
@babel/core
@babel/plugin-proposal-class-propertiese
@babel/cli
@babel/preset-env
@babel/preset-react
@babel/runtime
@babel/plugin-transform-runtime
babel-loader
css-loader
style-loader
html-webpack-plugin
clean-webpack-plugin对其中有些依赖做个说明,webpack-dev-server帮助我们实时打包文件,只要文件改动就重新打包。@babel/plugin-proposal-class-propertiese转译js实验特性,比如类里面定义的属性和箭头函数。@babel/preset-react帮助转译JSX语法。html-webpack-plugin帮助生成html,并将打包后的js引入。clean-webpack-plugin每次打包都会将上次打包的文件清除。
链接:https://www.npmjs.com/package/@babel/plugin-proposal-class-properties
在根目录下创建webpack.config.js配置webpack
const path = require('path')
const { CleanWebpackPlugin } = require('clean-webpack-plugin')
const HtmlWebpackPlugin = require('html-webpack-plugin')

module.exports = {
  entry: {
    app: './src/index.js'
  },
  output: {
    path: path.resolve(__dirname, 'build'),
    filename: '[name].bundle.js',
    publicPath: './',
    chunkFilename: '[name].js'
  },
  module: {
    rules: [
      // 处理js、jsx
      {
        test: /\.(js|jsx)$/,
        exclude: /node_modules/,
        use: [{
          loader: 'babel-loader'
        }]
      },
      // 处理样式
      {
        test: /\.css$/,
        use: [
          {
            loader: 'style-loader'
          },
          {
            loader: 'css-loader'
          }
        ]
      }
    ]
  },
  optimization: {

  },
  plugins: [
    new CleanWebpackPlugin(),
    new HtmlWebpackPlugin({
      title: '主文件',
      minify: {
        removeComments: true,
        collapseWhitespace: true,
        minifyCSS: true
      },
      filename: 'index.html',
      template: path.resolve(__dirname, 'index.html'),
      chunks: ['app']
    })
  ]
}在根目录下创建.babelrc配置babel
{
  "presets": [
    "@babel/preset-env",
    "@babel/preset-react"
  ],
  "plugins": [
    "@babel/plugin-transform-runtime",
    "@babel/plugin-proposal-class-properties" // 该插件可转换静态类属性以及使用属性初始值设定项语法声明的属性
  ]
}在根目录下创建idnex.html模板
<%= htmlWebpackPlugin.options.title %>
3、配置eslint
安装依赖
npm i -D eslint执行npx eslint --init在根目录下生成.eslintrc.js配置文件,交互生成过程中选择react。
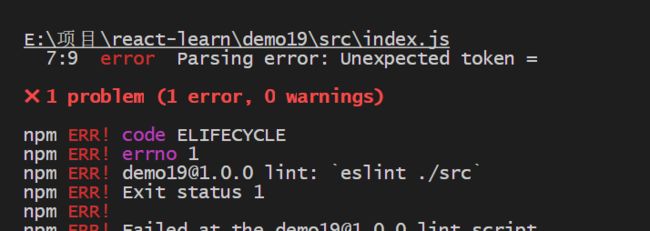
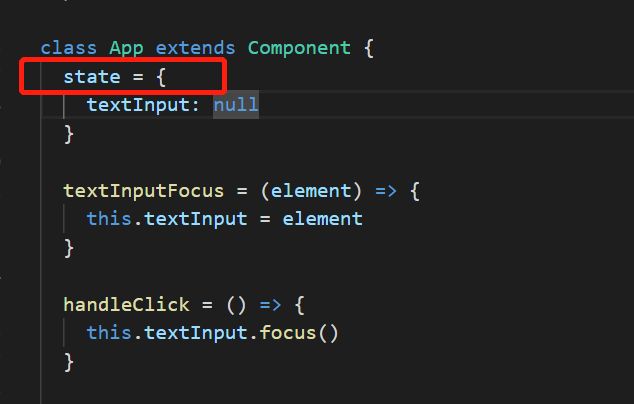
如果现在去校验src目录文件的代码规范将会报错,因为目前eslint只支持ES6/ES2015,不支持spread object语法,经查发现spread object是ES7规范(还包括class properties,decorators,async/await)
这条错误指的是
安装babel-eslint
npm install babel-eslint --save-dev
倘若需要支持generator-star,object-shorthand等特性,需要安装eslint-plugin-babel
npm install eslint-plugin-babel --save-dev
然后在配置文件.eslintrc.\* 添加如下配置
module.exports = {
  env: {
    browser: true,
    es6: true
  },
  extends: [
    'standard',
  ],
  globals: {
    Atomics: 'readonly',
    SharedArrayBuffer: 'readonly'
  },
  parser: "babel-eslint",
  parserOptions: {
    ecmaFeatures: {
      jsx: true,
      experimentalObjectRestSpread: true
    },
    ecmaVersion: 2018,
    sourceType: 'module'
  },
  plugins: [
    'react',
    'babel'
  ],
  rules: {
  },
}extends: [
'standard',
'plugin:react/recommended' // 添加react插件推荐规则
],或者在rule中添加如下重写如下规则:
rules: {
    "react/jsx-uses-react": 1, // 处理组件中React未被使用
    "react/jsx-uses-vars": 1 // 使用组件App未被使用
  },
再次检查代码规范又会报一条警告:
React version not specified in eslint-plugin-react settings说在 eslint-plugin-react中没有指定react版本
这里我们通过给所有规则配置共享设置来解决:
如何添加共享设置:https://eslint.org/docs/user-guide/configuring#adding-shared-settings
在.eslintrc.js加上下面设置
settings: {
    react: {
      // 修复警告:React version not specified in eslint-plugin-react settings
      version: require('./package.json').devDependencies.react
    }
}最后,为了运行方便,我们在package.json中添加脚本
"scripts": {
    "build": "webpack --mode production",
    "start": "webpack-dev-server --open",
    "lint": "eslint ./src",
    "lint:watch": "esw -w ./src"
},其中,配置lint:watch需要先安装eslint-watch插件,该插件帮助我们实时检测代码规范,就跟webpack-dev-server帮助我们启动服务实时打包一样。
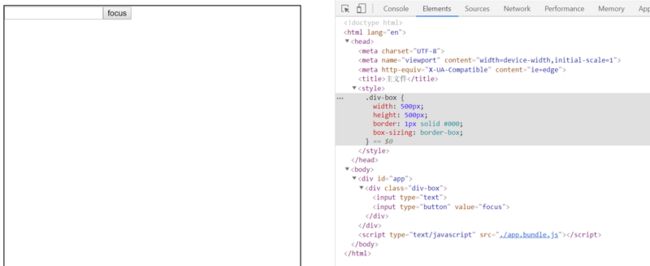
现在我们来打包运行看看:
浏览器打开生成的index.html
执行eslint看看
简直完美!
参考:
如何创建react项目:
https://mingjiezhang.github.io/2017/06/16/%E7%BF%BB%E8%AF%91-%E6%80%8E%E4%B9%88%E5%86%99%E4%B8%80%E4%B8%AAReact%E7%BB%84%E4%BB%B6%E5%BA%93%EF%BC%88%E4%B8%80%EF%BC%89/
https://dev.to/vish448/create-react-project-without-create-react-app-3goh
eslint如何支持ES7语法校验
https://github.com/garylgh/blog/blob/master/source/_posts/Eslint%E5%BC%80%E5%90%AFES7%E8%AF%AD%E6%B3%95%E6%A0%A1%E9%AA%8C.md
组件中React导入了但没有被使用,eslint检测报错
https://github.com/babel/babel-eslint/issues/6
修复警告:React version not specified in eslint-plugin-react settings
https://github.com/yannickcr/eslint-plugin-react/issues/1955


