Android二维码扫描
本文详细说明怎么在Android端实现二维码扫描,只是讲述如何利用Google zxing进行二维码扫描,不涉及代码的深入研究,结果文章最后附有demo,demo可直接使用,觉得文章累赘可以直接拷demo中的包和类应用到自己的项目中使用
1.先将zxing.jar拷到libs文件夹并添加依赖到项目
2.将下面几个包跟类拷贝到项目中

3.扫描页逻辑跟界面
public class Sao1SaoActivity extends Activity implements Callback{
    private SurfaceView surfaceView;
    private ViewfinderView viewfinderView;

    private CaptureActivityHandler handler;
    private boolean hasSurface;
    private Vector decodeFormats;
    private String characterSet;
    private InactivityTimer inactivityTimer;
    private MediaPlayer mediaPlayer;
    private boolean playBeep;
    private static final float BEEP_VOLUME = 0.10f;
    private boolean vibrate;

    @Override
    public void onCreate(Bundle savedInstanceState) {
        super.onCreate(savedInstanceState);
        setContentView(R.layout.activity_sao1sao);
        surfaceView = (SurfaceView) findViewById(R.id.preview_view);
        viewfinderView = (ViewfinderView) findViewById(R.id.viewfinder_view);

        //ViewUtil.addTopView(getApplicationContext(), this, R.string.scan_card);
        CameraManager.init(getApplication());
        hasSurface = false;
        inactivityTimer = new InactivityTimer(this);
    }

    @Override
    protected void onResume() {
        super.onResume();
        SurfaceHolder surfaceHolder = surfaceView.getHolder();
        if (hasSurface) {
            initCamera(surfaceHolder);
        } else {
            surfaceHolder.addCallback(this);
            surfaceHolder.setType(SurfaceHolder.SURFACE_TYPE_PUSH_BUFFERS);
        }
        decodeFormats = null;
        characterSet = null;

        playBeep = true;
        AudioManager audioService = (AudioManager) getSystemService(AUDIO_SERVICE);
        if (audioService.getRingerMode() != AudioManager.RINGER_MODE_NORMAL) {
            playBeep = false;
        }
        initBeepSound();
        vibrate = true;

    }

    @Override
    protected void onPause() {
        super.onPause();
        if (handler != null) {
            handler.quitSynchronously();
            handler = null;
        }
        CameraManager.get().closeDriver();
    }

    @Override
    protected void onDestroy() {
        inactivityTimer.shutdown();
        super.onDestroy();
    }

    /**
     * 处理扫描结果
     *
     * @param result
     * @param barcode
     */
    public void handleDecode(Result result, Bitmap barcode) {
        inactivityTimer.onActivity();
        playBeepSoundAndVibrate();
        String resultString = result.getText();
        if (resultString.equals("")) {
            Toast.makeText(Sao1SaoActivity.this, "Scan failed!", Toast.LENGTH_SHORT).show();
            Sao1SaoActivity.this.finish();
        } else {
            Intent resultIntent = new Intent();
            resultIntent.setClass(Sao1SaoActivity.this, Sao1SaoResultActivity.class);
            resultIntent.putExtra("result", resultString);
            ByteArrayOutputStream baos = new ByteArrayOutputStream();
            barcode.compress(Bitmap.CompressFormat.PNG, 100, baos);
            byte[] bitmapByte = baos.toByteArray();
            resultIntent.putExtra("bitmap", bitmapByte);
            startActivity(resultIntent);
            overridePendingTransition(R.anim.activity_in_from_rigth, R.anim.activity_out_to_scale);
            Sao1SaoActivity.this.finish();
        }

    }

    private void initCamera(SurfaceHolder surfaceHolder) {
        try {
            CameraManager.get().openDriver(surfaceHolder);
        } catch (IOException ioe) {
            return;
        } catch (RuntimeException e) {
            return;
        }
        if (handler == null) {
            handler = new CaptureActivityHandler(this, decodeFormats,
                    characterSet);
        }
    }

    @Override
    public void surfaceChanged(SurfaceHolder holder, int format, int width,
                               int height) {

    }

    @Override
    public void surfaceCreated(SurfaceHolder holder) {
        if (!hasSurface) {
            hasSurface = true;
            initCamera(holder);
        }

    }

    @Override
    public void surfaceDestroyed(SurfaceHolder holder) {
        hasSurface = false;

    }

    public ViewfinderView getViewfinderView() {
        return viewfinderView;
    }

    public Handler getHandler() {
        return handler;
    }

    public void drawViewfinder() {
        viewfinderView.drawViewfinder();

    }

    /**
     * 初始化声音资源
     */
    private void initBeepSound() {
        if (playBeep && mediaPlayer == null) {
            // The volume on STREAM_SYSTEM is not adjustable, and users found it
            // too loud,
            // so we now play on the music stream.
            setVolumeControlStream(AudioManager.STREAM_MUSIC);
            mediaPlayer = new MediaPlayer();
            mediaPlayer.setAudioStreamType(AudioManager.STREAM_MUSIC);
            mediaPlayer.setOnCompletionListener(beepListener);

            AssetFileDescriptor file = getResources().openRawResourceFd(
                    R.raw.beep);
            try {
                mediaPlayer.setDataSource(file.getFileDescriptor(),
                        file.getStartOffset(), file.getLength());
                file.close();
                mediaPlayer.setVolume(BEEP_VOLUME, BEEP_VOLUME);//设置音量
                mediaPlayer.prepare();
            } catch (IOException e) {
                mediaPlayer = null;
            }
        }
    }

    private static final long VIBRATE_DURATION = 200L;

    /**
     * 响铃和震动
     */
    private void playBeepSoundAndVibrate() {
        if (playBeep && mediaPlayer != null) {
            mediaPlayer.start();
        }
        if (vibrate) {
            Vibrator vibrator = (Vibrator) getSystemService(VIBRATOR_SERVICE);
            vibrator.vibrate(VIBRATE_DURATION);
        }
    }

    /**
     * When the beep has finished playing, rewind to queue up another one.
     */
    private final MediaPlayer.OnCompletionListener beepListener = new MediaPlayer.OnCompletionListener() {
        public void onCompletion(MediaPlayer mediaPlayer) {
            mediaPlayer.seekTo(0);
        }
    };

}
其中:
 /**
     * 处理扫描结果
     *
     * @param result
     * @param barcode
     */
    public void handleDecode(Result result, Bitmap barcode) {
        inactivityTimer.onActivity();
        playBeepSoundAndVibrate();
        String resultString = result.getText();
        if (resultString.equals("")) {
            Toast.makeText(Sao1SaoActivity.this, "Scan failed!", Toast.LENGTH_SHORT).show();
            Sao1SaoActivity.this.finish();
        } else {
            Intent resultIntent = new Intent();
            resultIntent.setClass(Sao1SaoActivity.this, Sao1SaoResultActivity.class);
            resultIntent.putExtra("result", resultString);
            ByteArrayOutputStream baos = new ByteArrayOutputStream();
            barcode.compress(Bitmap.CompressFormat.PNG, 100, baos);
            byte[] bitmapByte = baos.toByteArray();
            resultIntent.putExtra("bitmap", bitmapByte);
            startActivity(resultIntent);
            overridePendingTransition(R.anim.activity_in_from_rigth, R.anim.activity_out_to_scale);
            Sao1SaoActivity.this.finish();
        }

    }
这个方法是处理扫描结果的
playBeepSoundAndVibrate();//这个方法是为了扫描出结果时震动和响铃然后下面是执行扫描结果,我这里是把数据携带然后跳转到另一个界面、但是有个注意的是bundle和Intent.putExtra是不能传递大于40kb的图片的,所以解决办法是吧bitmap转换成byte数组然后再把byte数据传递过去。
扫描界面布局为:
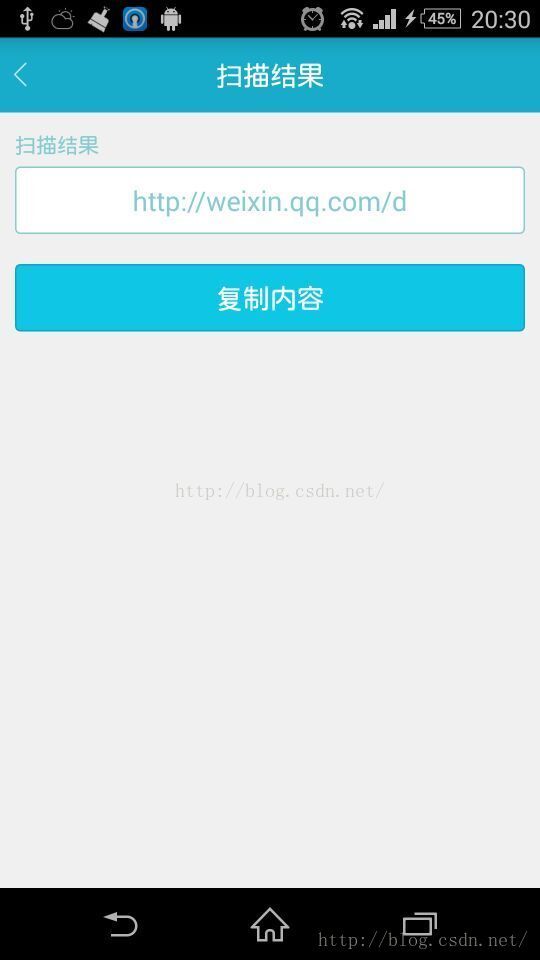
扫描结果我将它显示成了一个edittext
public class Sao1SaoResultActivity extends Activity {
    private EditText etSao1SaoResult;
    private Button btnBack;

    @Override
    protected void onCreate(Bundle savedInstanceState) {
        super.onCreate(savedInstanceState);
        setContentView(R.layout.activity_sao1sao_result);
        etSao1SaoResult = (EditText) findViewById(R.id.et_sao1sao_result);
        btnBack = (Button) findViewById(R.id.btn_back);
        String result = getIntent().getStringExtra("result");
        etSao1SaoResult.setText(result);
        btnBack.setOnClickListener(new View.OnClickListener() {
            @Override
            public void onClick(View v) {
                Sao1SaoResultActivity.this.finish();
            }
        });
    }
然后这样就完成了一个扫描的demo,下面是说明一些参数比如扫描匡大小和颜色之类的ui
扫描匡的四个角颜色是在ViewfinderView这个类里面,这个类前面已经拷过项目里面了,
还有一些框下面的文字之类的设置也是在这个类,直接进这个类去改参数就可以了。
扫描匡的大小是在CameraManager这个类里面
private static final int MIN_FRAME_WIDTH = 480;
private static final int MIN_FRAME_HEIGHT = 480;
private static final int MAX_FRAME_WIDTH = 720;
private static final int MAX_FRAME_HEIGHT = 600;
这四个参数就是设置匡的大小
上面这些就已经完成一个二维码扫描的业务逻辑了
结果如下我拿来扫描了一下微信:

完整源码下载地址:
http://download.csdn.net/detail/lxzmmd/9506920