Spring boot + swagger + mybtis + Maven整合
先感谢大佬文章帮我走完最后一步连接如下:https://blog.csdn.net/ZZ2713634772/article/details/79458489#commentBox
一,新建项目
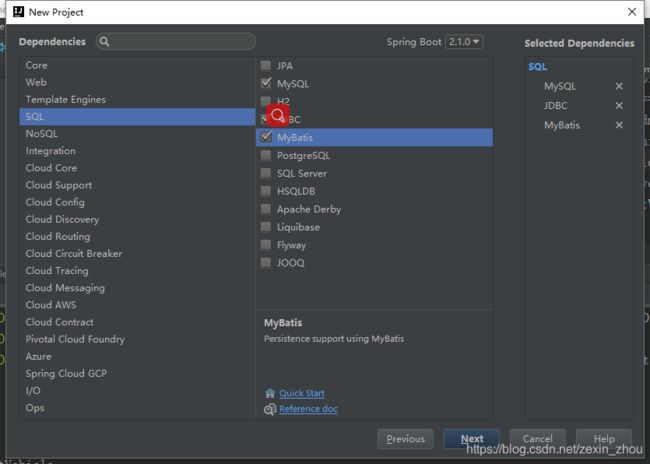
1.按正常操作流程,完成创建
二,在pom.xml文件中引入相关依赖
            org.mybatis.spring.boot
            mybatis-spring-boot-starter
            1.3.2


            mysql
            mysql-connector-java
            runtime


            org.springframework.boot
            spring-boot-starter-test
            test


            org.springframework.boot
            spring-boot-starter-web


            io.springfox
            springfox-swagger2
            2.7.0


            io.springfox
            springfox-swagger-ui
            2.7.0


            com.fasterxml.jackson.core
            jackson-core
            2.8.1


            com.fasterxml.jackson.core
            jackson-databind
            2.8.1
三,使用mybatis也要添加相关配置
主要目的是使Mapper与相对应的Xml文件进行绑定
                org.springframework.boot
                spring-boot-maven-plugin


                src/main/java


                    classpath*:mybatis/*.xml


                src/main/resources
这里也要添加对应数据库信息,我使用较为简单和原始的属性文件配置
spring.datasource.name=zhouzexinTest
spring.datasource.url=XXXXX
spring.datasource.username=XXXXXX
spring.datasource.password=XXXX
spring.datasource.driverClassName=com.mysql.cj.jdbc.Driver

###########################mybatis配置###############################
#全局映射器启用缓存
mybatis.configuration.cache-enabled=true
#查询时,关闭关联对象及时加载以提高性能
mybatis.configuration.lazy-loading-enabled=false
#按需加载字段(加载字段由SQL指定),不会加载关联表的所有字段,以提高性能
mybatis.configuration.aggressive-lazy-loading=false
#允许返回不同的结果集以达到通用的效果
mybatis.configuration.multiple-result-sets-enabled=true
#对于批量更新操作缓存SQL以提高性能
mybatis.configuration.default-executor-type=REUSE
#数据库执行超时时间
mybatis.configuration.default-statement-timeout=25000
mybatis.mapper-locations=classpath:mybatis/*.xml
mybatis.type-aliases-package=com.example.demo.Mapper
四,创建对应的包
目的:方便管理文件
dto ---“是对应实体类,可以了解解为Bean,pojo
映射器---“为与对应XML文件的接口,可理解为前半部分道层,主要目的是完成对应的Xml内SQL语句的绑定
服务 - >主要完成基础操作,可以理解到道
IMPL --->对应实现类
控制器---“完成对应消息的控制与转发,可理解为(MVC中控制层)
五,介绍类
最重要的两个配置类
DemoApplication 和 SwaggerConfigspring boot的起点为DemoApplication,具体为什么,可以自行百度,有很多大佬已经解释的很清楚了,SwaggerConfig为Swagger的配置类
package com.example.demo;
import org.springframework.context.annotation.Bean;
import org.springframework.context.annotation.Configuration;
import springfox.documentation.builders.ApiInfoBuilder;
import springfox.documentation.builders.PathSelectors;
import springfox.documentation.builders.RequestHandlerSelectors;
import springfox.documentation.service.ApiInfo;
import springfox.documentation.service.Contact;
import springfox.documentation.spi.DocumentationType;
import springfox.documentation.spring.web.plugins.Docket;
import springfox.documentation.swagger2.annotations.EnableSwagger2;
/**
* 类名: SwaggerConfig
* 描述: TODO
* 版权: zhouzexin
* 日期: 2018-11-20 15:24
*
* @author zhouzexin
*/
@Configuration
@EnableSwagger2
public class SwaggerConfig {
@Bean
public Docket createRestApi() {
return new Docket(DocumentationType.SWAGGER_2)
.apiInfo(apiInfo())
.select()
//为当前包路径
.apis(RequestHandlerSelectors.basePackage("com.example"))
.paths(PathSelectors.any())
.build();
}
//构建 api文档的详细信息函数,注意这里的注解引用的是哪个
private ApiInfo apiInfo() {
return new ApiInfoBuilder()
//页面标题
.title("Spring Boot 测试使用 Swagger2 构建 API")
//创建人
.contact(new Contact("zhouzexin", "https://mp.csdn.net/postedit/84344724", ""))
//版本号
.version("1.0")
//描述
.description("API 描述")
.build();
}
}
控制层
package com.example.demo.controller;


import com.example.demo.dto.DemoDTO;
import com.example.demo.dto.ResultDTO;
import com.example.demo.dto.VehicleDTO;
import com.example.demo.serives.VehicleSerives;
import com.sun.net.httpserver.Authenticator;
import io.swagger.annotations.Api;
import io.swagger.annotations.ApiOperation;
import io.swagger.annotations.ApiParam;
import org.springframework.beans.factory.annotation.Autowired;
import org.springframework.web.bind.annotation.*;
import org.springframework.web.servlet.ModelAndView;

import javax.validation.Valid;

/**
 * 类名: DemoController
 * 描述: TODO
 * 日期: 2018-11-19 17:21
 *
 * @author zhouzexin
 */
@Api(value = "demo接口",tags = "demo接口")
@RestController
@RequestMapping
public class DemoController {

    @Autowired
    private VehicleSerives vehicleSerives;


    @RequestMapping(value = "/demo4",method = RequestMethod.POST)
    @ApiOperation(value = "新增")
    public ResultDTO saveDemo(@RequestBody @Valid @ApiParam("Demo参数") VehicleDTO vehicleDTO){
        System.out.println(" Code  : "+ (vehicleDTO.getCode()==null||vehicleDTO.getCode().equals("")?"null":vehicleDTO.getCode()));
        System.out.println(" Brandmode "+ (vehicleDTO.getBrandmode()==null||vehicleDTO.getBrandmode().equals("")?"null":vehicleDTO.getBrandmode()));
        System.out.println(" VehicleType :"+(vehicleDTO.getVehicleType()==null||vehicleDTO.getVehicleType().equals("")?"null":vehicleDTO.getVehicleType()));
        System.out.println(" getGoodid :"+(vehicleDTO.getGoodId()==null||vehicleDTO.getGoodId().equals("")?"null":vehicleDTO.getGoodId()));
        boolean insertVehicle = vehicleSerives.insertVehicle(vehicleDTO);
        ResultDTO resultDTO =new ResultDTO("新增车辆 " ,insertVehicle,insertVehicle,12);
        return resultDTO;
    }

    @RequestMapping(value = "/demo1",method = RequestMethod.GET)
    @ApiOperation("展示")
    public String demo1(){
        System.out.println("===================================\n demo1 \n===================================");
        return "Hello Spring Boot demo1";
    }

    @RequestMapping(value = "/demo2",method = RequestMethod.GET)
    @ApiOperation("参数测试_必有参数")
    public String index2(@RequestParam @Valid DemoDTO demoDTO){
        System.out.println("demo2===================================");
        return "Hello Spring Boot"+ demoDTO;
    }
    @RequestMapping(value = "/demo3",method = RequestMethod.GET)
    @ApiOperation("参数测试_参数")
    public ResultDTO index3(@RequestParam(value = "code" ,required = false)@Valid String code){
        VehicleDTO vehicleDTO = vehicleSerives.getVehicle(code);
        System.out.println("===================================\ndemo3\n===================================");
        String r = "Hello Spring Boot !!!\n"+(code==null||"".equals(code)?"没有输入":("车辆编号 :"+code)) +
                "\n"+(vehicleDTO==null?"无此车":vehicleDTO);
        return new ResultDTO <>("r",vehicleDTO)   ;
    }

    @RequestMapping(value = "/demo/{uname}/{upwd}",method = RequestMethod.GET)
    @ApiOperation("参数测试mother_参数")
    public String login(@PathVariable @ApiParam("用例测试名")  @Valid String uname, @PathVariable @ApiParam("用例测试密码") @Valid String upwd) {
        ModelAndView mv = new ModelAndView();
        // 等同于request.setAttribute("name", uname)
        System.out.println("姓名 " + uname);
        System.out.println("密码 " + upwd);
        mv.addObject("name", uname);
        mv.setViewName("show");
        mv.addObject("pwd",upwd);
        System.out.println(mv);
        return mv.toString();
    }


}
如果缺少对应的豆(POJO)实体,自己创建就好,
服务(DAO)中
写对应业务操作
package com.example.demo.service;

import com.example.demo.dto.VehicleDTO;
import org.springframework.stereotype.Service;

import java.util.List;

/**
 * 类名: VehicleSerives
 * 描述: TODO
 * 日期: 2018-11-22 10:39
 *
 * @author zhouzexin
 */
@Service
public interface VehicleSerives {
    VehicleDTO getVehicle(String Code);

    boolean deleteVehicle(String Code);

    List qryAllVehicleDetail();

    boolean insertVehicle(VehicleDTO vehicleDTO);
}
映射里
package com.example.demo.Mapper;

import com.example.demo.dto.VehicleDTO;
import org.apache.ibatis.annotations.Mapper;
import org.apache.ibatis.session.SqlSessionFactory;

import java.util.List;

public interface VehicleMapper {
    int insertVehicle(VehicleDTO VehicleDTO);

    List qryAllVehicleDetail();

    List qryVehicleDetail(String code);

    int deleteByVehicleID(String VehicleID);

    int updateVehicle(VehicleDTO VehicleDTO);
}
对应的Xml中,其中比较重要的是id【比如选中的id,对应绑定接口里的方法名,mybatis原理也有大佬解释的很详细】,namespace【绑定对应Mapper(就上面写的) 】,关于这些Xml中具体描述可以找mybatis的相关文章。
good_id, org_id, type_id, code, vehicle_type, vehicle_class
delete from sys_vehicle_good
where code = #{VehicleID,jdbcType=VARCHAR}
insert into sys_vehicle_good
good_id,
org_id,
type_id,
code,
vehicle_type,
vehicle_class,
#{goodId,jdbcType=VARCHAR},
#{orgId,jdbcType=INTEGER},
#{typeId,jdbcType=INTEGER},
#{code,jdbcType=VARCHAR},
#{vehicleType,jdbcType=VARCHAR},
update sys_vehicle_good
org_id = #{orgId,jdbcType=INTEGER},
type_id = #{typeId,jdbcType=INTEGER},
code = #{code,jdbcType=VARCHAR},
vehicle_type = #{vehicleType,jdbcType=VARCHAR},
vehicle_class = #{vehicleClass,jdbcType=VARCHAR},
where good_id = #{goodId,jdbcType=VARCHAR}
然后写好对应实体类
在DemoApplication中启动
浏览器中访问的http://本地主机:8080 /招摇,ui.html#/就可以了


