springboot 集成Swagger
Swagger集成
本文介绍的Swagger是基于Spring Boot框架的,一起来看具体的实现步骤。
2.1 添加依赖
配置pom.xml,添加如下代码:
<dependency>
    <groupId>io.springfoxgroupId>
    <artifactId>springfox-swagger2artifactId>
    <version>2.9.2version>
dependency>
<dependency>
    <groupId>io.springfoxgroupId>
    <artifactId>springfox-swagger-uiartifactId>
    <version>2.9.2version>
dependency>
其中:
- springfox-swagger2 用于JSON API文档的生成;
- springfox-swagger-ui 用于文档界面展示。
更多版本请访问:
springfox-swagger2:http://mvnrepository.com/artifact/io.springfox/springfox-swagger2
springfox-swagger-ui:http://mvnrepository.com/artifact/io.springfox/springfox-swagger-ui
2.2 注册Swagger
在源码的根目录也就是Appliction.java的同级目录,创建Java类“SwaggerConfig.java”(命名无所谓),代码如下:
@Configuration
@EnableSwagger2
@ConditionalOnExpression("${swagger.enable:true}")
public class SwaggerConfig {

	@Bean
    public Docket buildDocket() {
        return new Docket(DocumentationType.SWAGGER_2)
                .apiInfo(buildApiInf())
                .select()
                .apis(RequestHandlerSelectors.basePackage("com.example.demo.controller"))
                .paths(PathSelectors.any())
                .build();
    }
    private ApiInfo buildApiInf() {
        return new ApiInfoBuilder()
                .title("系统RESTful API文档")
                .contact(new Contact("jmj", "https://jmj.cc", "[email protected]"))
                .version("1.0")
                .build();
    }
}
其中“@ConditionalOnExpression”为Spring的注解,用户是否实例化本类,用于是否启用Swagger的判断(生产环境需要屏蔽Swagger)。
2.3 生产环境禁用Swagger
是否启用Swagger是在application.properties文件里配置的,配置如下:
swagger.enable=true
生产环境禁用,设置为false即可。
2.4 添加文档注释
完成以上三个步骤,已经完成了Spring Boot对Swagger的集成,但是文档不够友好,比如类、接口的中文说明、参数的说明,是没有的,需要在代码中完成。
如下代码:
@ApiIgnore
	@GetMapping("hello")
	public @ResponseBody String hello() {
		return "hello";
	}


	@ApiOperation("获取用户信息")
	@ApiImplicitParams({
			@ApiImplicitParam(paramType="header",name="username",dataType="String",required=true,value="heeader中设置 用户的姓名",defaultValue="zhaojigang"),
			@ApiImplicitParam(paramType="body",name="password",dataType="String",required=true,value="用户的密码",defaultValue="wangna")
	})
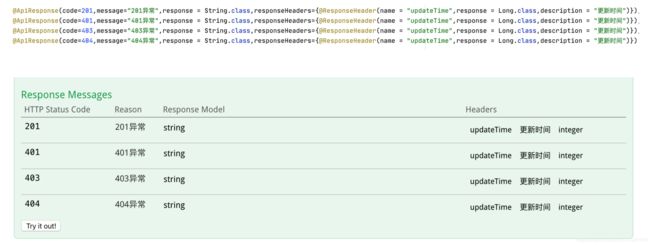
	@ApiResponses({
			@ApiResponse(code=200,message="交易成功",response = User.class,responseHeaders={@ResponseHeader(name = "updateTime",response = Long.class,description = "更新时间")}),
			@ApiResponse(code=401,message="401异常",response = User.class,responseHeaders={@ResponseHeader(name = "updateTime",response = Long.class,description = "更新时间")}),
			@ApiResponse(code=403,message="403异常",response = User.class,responseHeaders={@ResponseHeader(name = "updateTime",response = Long.class,description = "更新时间")}),
			@ApiResponse(code=404,message="404异常",response = User.class,responseHeaders={@ResponseHeader(name = "updateTime",response = Long.class,description = "更新时间")})
	})
	@RequestMapping(value="/getUser2",method=RequestMethod.POST,produces = MediaType.APPLICATION_JSON_UTF8_VALUE)
	public @ResponseBody  User getUser3(@RequestBody User user) {
		return user;
	}
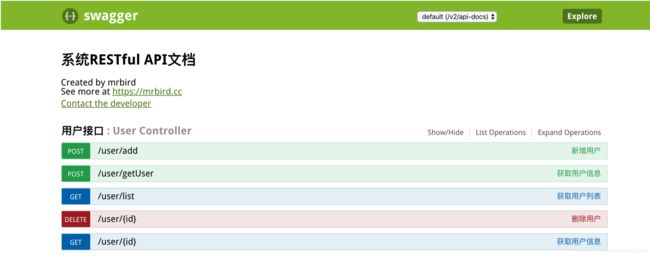
写完代码运行项目,在浏览器输入:http://localhost:8080/swagger-ui.html 查看添加注释的效果,如下图:
其中@Api是用来描述类的,@ApiOperation是用来描述方法的,@ApiImplicitParam是用来描述参数的,更多注解说明请看下文。
三、Swagger文档注解
我们现在已经对Swagger有了初步的认识,本节重点来看Swagger注解的使用。
Swagger注解的作用是给接口添加注释的。
3.1 @Api 类注释
@Api:用来描述类的,属性如下:
- tags 描述类的用途
- value 对显示而言没有任何用途可以不用设置
代码示例:
@Api(tags = “用户接口”)
3.2 @ApiOperation 方法注释
@ApiOperation:用来描述方法的,属性如下:
- value 方法的描述
- notes 方法备注说明
代码示例:
@ApiOperation(value = "获取用户信息", notes = "根据用户id获取用户信息")
效果如下图:
3.3 @ApiImplicitParams 参数注释
@ApiImplicitParams:描述多参数
@ApiImplicitParam:描述单参数
属性如下:
- name 参数
- value 参数的描述
- required 是否必传
- paramType 参数存放位置:header、query、path(resuful接口)、body、form
- dataType 参数类型
- defaultValue 参数默认值
代码示例:
@ApiImplicitParam(name = "id", value = "用户id", required = true, dataType = "Long", paramType = "path")
效果如下图:
3.4 @ApiModel 实体对象描述
@ApiModel:实体类名描述,属性如下:
- description 类描述
@ApiModelProperty:字段描述,属性如下:
- value 字段描述
示例如下:
@ApiModel(value="user对象",description="用户对象user")
public class User implements Serializable {

	private static final long serialVersionUID = -2731598327208972274L;
	@ApiModelProperty(value="id",name="age",example="1")
	private Long id;
	@ApiModelProperty(value="用户名",name="name",example="xingguo")
	private String name;
	@ApiModelProperty(value="年龄",name="age",example="99")
	private Integer age;
    /* getter/setter */
3.5@ApiResponse 响应信息
一般用于表达一个错误的响应信息
* code:数字,例如400
* message:信息,例如"请求参数没填好"
* response:抛出异常的类
3.6 @ApiResponses一组响应信息
用于表示一组响应
[外链图片转存失败,源站可能有防盗链机制,建议将图片保存下来直接上传(img-LwgfIRm6-1597217152962)(/Users/mac/Library/Application Support/typora-user-images/image-20200812151948359.png)]
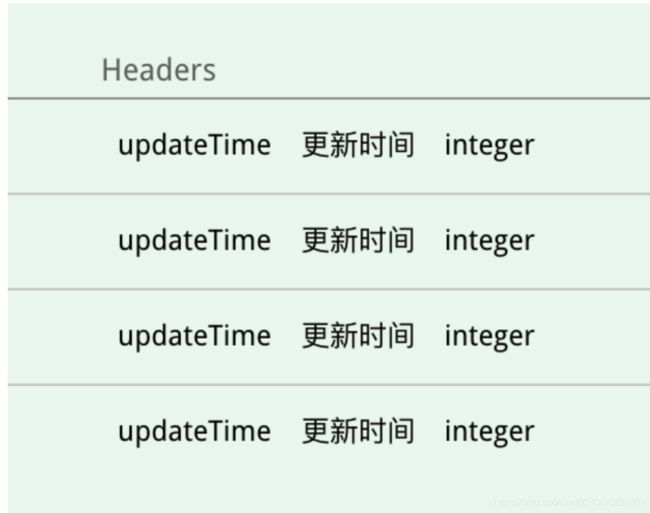
3.7@ResponseHeader 响应头
表示响应头
@ResponseHeader(name = "updateTime",response = Long.class,description = "更新时间")}


![[外链图片转存失败,源站可能有防盗链机制,建议将图片保存下来直接上传(img-byS3ChkO-1597217152953)(/Users/mac/Library/Application Support/typora-user-images/image-20200812151422140.png)]](http://img.e-com-net.com/image/info8/17455e23cce6436789cd2c5a52e7c101.jpg)


