SpringSecurity入门学习(3)Security整合kaptcha添加图形验证码验证
在上一篇文章中 SpringSecurity入门学习(2)我们学习了Security如何将用户存入数据库,现在我们在上一篇文章中项目的基础上在登陆逻辑中添加验证码验证逻辑。
SpringSecurity整合kaptcha添加图形验证码验证
1.引入依赖
这里我们使用谷歌开源的验证码kaptcha
    com.github.penggle
    kaptcha
    2.3.2
2.添加配置
在SecurityConfig配置类中继续添加如下配置
@Bean
Producer verifyCode() {
    Properties properties = new Properties();
    properties.setProperty("kaptcha.image.width", "120");
    properties.setProperty("kaptcha.image.height", "60");
    properties.setProperty("kaptcha.textproducer.char.string", "0123456789qwertyuiopasdfghjklzxcvbnm");
    properties.setProperty("kaptcha.textproducer.char.length", "4");
    Config config = new Config(properties);
    DefaultKaptcha kaptcha = new DefaultKaptcha();
    kaptcha.setConfig(config);
    return kaptcha;
}
该方法主要是配置图形验证码的宽高,验证码内容,验证码长度
3.创建验证码返回接口
@RestController
public class VerifyCodeController {
    @Autowired
    Producer producer;
    @GetMapping("/verify-code")
    public void getVerifyCode(HttpServletResponse resp, HttpSession session) throws IOException {
        resp.setContentType("image/jpg");
        String text = producer.createText();
        session.setAttribute("verifyCode", text);
        BufferedImage image = producer.createImage(text);
        try (ServletOutputStream out = resp.getOutputStream()) {
            ImageIO.write(image, "jpg", out);
        }
    }
}
然后记得在configure(HttpSecurity http)配置放行 /verify-code 接口,不需要登录就能访问
.antMatchers("/verify-code").permitAll()启动项目,直接访问看一下验证码有没有返回成功,我这里已经返回成功了

4.添加自定义认证
网上很多添加验证码的方式都是通过自定义过滤器,将自定义的验证码过滤器加入到SpringSecurity过滤器链中,进而实现了添加登录验证码功能,但是这种方式的弊端就是破坏了原有的过滤器链,请求每次都要走一遍验证码过滤器,这样不合理。
其实我们只是要在登陆验证用户名密码的时候顺便验证一下验证码是否正确,看过Security登录流程源码的同学会发现,用户密码的校验是在DaoAuthenticationProvider类中additionalAuthenticationChecks方法进行的,这里贴一下这个方法的源码:
protected void additionalAuthenticationChecks(UserDetails userDetails, UsernamePasswordAuthenticationToken authentication) throws AuthenticationException {
    if (authentication.getCredentials() == null) {
        this.logger.debug("Authentication failed: no credentials provided");
        throw new BadCredentialsException(this.messages.getMessage("AbstractUserDetailsAuthenticationProvider.badCredentials", "Bad credentials"));
    } else {
        String presentedPassword = authentication.getCredentials().toString();
        if (!this.passwordEncoder.matches(presentedPassword, userDetails.getPassword())) {//这里进行密码校验
            this.logger.debug("Authentication failed: password does not match stored value");
            throw new BadCredentialsException(this.messages.getMessage("AbstractUserDetailsAuthenticationProvider.badCredentials", "Bad credentials"));
        }
    }
}
因此,我们可以自定义一个AuthenticationProvider来代替 DaoAuthenticationProvider,并重其additionalAuthenticationChecks方法,在重写的过程中,加入验证码的校验逻辑即可。
创建自定义VerifyCodeAuthenticationProvider类,继承DaoAuthenticationProvider实现additionalAuthenticationChecks方法,内容如下:
public class VerifyCodeAuthenticationProvider extends DaoAuthenticationProvider {
    @Override
    protected void additionalAuthenticationChecks(UserDetails userDetails, UsernamePasswordAuthenticationToken authentication) throws AuthenticationException {
        //获取当前请求
        HttpServletRequest req = ((ServletRequestAttributes) RequestContextHolder.getRequestAttributes()).getRequest();
        String code = req.getParameter("code");//从当前请求中拿到code参数
        String verifyCode = (String) req.getSession().getAttribute("verifyCode");//从session中获取生成的验证码字符串
        //比较验证码是否相同
        if (StringUtils.isBlank(code) || StringUtils.isBlank(verifyCode) || !Objects.equals(code, verifyCode)) {
            throw new AuthenticationServiceException("验证码错误!");
        }
        super.additionalAuthenticationChecks(userDetails, authentication);//调用父类DaoAuthenticationProvider的方法做密码的校验
    }
}
接下来就开始配置,让MyAuthenticationProvider代替DaoAuthenticationProvider,在SecurityConfig中添加以下代码:
@Bean
VerifyCodeAuthenticationProvider authenticationProvider() {
    VerifyCodeAuthenticationProvider authenticationProvider = new VerifyCodeAuthenticationProvider();
    authenticationProvider.setPasswordEncoder(passwordEncoder());
    authenticationProvider.setUserDetailsService(sysUserDetailService);
    return authenticationProvider;
}
@Override
@Bean
protected AuthenticationManager authenticationManager() throws Exception {
    return new ProviderManager(Arrays.asList(authenticationProvider()));
}
其中:
authenticationProvider方法提供一个VerifyCodeAuthenticationProvider的实例,创建该实例时,需要提供UserDetailService和PasswordEncoder实例。
重写authenticationManager方法来提供一个自己的AuthenticationManager,实际上就是ProviderManager,然后加入自定义的VerifyCodeAuthenticationProvider。
5.启动测试
首先访问 http://localhost:8080/verify-code 获取验证码
然后访问登录接口,添加验证码字段
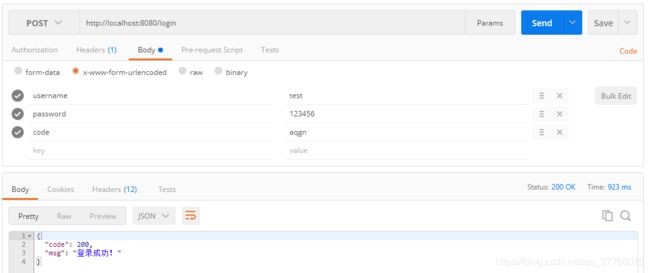
下面我们输入一个错误的验证码,我们发现错误消息并不是我们自己定义的"验证码错误!"
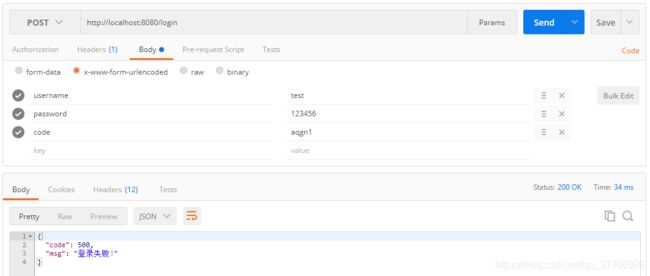
是因为在登录失败配置中,我们并没有处理VerifyCodeAuthenticationException异常,所以我们修改一下SecurityConfig中的配置
.failureHandler((req, resp, exception) -> {
    resp.setContentType(CONTENT_TYPE);
    PrintWriter out = resp.getWriter();
    String exeMsg = exception.getMessage();
    if (exception instanceof LockedException) {
        exeMsg = "账户已被锁定!";
    } else if (exception instanceof CredentialsExpiredException) {
        exeMsg = "密码已过期!";
    } else if (exception instanceof AccountExpiredException) {
        exeMsg = "账户已过期!";
    } else if (exception instanceof DisabledException) {
        exeMsg = "账户已被禁用!";
    } else if (exception instanceof BadCredentialsException) {
        exeMsg = "用户名或者密码输入错误,请重新输入!";
    }
    out.write(JSON.toJSONString(ResponseDTO.error(exeMsg)));
    out.flush();
    out.close();
})
然后在验证失败时就返回自己定义的错误消息

6.小结
上面的步骤是在上一篇文章 SpringSecurity入门学习(2)中项目的基础上进行修改的,有些步骤看不懂的小伙伴可以先看一下上一篇文章,另外如果对Security登录流程不熟的小伙伴可以去看下源码,了解下流程会更容易理解本篇文章。
实际上,目前这种登录场景用的还蛮多的,处理验证码还有手机号码动态验证,有兴趣的小伙伴可以自己了解下。