本文介绍下传统的tomcat负载均衡和session复制. session复制是基于JVM内存的,当然在当今的互联网大数据时代,有更好的替代方案,如将session数据保存在Redis中.
1、安装nginx
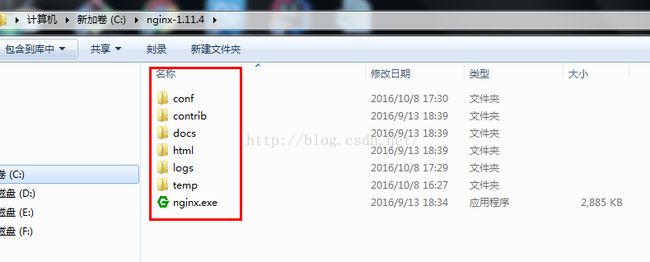
首先下载nginx,我下载的版本是1.11.4版本 .http://nginx.org/download/nginx-1.11.4.zip .
下载后,解压.
安装完成之后,配置下conf目录下的nginx.conf文件.
主要添加了如下内容:
     #tomcat的三个服务
      upstream mysite {
      server localhost:18080 weight=5;
      server localhost:28080 weight=5;
      server localhost:38080 weight=5;
        }
proxy_pass http://mysite;
#添加如下3个配置后,当一台server宕机,切换速度会很快,此时配置是1秒
proxy_connect_timeout 1;
proxy_send_timeout 1;
proxy_read_timeout 1; 完整的文件如下:
#user nobody;
worker_processes 1;
#error_log logs/error.log;
#error_log logs/error.log notice;
#error_log logs/error.log info;
#pid logs/nginx.pid;
events {
worker_connections 1024;
}
http {
include mime.types;
default_type application/octet-stream;
#log_format main '$remote_addr - $remote_user [$time_local] "$request" '
# '$status $body_bytes_sent "$http_referer" '
# '"$http_user_agent" "$http_x_forwarded_for"';
#access_log logs/access.log main;
sendfile on;
#tcp_nopush on;
#keepalive_timeout 0;
keepalive_timeout 10;
#gzip on;
#tomcat的三个服务
upstream mysite {
server localhost:18080 weight=5;
server localhost:28080 weight=5;
server localhost:38080 weight=5;
}
server {
listen 80;
server_name localhost;
#charset koi8-r;
#access_log logs/host.access.log main;
location / {
root html;
index index.html index.htm;
proxy_pass http://mysite;
            #添加如下3个配置后,当一台server宕机,切换速度会很快,此时配置是1秒
            proxy_connect_timeout   1;
            proxy_send_timeout      1;
            proxy_read_timeout      1;
}
#error_page 404 /404.html;
# redirect server error pages to the static page /50x.html
#
error_page 500 502 503 504 /50x.html;
location = /50x.html {
root html;
}
# proxy the PHP scripts to Apache listening on 127.0.0.1:80
#
#location ~ \.php$ {
# proxy_pass http://127.0.0.1;
#}
# pass the PHP scripts to FastCGI server listening on 127.0.0.1:9000
#
#location ~ \.php$ {
# root html;
# fastcgi_pass 127.0.0.1:9000;
# fastcgi_index index.php;
# fastcgi_param SCRIPT_FILENAME /scripts$fastcgi_script_name;
# include fastcgi_params;
#}
# deny access to .htaccess files, if Apache's document root
# concurs with nginx's one
#
#location ~ /\.ht {
# deny all;
#}
}
# another virtual host using mix of IP-, name-, and port-based configuration
#
#server {
# listen 8000;
# listen somename:8080;
# server_name somename alias another.alias;
# location / {
# root html;
# index index.html index.htm;
# }
#}
# HTTPS server
#
#server {
# listen 443 ssl;
# server_name localhost;
# ssl_certificate cert.pem;
# ssl_certificate_key cert.key;
# ssl_session_cache shared:SSL:1m;
# ssl_session_timeout 5m;
# ssl_ciphers HIGH:!aNULL:!MD5;
# ssl_prefer_server_ciphers on;
# location / {
# root html;
# index index.html index.htm;
# }
#}
}
2、Tomcat配置
下载tomcat之后, 新建三个文件夹tomcat1、tomcat2、tomcat3,把解压后的文件分别复制进这三个文件夹中,更改每个tomcat目录下的server.xml文件.
更改server和Connector端口. tomcat1 中server的端口为18005,Connector端口为18080,;tomcat2的分别是28005,28080;tomcat3分别是38085 ,38080。
为了session复制,还需要对server.xml做如下配置:
(1)取消Cluster节点的注释. (2)保持每个Engine 节点jvmRoute的值是相同的.
如下是tomcat1中的server.xml配置文件:
3、部署web工程
新建个一个web工程,我这里命名为session_test, 主要就是web.xml和index.jsp文件,将工程分别部署到tomcat1-3里面. 为了区分各个tomcat服务器,index.jsp稍微不一样.
web.xml :添加 了
  session_test


    index.html
    index.htm
    index.jsp
    default.html
    default.htm
    default.jsp


    This is the description of my J2EE component
    This is the display name of my J2EE component
<%@page language="java"%>
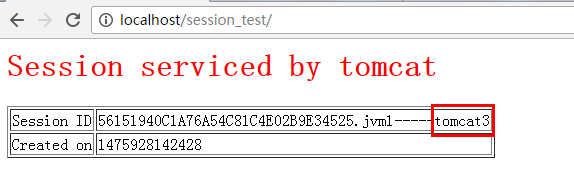
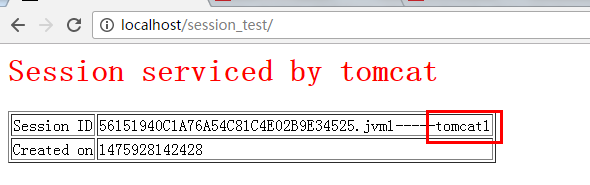
Session serviced by tomcat
Session ID
<%=session.getId() %>-----tomcat1
<% session.setAttribute("abc","abc");%>
Created on
<%= session.getCreationTime() %>

至此,所有配置和部署都完成了.
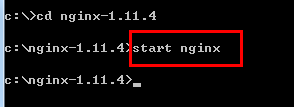
4、启动nginx和tomcat服务
注:停止nginx服务的命令是 nginx -s stop
(2) 分别启动tomcat1 、tomcat2、tomcat3服务.
直接双击tomcat 下的bin目录的startup.bat文件即可启动对应的tomcat服务.
5、测试负载均衡和session复制