学习 | egg.js 从入门到精通
快速初始化
使用脚手架,对项目进行快速初始化
$ mkdir egg-example && cd egg-example
$ npm init egg --type=simple
$ npm i
启动项目
$ npm run dev
$ open http://localhost:7001
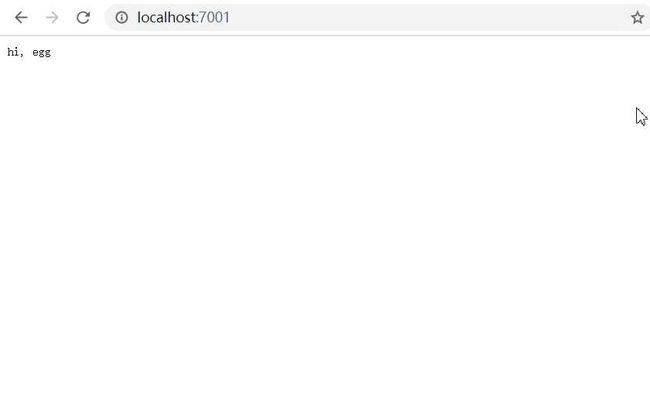
访问效果如下
[外链图片转存失败,源站可能有防盗链机制,建议将图片保存下来直接上传(img-8NRKYXKR-1595137239837)(https://www.iming.info/wp-content/uploads/2020/07/wp_editor_md_976949143a4a48533829d49a6bdde651.jpg)]
逐步搭建
初始化项目
$ mkdir egg-example
$ cd egg-example
$ npm init
$ npm i egg --save
$ npm i egg-bin --save-dev
添加相关的执行脚本
{
  "name": "egg-example",
  "scripts": {
    "dev": "egg-bin dev"
  }
}
编写Controller
const Controller = require('egg').Controller;

class HomeController extends Controller {
    async index(){
        this.ctx.body = 'Hello World';
    }
}

module.exports = HomeController;
添加路由
module.exports = app => {
    const {router, controller } = app;
    router.get('/', controller.home.index);
}
添加配置文件
exports.keys = '_1595046215730_9281';
此时目录文件结构
[外链图片转存失败,源站可能有防盗链机制,建议将图片保存下来直接上传(img-kYDqwg5U-1595137239859)(https://www.iming.info/wp-content/uploads/2020/07/wp_editor_md_6b3139be16c29f38aeb986ca436c91b7.jpg)]
访问效果
此时输入命令
npm run dev
输入地址进行访问
http://localhost:7001
静态资源
这里使用egg.js的插件完成对egg.js文件进行处理。
启动项目,访问静态资源
http://localhost:7001/public/js/lib.js
然后就可以访问了。
模板渲染
在本例子中,使用egg-view-nunjucks作为插件,进行模板的渲染
安装插件
C:\Users\Administrator\Desktop\untitled2\egg-example>npm i egg-view-nunjucks --save
npm WARN [email protected] requires a peer of acorn@^6.0.0 || ^7.0.0 but none is installed. You must install peer dependencies yo
urself.
npm WARN [email protected] requires a peer of mocha@>=1.18 <6 but none is installed. You must install peer dependencies yourself.
npm WARN optional SKIPPING OPTIONAL DEPENDENCY: [email protected] (node_modules\fsevents):
npm WARN notsup SKIPPING OPTIONAL DEPENDENCY: Unsupported platform for [email protected]: wanted {"os":"darwin","arch":"any"} (cu
rrent: {"os":"win32","arch":"x64"})
npm WARN optional SKIPPING OPTIONAL DEPENDENCY: [email protected] (node_modules\nunjucks\node_modules\fsevents):
npm WARN notsup SKIPPING OPTIONAL DEPENDENCY: Unsupported platform for [email protected]: wanted {"os":"darwin","arch":"any"} (cur
rent: {"os":"win32","arch":"x64"})

+ [email protected]
added 1 package from 1 contributor in 11.263s

36 packages are looking for funding
  run `npm fund` for details


C:\Users\Administrator\Desktop\untitled2\egg-example>
完成了插件的安装
开启插件
配置如下目录,开启插件
config/plugin.js
配置内容如下
exports.nunjucks = {
    enable: true,
    package: 'egg-view-nunjucks'
};
修改总的配置文件
exports.keys = "_fduhuhrefguir83238uhfr";

exports.view = {
    defaultViewEngine: 'nunjucks',
    mapping: {
        '.tpl': 'nunjucks',
    },
}
编写模板文件
在app/view文件下增加新的模板文件。
Hacker News
{% for item in list %}
-
{{ item.title }}
{% endfor %}
添加控制器和路由
const Controller = require('egg').Controller;

class NewsController extends Controller {
    // 同步,设置模板参数列表
    async list() {
        const dataList = {
            list: [
                { id: 1, title: 'this is news 1', url: '/news/1' },
                { id: 2, title: 'this is news 2', url: '/news/2' }
            ]
        };
        // 等待进入render
        await this.ctx.render('news/list.tpl', dataList);
    }
}

module.exports = NewsController;
添加路由
module.exports = app => {
    const { router, controller } = app;
    router.get('/', controller.home.index);
    router.get('/news', controller.news.list);
};
访问 http://localhost:7001/news 即可看到页面
编写service
在app/service 目录下,添加service相关文件。
代码如下
const Service = require('egg').Service;

class NewsService extends Service {
    async list(page = 1) {
        // read config
        const { serverUrl, pageSize } = this.config.news;

        // use build-in http client to GET hacker-news api
        const { data: idList } = await this.ctx.curl(`${serverUrl}/topstories.json`, {
            data: {
                orderBy: '"$key"',
                startAt: `"${pageSize * (page - 1)}"`,
                endAt: `"${pageSize * page - 1}"`,
            },
            dataType: 'json',
        });

        // parallel GET detail
        const newsList = await Promise.all(
            Object.keys(idList).map(key => {
                const url = `${serverUrl}/item/${idList[key]}.json`;
                return this.ctx.curl(url, { dataType: 'json' });
            })
        );
        return newsList.map(res => res.data);
    }
}

module.exports = NewsService;
修改Controller 添加相关的service
const Controller = require('egg').Controller;

class NewsController extends Controller {
  async list() {
    const ctx = this.ctx;
    const page = ctx.query.page || 1;
    const newsList = await ctx.service.news.list(page);
    await ctx.render('news/list.tpl', { list: newsList });
  }
}

module.exports = NewsController;
此时ctx.service.news.list 提供相关的数据。
增加配置文件
这时增加相关的配置文件
exports.news = {
    pageSize: 5,
    serverUrl: 'https://hacker-news.firebaseio.com/v0',
};
在模板里添加自定义函数
安装插件
npm i moment --save
// app/extend/helper.js
const moment = require('moment');
exports.relativeTime = time => moment(new Date(time * 1000)).fromNow();
{{ helper.relativeTime(item.time) }}
编写中间件
// app/middleware/robot.js
// options === app.config.robot
module.exports = (options, app) => {
  return async function robotMiddleware(ctx, next) {
    const source = ctx.get('user-agent') || '';
    const match = options.ua.some(ua => ua.test(source));
    if (match) {
      ctx.status = 403;
      ctx.message = 'Go away, robot.';
    } else {
      await next();
    }
  }
};

// config/config.default.js
// add middleware robot
exports.middleware = [
  'robot'
];
// robot's configurations
exports.robot = {
  ua: [
    /Baiduspider/i,
  ]
};
最后
对于egg.js 来说,总体上也是MVC三层架构。外加中间件,设置相关的文件。
以后的内容将会再次挨个深入讲解。


