Anroid动画总结二:属性动画 ValueAnimator的基本使用
属性动画包括ValueAnimator和ObjectAnimator,上一篇先介绍了属性动画的ObjectAnimator的用法,这一篇来介绍下ValueAnimator的使用。
ValueAnimator是ObjectAnimator的父类,顾名思义,它只对值进行操作,如何需要把它用于view的动画,则需监听它的值的变化来设置view的属性。
ValueAnimator的原理有点类似于Scroller。
一、基本用法
1、创建ValueAnimator的实例
ValueAnimator animator = ValueAnimator.ofInt(0,400);//创建一个值从0到400的动画
animator.setDuration(1000);//动画时长为1s
2、添加监听
代码中的tv是一个TextView:
animator.addUpdateListener(new ValueAnimator.AnimatorUpdateListener() {
    @Override
    public void onAnimationUpdate(ValueAnimator animation) {
        int curValue = (int)animation.getAnimatedValue();
        Log.d("qijian","curValue:"+curValue);
        tv.layout(curValue,curValue,curValue+tv.getWidth(),curValue+tv.getHeight());
    }
});
通过addUpdateListener添加一个监听,监听的回掉onAnimationUpdate()传入当前的ValueAnimator的实例animation,
然后通过animation.getAnimatedValue()获取当前值,打印出来的值如下:
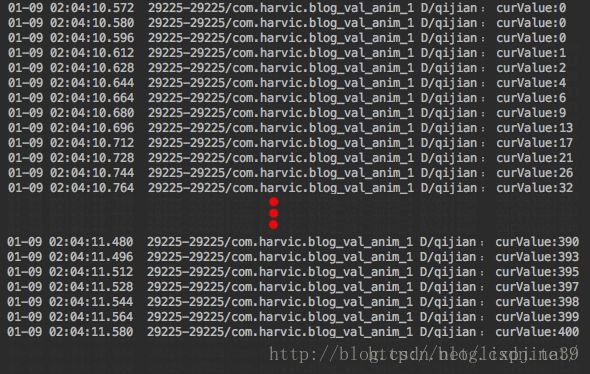
利用这个值,我们可以来设置view的属性:
tv.layout(curValue,curValue,curValue+tv.getWidth(),curValue+tv.getHeight()); 3、开启动画
animator.start(); 在监听过程中,通过layout函数改变tv的位置,效果如下:
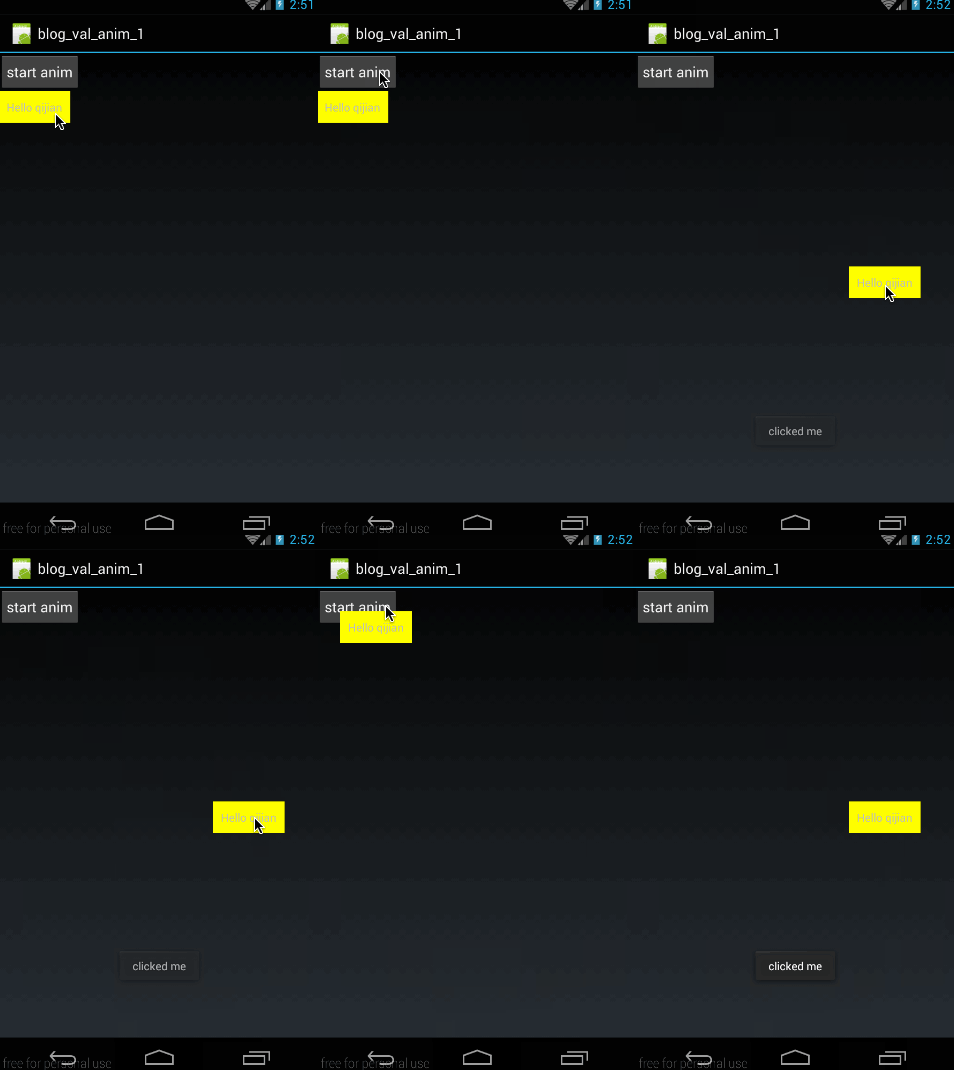
这里注意了,我们是通过layout函数来改变位置的,我们知道layout函数在改变控件位置时是永久性的,即通过更改控件left,top,right,bottom这四个点的坐标来改更改坐标位置的,而不仅仅是从视觉上画在哪个位置,所以通过layout函数更改位置后,控件在新位置是可以响应点击事件的。
大家可能注意到了,layout()函数中上下左右点的坐标是以屏幕坐标来标准的。所以在效果图中可以看到,textview的运动轨迹是从屏幕的左上角(0,0)点运行到(400,400)点。
二、常用方法
上面是ValueAnimator的基本使用,下面来看看它还有哪些常用方法。
1、ofInt与ofFloat
在上面的例子中,我们使用了ofInt函数,与它同样功能的还有一个函数叫ofFloat,下面我们先看看他们的具体声明:
public static ValueAnimator ofInt(int... values)
public static ValueAnimator ofFloat(float... values)
他们的参数类型都是可变参数长参数,所以我们可以传入任何数量的值;传进去的值列表,就表示动画时的变化范围;比如ofInt(2,90,45)就表示从数值2变化到数字90再变化到数字45;所以我们传进去的数字越多,动画变化就越复杂。从参数类型也可以看出ofInt与ofFloat的唯一区别就是传入的数字类型不一样,ofInt需要传入Int类型的参数,而ofFloat则表示需要传入Float类型的参数。
下面我们还在上面例子的基础上,使用ofFloat函数来举个例子:
ValueAnimator animator = ValueAnimator.ofFloat(0f,400f,50f,300f);
animator.setDuration(3000);

animator.addUpdateListener(new ValueAnimator.AnimatorUpdateListener() {
    @Override
    public void onAnimationUpdate(ValueAnimator animation) {
        Float curValueFloat = (Float)animation.getAnimatedValue();
        int curValue = curValueFloat.intValue();
        tv.layout(curValue,curValue,curValue+tv.getWidth(),curValue+tv.getHeight());
    }
});
animator.start();
先看看效果:
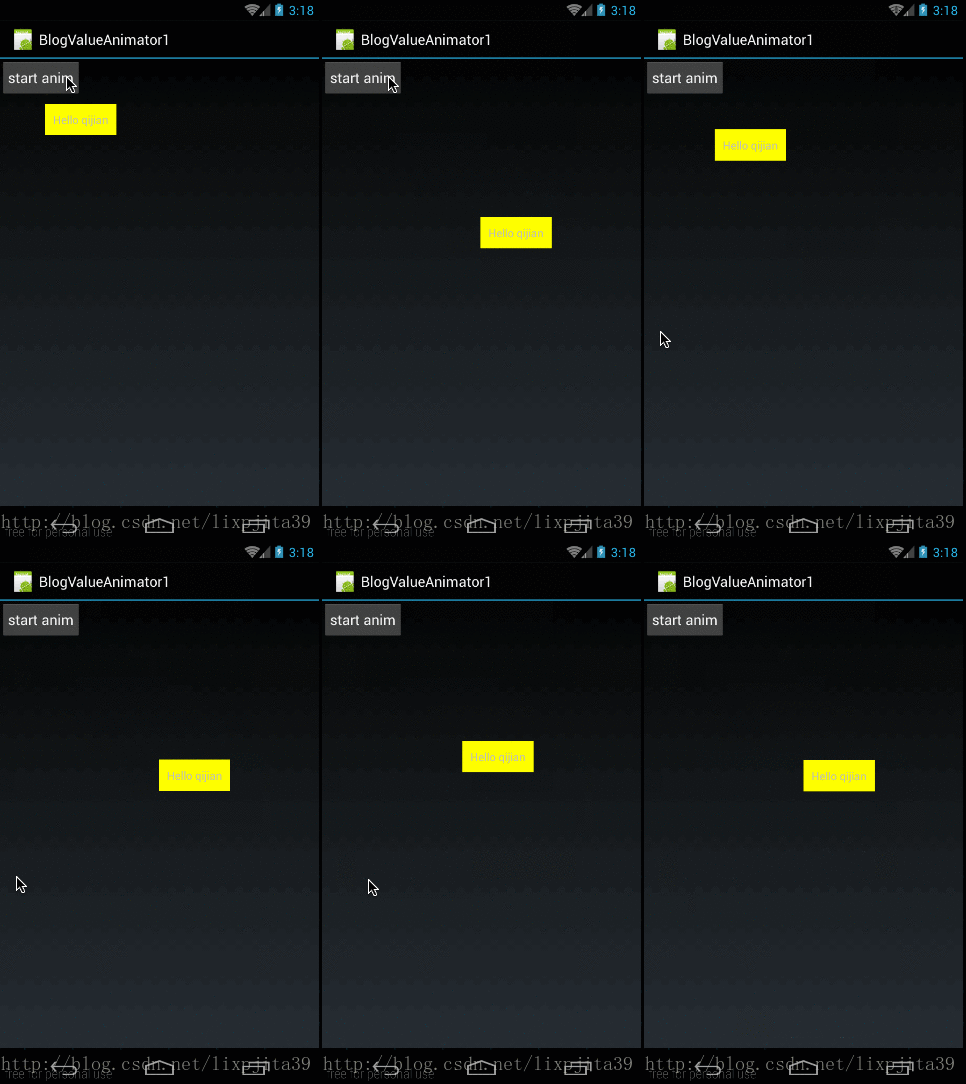
在效果图中,我们可以看到,在点击按钮之后,textview先向右下运动然后再回来,然后再向右下运动过去。
在这个例子中,我们使用ValueAnimator.ofFloat(0f,400f,50f,300f)构造了一个比较复杂的动画渐变,值是0变到400再回到50最后变成300;
所以我们在监听时,首先得到当前动画的值:
Float curValueFloat = (Float)animation.getAnimatedValue();通过getAnimatedValue()来获取当前运动点的值,大家可能会疑问为什么要转成Float类型,我们先来看看getAnimatedValue()的声明:
Object getAnimatedValue();它返回的类型是一个Object原始类型,那我们怎么知道我们要将它强转成什么类型呢。注意,我们在设定动画初始值时用的是ofFloat()函数,所以每个值的类型必定是Float类型,所以我们获取出来的类型也必然是Float类型的。同样,如果我们使用ofInt设定的初始值,那么通过getAnimatedValue()获取到的值就应该强转为Int类型。
在得到当前运动的值以后,通过layout函数将textview移动到指定位置即可。
2、setDuration()、getAnimatedValue()、start()
这三个函数在上面的实例中已经使用过,setDuration(long duration)是设置一次动画的时长,单位是毫秒,start()是开始动画,唯一有点难度的是Object getAnimatedValue(),它的声明为:
Object getAnimatedValue();它的意义就是获取动画在当前运动点的值,所以这个对象只能用于在动画运动中。返回的值是Object,上面我们说过,通过getAnimatedValue()得到的值的实际类型与初始设置的值相同,如果我们利用ofInt()设置的动画,那通过getAnimatedValue()得到的值为类型就是Int类型。如果我们利用ofFloat()设置的动画,通过getAnimatedValue()得到的值类型就是Float类型。
总而言之,通过getAnimatedValue()值类型与初始设置动画时的值类型相同。
上面我们已经用过这些函数了,这里就不再举例了。
3、setRepeatCount()、setRepeatMode()、cancel()
setRepeatCount(int value)用于设置动画循环次数,设置为0表示不循环,设置为ValueAnimation.INFINITE表示无限循环。
cancel()用于取消动画
我们着重说一下setRepeatMode:
/**
 * 设置循环模式
 * value取值有RESTART,REVERSE
 */
void setRepeatMode(int value)
setRepeatMode(int value)用于设置循环模式,取值为ValueAnimation.RESTART时,表示正序重新开始,当取值为ValueAnimation.REVERSE表示倒序重新开始。
下面我们使用这三个函数来举个例子,先看下动画效果:
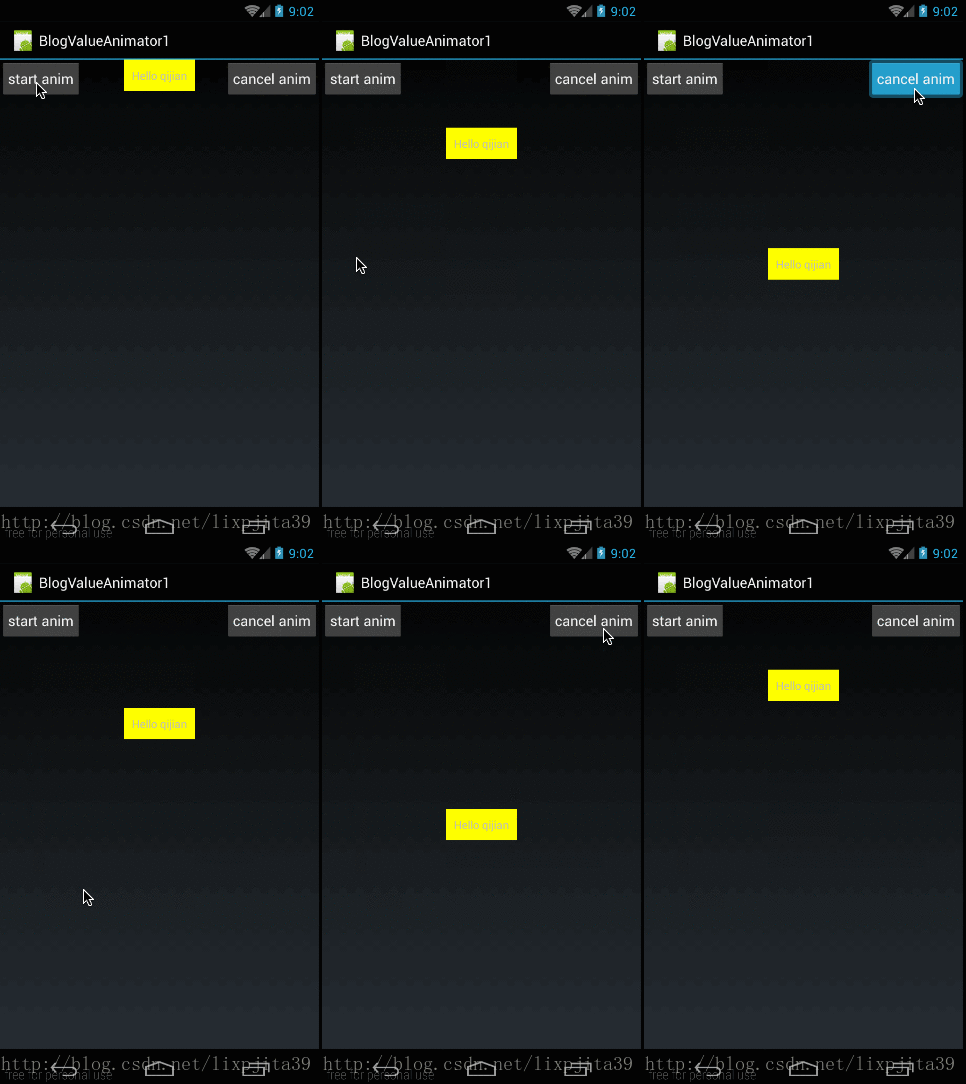
在这里,有两个按钮,当点击start anim时,textview垂直向下运动,我定义的运动初始值为ofInt(0,400);所以从效果图中也可以看出我们定义它为无限循环,而且每次循环时都是使用ValueAnimation.REVERSE让其倒序重新开始循环。当我们点击cancel anim时,取消动画。
下面我们来看看代码
首先是布局代码,布局代码时,采用RelativeLayout布局,将两个按钮放两边,textview放中间,代码如下:
<RelativeLayout xmlns:android="http://schemas.android.com/apk/res/android"
              android:orientation="vertical"
              android:layout_width="fill_parent"
              android:layout_height="fill_parent">

    <Button
        android:id="@+id/btn"
        android:layout_width="wrap_content"
        android:layout_height="wrap_content"
        android:layout_alignParentLeft="true"
        android:padding="10dp"
        android:text="start anim"
        />

    <Button
            android:id="@+id/btn_cancel"
            android:layout_width="wrap_content"
            android:layout_height="wrap_content"
            android:layout_alignParentRight="true"
            android:padding="10dp"
            android:text="cancel anim"
            />
    <TextView
            android:id="@+id/tv"
            android:layout_width="wrap_content"
            android:layout_height="wrap_content"
            android:layout_centerHorizontal="true"
            android:padding="10dp"
            android:background="#ffff00"
            android:text="Hello qijian"/>
RelativeLayout>
这个布局代码没什么难度就不讲了。
下面来看看两个按钮的操作代码:
    private Button btnStart,btnCancel;
    private ValueAnimator repeatAnimator;

    @Override
    public void onCreate(Bundle savedInstanceState) {
        super.onCreate(savedInstanceState);
        setContentView(R.layout.main);
        tv = (TextView) findViewById(R.id.tv);

        btnStart = (Button) findViewById(R.id.btn);
        btnCancel = (Button)findViewById(R.id.btn_cancel);

        btnStart.setOnClickListener(new View.OnClickListener() {
            @Override
            public void onClick(View v) {
                repeatAnimator = doRepeatAnim();
            }
        });

        btnCancel.setOnClickListener(new View.OnClickListener() {
            @Override
            public void onClick(View v) {

                repeatAnimator.cancel();
            }
        });
    }
这段代码也没什么难度,当我们点击btnStart的时候,执行doRepeatAnim()函数,这个函数返回它构造的ValueAnimator对象,将其赋值给repeatAnimator变量。当点击btnCancel时,调用 repeatAnimator.cancel()取消当前动画。
下面我们来看看doRepeatAnim()函数都做了哪些工作:
private ValueAnimator doRepeatAnim(){
   ValueAnimator animator = ValueAnimator.ofInt(0,400);
   animator.addUpdateListener(new ValueAnimator.AnimatorUpdateListener() {
       @Override
       public void onAnimationUpdate(ValueAnimator animation) {
           int curValue = (int)animation.getAnimatedValue();
           tv.layout(tv.getLeft(),curValue,tv.getRight(),curValue+tv.getHeight());
       }
   });
   animator.setRepeatMode(ValueAnimator.REVERSE);
   animator.setRepeatCount(ValueAnimator.INFINITE);
   animator.setDuration(1000);
   animator.start();
   return animator;
}
在这里我们构造了一个ValueAnimator,动画范围是0-400,设置重复次数为无限循环。循环模式为倒序。在animator.setDuration(1000)表示动画一次的时长为1000毫秒。最后,由于我们在取消动画时还需要我们构造的这个ValueAnimator实例,所以将animator返回。
4、两个监听器
前面,我们讲过一个添加监听器animator.addUpdateListener,以监听动画过程中值的实时变化,其实在ValueAnimator中共有两个监听器:
/**
 * 监听器一:监听动画变化时的实时值
 */
public static interface AnimatorUpdateListener {
    void onAnimationUpdate(ValueAnimator animation);
}
//添加方法为:public void addUpdateListener(AnimatorUpdateListener listener)
/**
 * 监听器二:监听动画变化时四个状态
 */
public static interface AnimatorListener {
    void onAnimationStart(Animator animation);
    void onAnimationEnd(Animator animation);
    void onAnimationCancel(Animator animation);
    void onAnimationRepeat(Animator animation);
}
//添加方法为:public void addListener(AnimatorListener listener)
关于监听器一:AnimatorUpdateListener就是监听动画的实时变化状态,在onAnimationUpdate(ValueAnimator animation)中的animation表示当前状态动画的实例。这里就不再细讲这个监听器了,这里我们主要讲讲监听器AnimatorListener;
在AnimatorListener中,主要是监听Animation的四个状态,start、end、cancel、repeat;当动画开始时,会调用onAnimationStart(Animator animation)方法,当动画结束时调用onAnimationEnd(Animator animation),当动画取消时,调用onAnimationCancel(Animator animation)函数,当动画重复时,会调用onAnimationRepeat(Animator animation)函数。
添加AnimatorListener的方法是addListener(AnimatorListener listener) ;
下面我们就举个例子来看一下AnimatorListener的使用方法。
我们在上面doRepeatAnim()函数的基础上,添加上AnimatorListener,代码如下:
代码如下:
private ValueAnimator doAnimatorListener(){
    ValueAnimator animator = ValueAnimator.ofInt(0,400);

    animator.addUpdateListener(new ValueAnimator.AnimatorUpdateListener() {
        @Override
        public void onAnimationUpdate(ValueAnimator animation) {
            int curValue = (int)animation.getAnimatedValue();
            tv.layout(tv.getLeft(),curValue,tv.getRight(),curValue+tv.getHeight());
        }
    });
    animator.addListener(new Animator.AnimatorListener() {
        @Override
        public void onAnimationStart(Animator animation) {
            Log.d("qijian","animation start");
        }

        @Override
        public void onAnimationEnd(Animator animation) {
            Log.d("qijian","animation end");
        }

        @Override
        public void onAnimationCancel(Animator animation) {
            Log.d("qijian","animation cancel");
        }

        @Override
        public void onAnimationRepeat(Animator animation) {
            Log.d("qijian","animation repeat");
        }
    });
    animator.setRepeatMode(ValueAnimator.REVERSE);
    animator.setRepeatCount(ValueAnimator.INFINITE);
    animator.setDuration(1000);
    animator.start();
    return animator;
}
在上面的代码中,我们是在doRepeatAnim()函数的基础上,又添加了AnimatorListener()以监听它的状态,并把这些状态打印出来。
我们来看看动画效果:
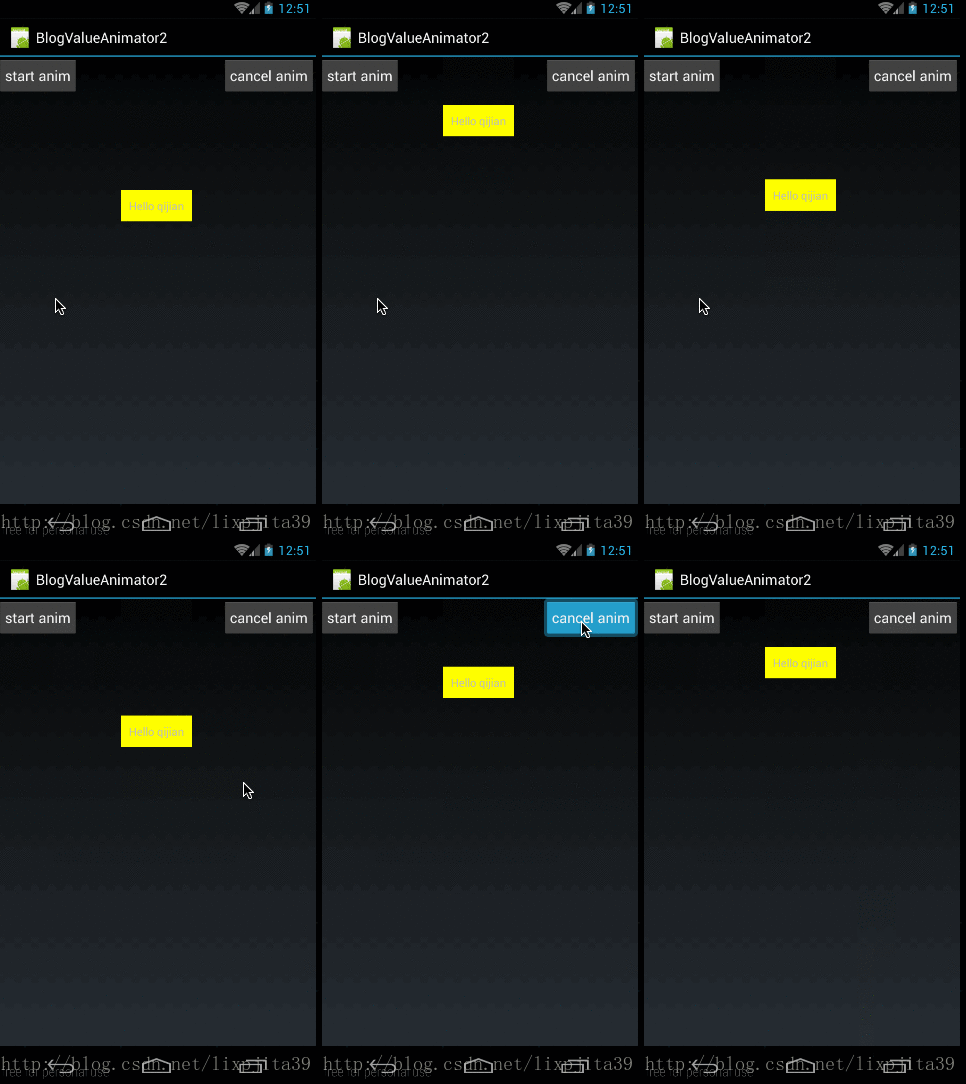
打印出来结果如下:

取消监听:
上面我们讲了如何添加监听函数,下面我们来看看如何移除监听器:
/**
 * 移除AnimatorUpdateListener
 */
void removeUpdateListener(AnimatorUpdateListener listener);
void removeAllUpdateListeners();
 /**
  * 移除AnimatorListener
  */
void removeListener(AnimatorListener listener);
void removeAllListeners();
针对AnimatorUpdateListener和AnimatorListener,每个监听器都有两个方法来移除;我们就以移除AnimatorListener来简单讲一下,
removeListener(AnimatorListener listener)用于在animator中移除指定的监听器,而removeAllListeners()用于移除animator中所有的AnimatorListener监听器;
5.setStartDelay(),clone()
setStartDelay(long startDelay)非常容易理解,就是设置多久后动画才开始。
clone()在堆中clone一个相同的对象。