教程预览
01 | 前言
02 | 简单的分库分表设计
03 | 控制反转搭配简单业务
04 | 强化设计方案
05 | 完善业务自动创建数据库
说明
这节来把基础的业务部分完善一下。
因为 IQueryable的问题我们还是先把 IDbRepository 换成 ISqlSugarRepository来使用
private readonly ISqlSugarRepository
AutoMapper 和 Swagger 已经有很好的讲解文章,不做重复讲解。
安装基本使用的包
AutoMapper
AutoMapper.Extensions.Microsoft.DependencyInjection
基本介绍和使用方法参考:https://www.cnblogs.com/laozhang-is-phi/p/9560949.html
Swashbuckle.AspNetCore
基本介绍和使用方法参考:https://www.cnblogs.com/laozhang-is-phi/p/9495624.html
业务代码部分没什么重点讲解的这里大家对着写一下就行
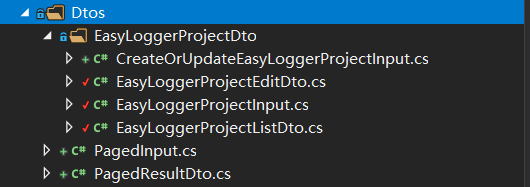
1.在项目目录下新建文件夹 Dtos 来存放我们的Dto实体 新建文件夹 EasyLoggerProjectDto 存放项目部分的Dto
  public class PagedInput
    {
        public Int32 PageSize { get; set; }
        public Int32 PageIndex { get; set; }
    }
 public class PagedResultDto
    {
        public List List { get; set; }
        public long Total { get; set; }
    }
 public class EasyLoggerProjectListDto
    {
        ///
        /// 主键
        ///
        public int Id { get; set; }
        ///
        /// 名称
        ///
        public string Name { get; set; }
        ///
        /// 系统编码
        ///
        public string Code { get; set; }
    }
 public class EasyLoggerProjectInput: PagedInput
    {
        ///
        /// 项目名称
        ///
        public string Name { get; set; }
        ///
        /// 系统编码
        ///
        public string Code { get; set; }

    }
 public class EasyLoggerProjectEditDto
    {
        ///
        /// 主键
        ///
        public int? Id { get; set; }
        ///
        /// 名称
        ///
        public string Name { get; set; }
        ///
        /// 系统编码
        ///
        public string Code { get; set; }
    }
 public class CreateOrUpdateEasyLoggerProjectInput
    {
        public EasyLoggerProjectEditDto EasyLoggerProject { get; set; }
    }
2.在项目目录下新建文件夹 AutoMapper 存放我们的配置文件 新建类 EntityToViewModelMappingProfile、ViewModelToEntityMappingProfile 统一继承 Profile 来做Dto的配置
public class EntityToViewModelMappingProfile : Profile
    {
        public EntityToViewModelMappingProfile()
        {
            CreateMap();
            CreateMap();
        }
    }
  public class ViewModelToEntityMappingProfile : Profile
    {
        public ViewModelToEntityMappingProfile()
        {
            CreateMap();
            CreateMap();

        }
    }
3.Startup 中记得添加AutoMapper
 #region AutoMapper
            services.AddAutoMapper(typeof(EntityToViewModelMappingProfile), typeof(ViewModelToEntityMappingProfile));
#endregion
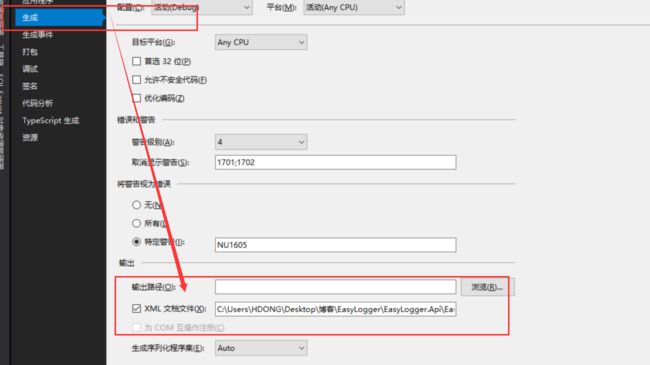
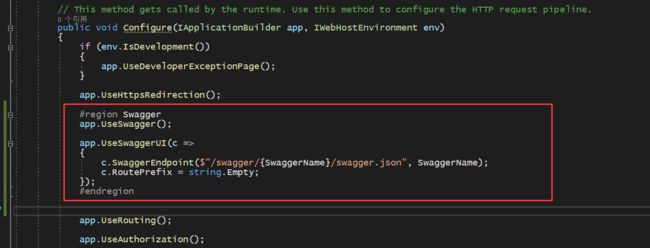
4.为了方便调试把Swagger也加上去吧(记得操作完重新生成下项目)
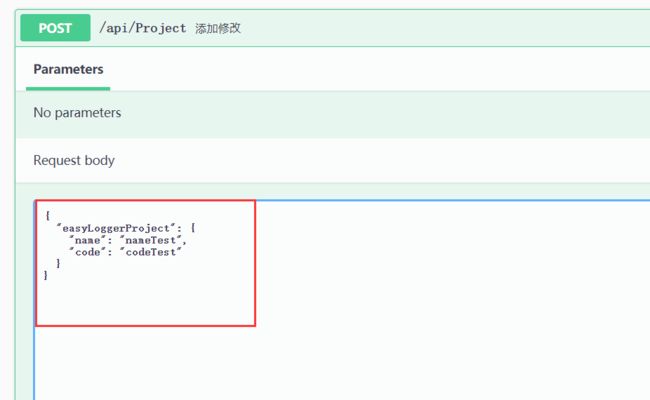
5.调试试验一下
6.完工
到此整个教程中最枯燥的部分我们终于把他完成了。
继续改造我们的项目
不同的ORM 都有自己的生成数据库和表的API 我们把这一部分 处理一下
1,将我们的SqlSugar的依赖注入封装起来
在 EasyLogger.SqlSugarDbStorage 类库下新建SqlSugarDbStorageServiceCollectionExtensions 类
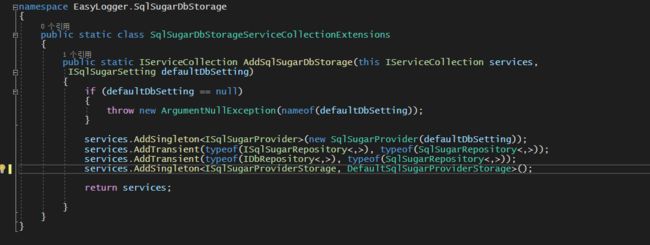
    public static class SqlSugarDbStorageServiceCollectionExtensions
    {
        public static IServiceCollection AddSqlSugarDbStorage(this IServiceCollection services,
         ISqlSugarSetting defaultDbSetting)
        {
            if (defaultDbSetting == null)
            {
                throw new ArgumentNullException(nameof(defaultDbSetting));
            }

            services.AddSingleton(new SqlSugarProvider(defaultDbSetting));
            services.AddTransient(typeof(ISqlSugarRepository<,>), typeof(SqlSugarRepository<,>));
            services.AddTransient(typeof(IDbRepository<,>), typeof(SqlSugarRepository<,>));
            services.AddSingleton();


            return services;

        }
    }
2.然后改一下 Startup
 #region SqlSugar
            // 改造一下把 自己的注入部分封装起来
            var defaultDbPath = Path.Combine(PathExtenstions.GetApplicationCurrentPath(), $"{Configuration["EasyLogger:DbName"]}.db");
            services.AddSqlSugarDbStorage(new SqlSugarSetting()
            {
                Name = SqlSugarDbStorageConsts.DefaultProviderName,
                ConnectionString = @$"Data Source={defaultDbPath}",
                DatabaseType = DbType.Sqlite,
                LogExecuting = (sql, pars) =>
                {
                    Console.WriteLine($"sql:{sql}");
                }
            });
#endregion
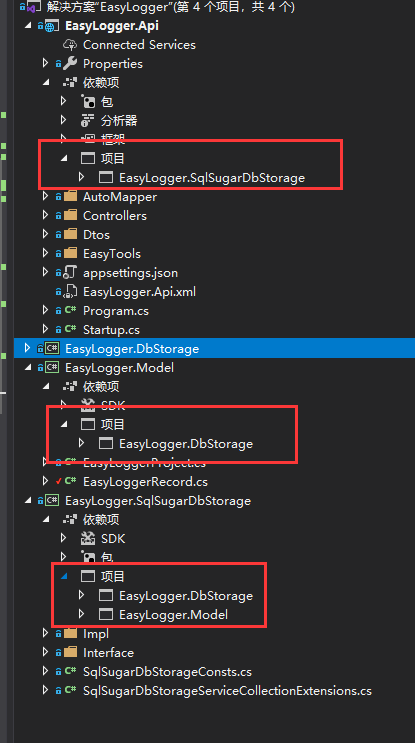
3.新建 EasyLogger.Model 类库 记得引用 EasyLogger.DbStorage 把我们的数据库实体迁移进去 顺便把我们的日志实体建立一下
 public class EasyLoggerRecord : IDbEntity
    {
        public int Id { get; set; }
        ///
        /// 项目Id
        ///
        public int ProjectId { get; set; }
        ///
        /// 类型.自定义标签
        ///
        public string LogType { get; set; }
        ///
        /// 状态-成功、失败、警告等
        ///
        public string LogState { get; set; }
        ///
        /// 标题
        ///
        public string LogTitle { get; set; }
        ///
        /// 内容描述
        ///
        public string LogContent { get; set; }
        ///
        /// 在系统中产生的时间
        ///
        public DateTime LogTime { get; set; }
        ///
        /// 创建时间
        ///
        public DateTime CreateTime { get; set; }
    }
补: 注意调整一下引用
4.在 EasyLogger.DbStorage 类库 新建 IPartitionDbTableFactory 接口 来约束ORM生成数据库
public interface IPartitionDbTableFactory
    {
        void DbTableCreate(string path, bool isBaseDb);
    }
5.老规矩 在 EasyLogger.SqlSugarDbStorage 创建类 SqlSugarPartitionDbTableFactory 实现接口
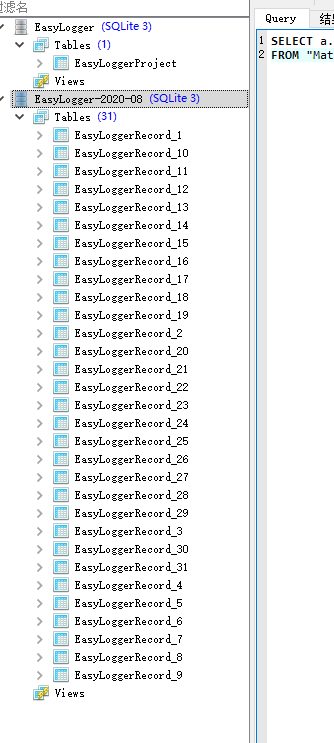
这部分代码的工作:通过外部传递进来数据库的连接,传递创建基础数据库 还是 日志数据库,如果是日志数据库,就在生成数据库的同时,根据当月天数,创建对应的表结构。
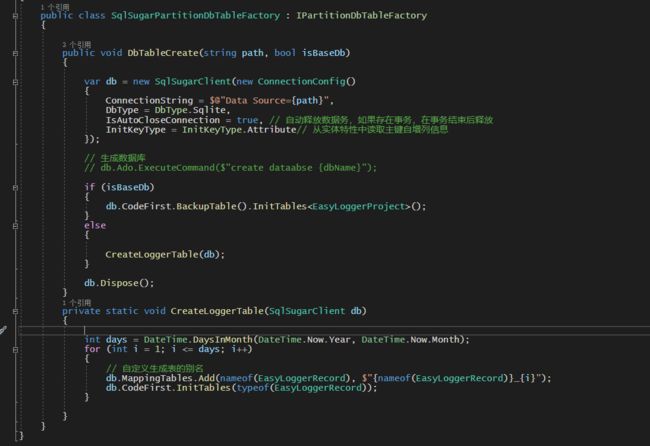
 public class SqlSugarPartitionDbTableFactory : IPartitionDbTableFactory
    {

        public void DbTableCreate(string path, bool isBaseDb)
        {

            var db = new SqlSugarClient(new ConnectionConfig()
            {
                ConnectionString = $@"Data Source={path}",
                DbType = DbType.Sqlite,
                IsAutoCloseConnection = true, // 自动释放数据务,如果存在事务,在事务结束后释放
                InitKeyType = InitKeyType.Attribute// 从实体特性中读取主键自增列信息
            });

            // 生成数据库
            // db.Ado.ExecuteCommand($"create dataabse {dbName}");

            if (isBaseDb)
            {
                db.CodeFirst.BackupTable().InitTables();
            }
            else
            {

                CreateLoggerTable(db);
            }

            db.Dispose();
        }
        private static void CreateLoggerTable(SqlSugarClient db)
        {

            int days = DateTime.DaysInMonth(DateTime.Now.Year, DateTime.Now.Month);
            for (int i = 1; i <= days; i++)
            {
                // 自定义生成表的别名
                db.MappingTables.Add(nameof(EasyLoggerRecord), $"{nameof(EasyLoggerRecord)}_{i}");
                db.CodeFirst.InitTables(typeof(EasyLoggerRecord));
            }

        }
}
6.将我们 Startup 中 ConfigureServices 创建数据库部分 改造成下面这样。
   #region 默认创建基础数据库 和  时间数据库

            if (!File.Exists(defaultDbPath))
            {
                var partition = services.BuildServiceProvider().GetService();
                partition.DbTableCreate(defaultDbPath, true);
            }

            var startUpDbPath = Path.Combine(PathExtenstions.GetApplicationCurrentPath(), $"{Configuration["EasyLogger:DbName"]}-{DateTime.Now.ToString("yyyy-MM")}.db");
            if (!File.Exists(startUpDbPath))
            {
                var partition = services.BuildServiceProvider().GetService();
                partition.DbTableCreate(startUpDbPath, false);
            }

    #endregion
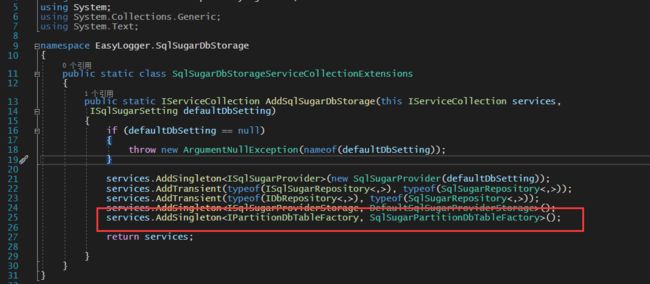
7.最后记得不要忘了 在我们封装的SqlSugar的注入类 中 添加我们的注入
8.效果
结尾回顾
这节文章前半部分非常的枯燥非常单纯的业务部分。
重点主要在后半部分
1.我们首先建立将ORM自己的注入部分封装起来。
2.更改实体存放位置,让其公共出来,目的是可以被其他类库访问
3.我们创建生成数据库的接口。
4.SqlSugar 使用自己的创建数据库和生成表的方式 实现该接口。
思考
现在来看我们的代码是不是很灵活,新的ORM进来只需要根据我们的约束实现自己的部分
我们切换ORM只要将 Startup 中 SqlSugar 这行代码换掉 就切换完成了。
下一节我们来做动态创建数据库连接,切换数据库查询数据,以及跨表查询数据。
