SystemJS简介
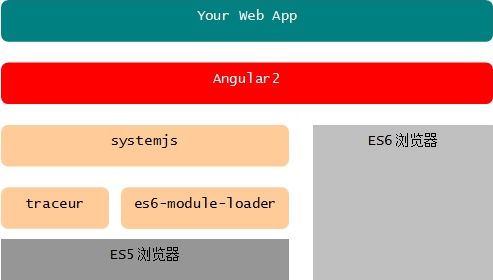
systemjs是一个通用模块加载器,支持AMD、CommonJS、ES6等各种格式的JS模块加载,也是Angular2官推的加载器。根据解释,我们可以理解为一个插件。关于systemjs的使用及说明,网上资料也不少,但是系统全面讲解的即没发现。对于一个初学者来说,凭借官网上几行截下来的示例代码,显示不能满足那种饥饿的求知欲。在了解更多之前,我们先看下面这张图片。
从图上可以看出,整个Angular2应该是直接构建在现代浏览器之上,即ES6。如果需要支持ES5浏览器,则需要在中间添加一些垫片来支持。现在,我们知道systemjs工作的层级,就好理解systemjs在整个浏览器中的作用。
背景
在学习Angular2教程时,有个实例叫“英雄编辑器”。把项目down下来后可以发现,此项目正是用到了Systemjs加载器。对于项目中一堆的配置文件,想要摸清systemjs的使用及配置并不那么容易,查找systemjs官网,也只是泛泛而谈地展示了几行代码而已,对配置也没有做过多说明。
在这里提出一个问题,例如我需要新建一个项目,这个项目要包含angular-cli工具、systemjs加载器,那么应该怎么来构建?下面一步步来
集成systemjs插件
1、创建一个angular2_systemjs工程来一步步实现对systemjs加载器的集成。创建目录结构如下
2、在工程根目录下创建package.json配置文件,标记本项目所需的 npm 依赖包,内容如下。
{
  "name": "angular2-systemjs",
  "version": "1.0.0",
  "scripts": {
    "start": "tsc && concurrently \"npm run tsc:w\" \"npm run lite\" ",
    "lite": "lite-server",
    "postinstall": "typings install",
    "tsc": "tsc",
    "tsc:w": "tsc -w",
    "typings": "typings"
  },
  "license": "ISC",
  "dependencies": {
    "@angular/common": "~2.4.0",
    "@angular/compiler": "~2.4.0",
    "@angular/core": "~2.4.0",
    "@angular/forms": "~2.4.0",
    "@angular/http": "~2.4.0",
    "@angular/platform-browser": "~2.4.0",
    "@angular/platform-browser-dynamic": "~2.4.0",
    "@angular/router": "~3.4.0",
    "@angular/upgrade": "2.0.0",
    "bootstrap": "^3.3.7",
    "reflect-metadata": "^0.1.3",
    "angular-in-memory-web-api": "~0.2.4",
    "systemjs": "0.19.40",
    "core-js": "^2.4.1",
    "rxjs": "5.0.1",
    "zone.js": "^0.7.4"
  },
  "devDependencies": {
    "concurrently": "^2.2.0",
    "lite-server": "^2.2.2",
    "typescript": "^2.0.2",
    "typings": "^1.3.2"
  }
}
3、在根目录下添加typings.json配置文件,为那些 TypeScript 编译器无法识别的库提供了额外的定义文件。
{
  "globalDependencies": {
    "core-js": "registry:dt/core-js#0.0.0+20160725163759",
    "jasmine": "registry:dt/jasmine#2.2.0+20160621224255",
    "node": "registry:dt/node#6.0.0+20160909174046"
  }
}
4、在src目录下创建tsconfig.json配置文件,定义了 TypeScript 编译器如何从项目源文件生成 JavaScript 代码。
{
  "compilerOptions": {
    "target": "es5",
    "module": "commonjs",
    "moduleResolution": "node",
    "sourceMap": true,
    "emitDecoratorMetadata": true,
    "experimentalDecorators": true,
    "lib": [ "es2015", "dom" ],
    "noImplicitAny": true,
    "suppressImplicitAnyIndexErrors": true
  },
  "exclude": [
    "node_modules"
  ]
}
5、至此,我们就可以通过cmd窗口,执行命令来添加本项目的依赖包或者文件。
$ cd angular2_systemjs
$ npm install
6、依赖添加完毕,在src目录下添加systemjs.config.js文件,为模块加载器提供了该到哪里查找应用模块的信息,并注册了所有必备的依赖包。
/**
 * System configuration for Angular samples
 * Adjust as necessary for your application needs.
 */
(function (global) {
  System.config({
    paths: {
      // paths serve as alias
      'npm:': 'node_modules/'
    },
    // map tells the System loader where to look for things
    map: {
      // our app is within the app folder
      app: 'app',
      // angular bundles
      '@angular/core': 'npm:@angular/core/bundles/core.umd.js',
      '@angular/common': 'npm:@angular/common/bundles/common.umd.js',
      '@angular/compiler': 'npm:@angular/compiler/bundles/compiler.umd.js',
      '@angular/platform-browser': 'npm:@angular/platform-browser/bundles/platform-browser.umd.js',
      '@angular/platform-browser-dynamic': 'npm:@angular/platform-browser-dynamic/bundles/platform-browser-dynamic.umd.js',
      '@angular/http': 'npm:@angular/http/bundles/http.umd.js',
      '@angular/router': 'npm:@angular/router/bundles/router.umd.js',
      '@angular/forms': 'npm:@angular/forms/bundles/forms.umd.js',
      // other libraries
      'rxjs':                       'npm:rxjs',
      'angular-in-memory-web-api': 'npm:angular-in-memory-web-api',
    },
    // packages tells the System loader how to load when no filename and/or no extension
    packages: {
      app: {
        main: './main.js',
        defaultExtension: 'js'
      },
      rxjs: {
        defaultExtension: 'js'
      },
      'angular-in-memory-web-api': {
        main: './index.js',
        defaultExtension: 'js'
      }
    }
  });
})(this);
7、在app文件夹下添加app.component.ts文件,创建一个根组件。
import { Component } from '@angular/core';
@Component({
selector: 'my-app',
template: '{{title}}
'
})
export class AppComponent {
title="app work!";
}
8、在app文件夹下添加app.module.ts,创建项目根模块
import {NgModule}      from '@angular/core';
import {BrowserModule} from '@angular/platform-browser';
import {FormsModule}   from '@angular/forms';
import {AppComponent}  from './app.component';

@NgModule({
    imports: [
        BrowserModule,
        FormsModule
    ],
    declarations: [
        AppComponent
    ],
    bootstrap: [AppComponent]
})
export class AppModule {
}
9、在app目录下添加main.ts,作为项目的启动器
import { platformBrowserDynamic } from '@angular/platform-browser-dynamic';
import { AppModule } from './app.module';
const platform = platformBrowserDynamic();
platform.bootstrapModule(AppModule);
10、至此,项目已经创建得差不多了,但是别着急,还需要添加一个文件bs-config.json到根目录,目的是告诉工程启动的时候哪里作为根目录寻找启动文件,这里配置src为应用启动的根目录。
{
  "server": {
    "baseDir": "src",
    "routes": {
      "/node_modules": "node_modules"
    }
  }
}
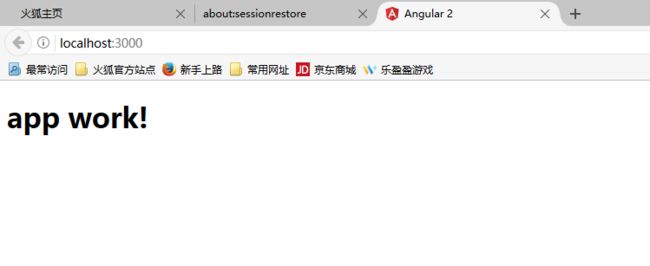
到这里,项目应该可以算完成了,执行npm start命令,同不是看到了app works!
11、工程创建完了,已经集成了systemjs插件,并完美地进行工作。但是有个问题,如果我的页面或者数据不是写在根组件里,实际情况会创建很多组件,最后通过根组件来加载,那应该怎么做,且往下看。在app文件夹下再创建一个home组件,并加载到根组件之上,看效果怎样。
home.component.ts文件:
import { Component } from '@angular/core';
@Component({
selector: 'home-app',
template: '{{message}}
'
})
export class HomeComponent {
message="这里是Home组件";
}
home.module.ts文件
import {NgModule}      from '@angular/core';
import {BrowserModule} from '@angular/platform-browser';
import {FormsModule}   from '@angular/forms';
import {HomeComponent} from "./home.component";

@NgModule({
    imports: [
        BrowserModule,
        FormsModule
    ],
    declarations: [
        HomeComponent
    ],
    bootstrap: [HomeComponent]
})
export class HomeModule {
}
app.component.ts文件:
import { Component } from '@angular/core';
@Component({
selector: 'my-app',
template: '{{title}}
app.module.ts文件
import {NgModule}      from '@angular/core';
import {BrowserModule} from '@angular/platform-browser';
import {FormsModule}   from '@angular/forms';
import {AppComponent}  from './app.component';
import {HomeComponent} from "./home/home.component";
import {HomeModule} from "./home/home.module";

@NgModule({
    imports: [
        BrowserModule,
        FormsModule
    ],
    declarations: [
        AppComponent,
        HomeComponent
    ],
    bootstrap: [AppComponent,HomeComponent]
})
export class AppModule {
}
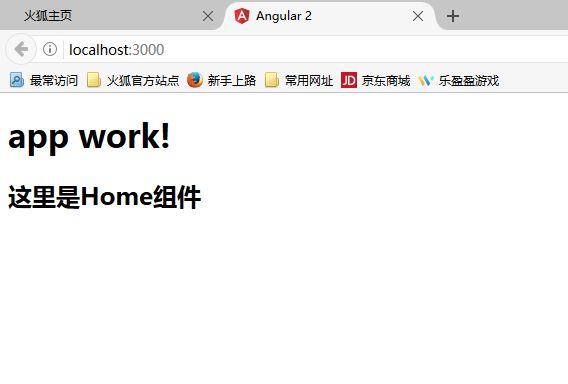
启动程序运行后结果如下
12、现在,我们可以在根组件上加载更多的自定义组件了。现在又遇到一个问题,假如我定义的组件是连接的html模板文件,效果怎样呢,下面试下。
修改home.component.ts文件
import { Component } from '@angular/core';

@Component({
    selector: 'home-app',
    templateUrl: 'home.component.html'
})
export class HomeComponent {
    message="这里是Home组件";
}
在home文件夹下创建home.component.html文件:
{{message}}
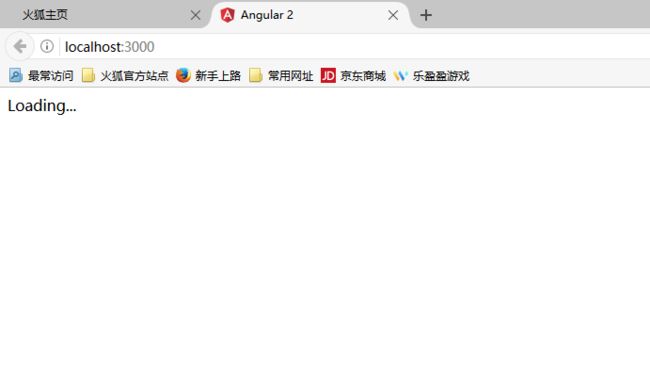
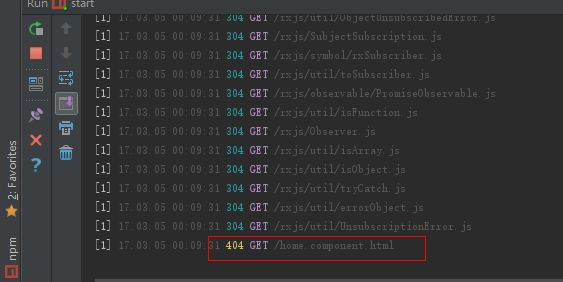
13、启动程序,结果如下,出现问题。查看控制台,出现404错误,说明程序无法加载这个html模板页面。
14、为了处理这个问题,需要在home.component.ts里添加一个moduleId,如下
到这里,全部内容结束
