快速回复
前言
通过这篇文章你会学到:
- 弄出本地通知
- 弄出有选项操作的通知
- 类似微信的快速回复
本地通知
我写成了函数的形式方便设置
func setNotification(body:String,timeToNotification:Double,soundName:String,category:String) -> UILocalNotification {
    let localNotification:UILocalNotification = UILocalNotification()
    localNotification.alertAction = "滑动查看信息"
    localNotification.alertBody = body

//在mainBundle的短于30秒的播放文件,否则就会是系统默认声音
    localNotification.soundName = soundName
    localNotification.fireDate = NSDate(timeIntervalSinceNow: timeToNotification)

//下面这条category语句是对应下面的“有选项的本地操作”章节
    localNotification.category = category

    return localNotification
}
在appDelegate里填下
//请求通知权限
func application(application: UIApplication, didFinishLaunchingWithOptions launchOptions: NSDictionary?) -> Bool {
            application.registerUserNotificationSettings(UIUserNotificationSettings(forTypes: [.Sound , .Alert , .Badge], categories: nil))

}
使用时:
//设置10秒的提醒
let completeNotification = setNotification("时间到了,已完成任务",timeToNotification: 10,soundName: "提醒音乐.mp3",category: nil)

UIApplication.sharedApplication().scheduleLocalNotification(completeNotification)
10秒后

通知
有选项的本地操作
效果如图:
侧滑出选项
设置Notification Action 和 Category
        //MARK: - 提醒操作 设置
        let notificationActionOk : UIMutableUserNotificationAction = UIMutableUserNotificationAction()
        notificationActionOk.identifier = "completeRemindRater"
        notificationActionOk.title = "再工作一会儿"
//是否取消提醒
        notificationActionOk.destructive = false
//是否需要权限,例如锁屏的时候,执行操作是否需要解锁再执行
        notificationActionOk.authenticationRequired = false
//启动app还是后台执行
        notificationActionOk.activationMode = UIUserNotificationActivationMode.Background

        let notificationActionRestNow: UIMutableUserNotificationAction = UIMutableUserNotificationAction()
        notificationActionRestNow.identifier = "relaxNow"
        notificationActionRestNow.title = "休息"
        notificationActionRestNow.destructive = false
        notificationActionRestNow.authenticationRequired = false
        notificationActionRestNow.activationMode = UIUserNotificationActivationMode.Background


        //MARK: -Notification Category 设置
        let notificationCompleteCategory: UIMutableUserNotificationCategory = UIMutableUserNotificationCategory()
        //记住这个identifier ,待会用
        notificationCompleteCategory.identifier = "COMPLETE_CATEGORY"
        notificationCompleteCategory.setActions([notificationActionOk,notificationActionRestNow], forContext: .Default)
        notificationCompleteCategory.setActions([notificationActionOk,notificationActionRestNow], forContext: .Minimal)

        //请求用户允许通知
        application.registerUserNotificationSettings(UIUserNotificationSettings(forTypes: [.Sound , .Alert , .Badge], categories: NSSet(array: [notificationCompleteCategory]) as? Set))
接着在使用时,则将category参数的nil改为"COMPLETE_CATEGORY"
//跟之前的一样,10秒后出通知,但category不同
let completeNotification = setNotification("时间到了,已完成任务",timeToNotification: 10,soundName: "提醒铃声.mp3",category: "COMPLETE_CATEGORY")

UIApplication.sharedApplication().scheduleLocalNotification(completeNotification)
在appDelegate使用下面method处理按下的选项
func application(application: UIApplication, handleActionWithIdentifier identifier: String?, forLocalNotification notification: UILocalNotification, completionHandler: () -> Void) {
    print("按下的选项的identifier是:\\\\(identifier)")
}
按下休息时,终端显示按下的选项的identifier是:relaxNow
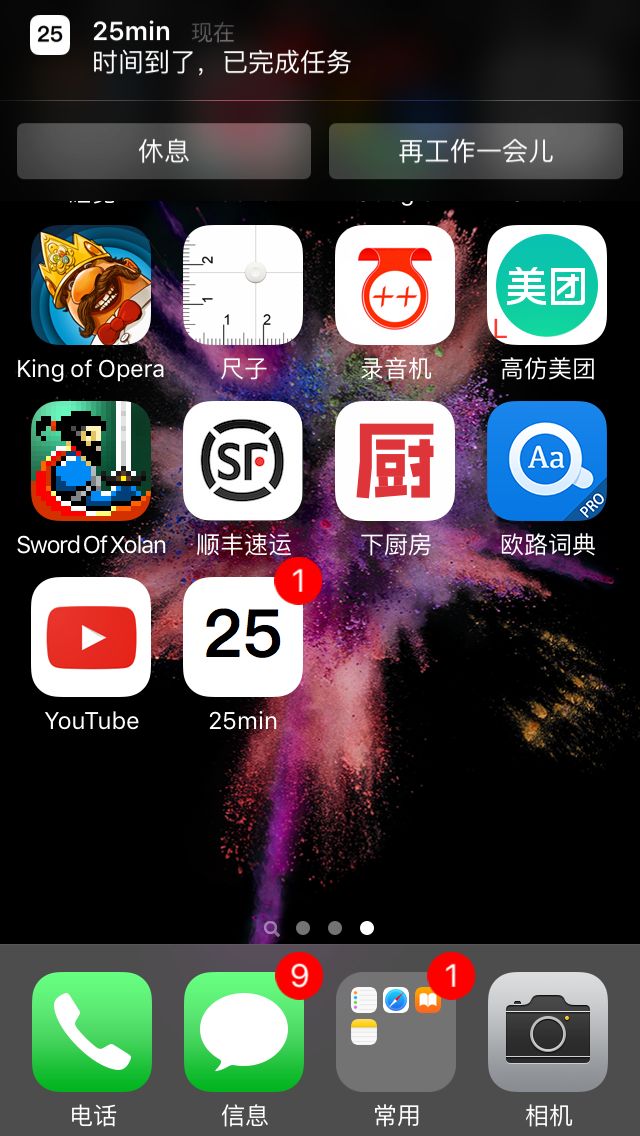
信息下滑有选项
通知快速回复
实现类似微信的快速回复
效果如图:
实现基本同上面的选项通知一样,就是创建时修改 action的behavior为.TextInput:
        let replyAction = UIMutableUserNotificationAction()
        replyAction.title = "回复"
        replyAction.identifier = "inline-reply"
        replyAction.activationMode = .Background
        replyAction.authenticationRequired = false
        replyAction.behavior = .TextInput
接着像设置有选项的操作那样设置Category
        let notificationCategory:UIMutableUserNotificationCategory = UIMutableUserNotificationCategory()
        notificationCategory.identifier = "REPLY_CATEGORY"
        notificationCategory.setActions([replyAction], forContext: UIUserNotificationActionContext.Default)

        application.registerUserNotificationSettings(UIUserNotificationSettings(forTypes: [.Sound , .Alert , .Badge], categories: NSSet(array: [notificationCategory]) as? Set))
设置提醒,使用本地操作时那个函数setNotification
        let replyNotification = setNotification("说些什么吧", timeToNotification: 10, soundName: "提醒音乐.mp3" , category: "REPLY_CATEGORY")
        UIApplication.sharedApplication().scheduleLocalNotification(replyNotification)
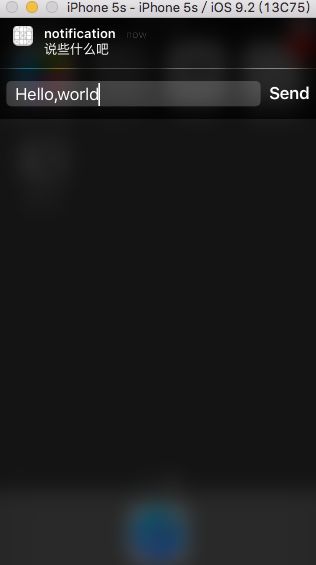
快速回复
处理回复:则在appDelegate下添加:
    func application(application: UIApplication, handleActionWithIdentifier identifier: String?, forLocalNotification notification: UILocalNotification, withResponseInfo responseInfo: [NSObject : AnyObject], completionHandler: () -> Void) {
        if let response = responseInfo[UIUserNotificationActionResponseTypedTextKey]{

            let responseText = response as! String
                print("\(responseText)")
        }
        completionHandler()
    }
在快速回复如上图打下Hello,world!,终端就会出现:

终端
一些tips
//取消本地通知
UIApplication.sharedApplication().cancelAllLocalNotifications()
//修改App Icon上的数字如下图中右上角的数字
UIApplication.sharedApplication().applicationIconBadgeNumber = 1

icon
最后
通知的实现基本就如此了。
(END and Thank U)
参考链接:
纯本地通知
有选项的本地操作
通知快速回复