作为博客园的处女作,本文将引导大家理解Web Server的原理。
Table of contents
- 常见Web Server及其功能
- 低功耗WiFi
- 嵌入式Web Server的应用
- Energia Project无缝支持Arduino框架在TI LaunchPad上的扩展
- 基于CC3200如何构建一个嵌入式Web Server
做过Web开发的同学都知道,Web Server是用来处理http(POST、GET、PUT、DELETE等)请求的系统,有大名鼎鼎的Apache http Server,也有企业应用中的Microsoft IIS。
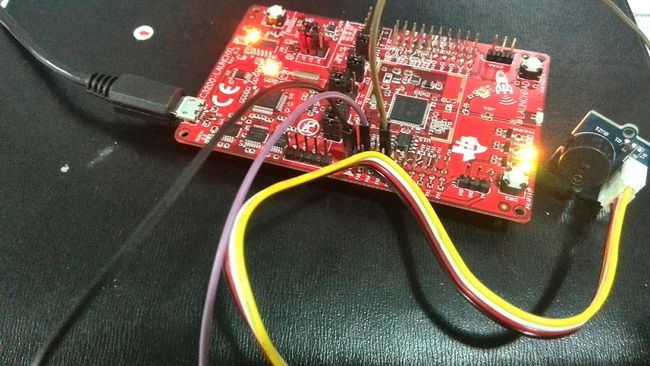
我们在IE输入URL:192.168.18.108/cc3200, 登陆到CC3200构建的Web Server上,其中,cc3200是统一资源标示符,可在Energia中修改。

Energia是个什么东西?他是TI从Arduino那边Fork过来的,正对MSP430等TI的芯片重新封装的一个IDE。非常适合学生,创客使用。
/* Copyright (c) 2014 等风的猪. This program is free software; you can redistribute it and/or modify it under the terms of the GNU Lesser General Public License as published by the Free Software Foundation, either version 3 of the License, or (at your option) any later version. This program is distributed in the hope that it will be useful, but WITHOUT ANY WARRANTY; without even the implied warranty of MERCHANTABILITY or FITNESS FOR A PARTICULAR PURPOSE. See the GNU Lesser General Public License for more details. You should have received a copy of the GNU Lesser General Public License along with this program; if not, see <http://www.gnu.org/licenses/>. */ #include "SPI.h" #include "WiFi.h" #include "WebServer.h" //your network name and password char ssid[] = "COAP-STATION"; char password[] = "这个真不能告诉你"; // CHANGE THIS TO YOUR OWN UNIQUE VALUE static uint8_t mac[6] = { 0x02, 0xAA, 0xBB, 0xCC, 0x00, 0x22 }; // CHANGE THIS TO MATCH YOUR HOST NETWORK static uint8_t ip[4] = { 192, 168, 1, 210 }; // area 51! /* all URLs on this server will start with /buzz because of how we * define the PREFIX value. We also will listen on port 80, the * standard HTTP service port */ #define PREFIX "/cc3200" WebServer webserver(PREFIX, 80); /* the piezo speaker on the Danger Shield is on PWM output pin #3 */ #define BUZZER_PIN 24 /* this is the number of microseconds to wait after turning the * speaker on before turning it off. */ int buzzDelay = 0; /* toggle is used to only turn on the speaker every other loop iteration. */ char toggle = 0; /* This command is set as the default command for the server. It * handles both GET and POST requests. For a GET, it returns a simple * page with some buttons. For a POST, it saves the value posted to * the buzzDelay variable, affecting the output of the speaker */ void buzzCmd(WebServer &server, WebServer::ConnectionType type, char *, bool) { if (type == WebServer::POST) { bool repeat; char name[16], value[16]; do { /* readPOSTparam returns false when there are no more parameters * to read from the input. We pass in buffers for it to store * the name and value strings along with the length of those * buffers. */ repeat = server.readPOSTparam(name, 16, value, 16); /* this is a standard string comparison function. It returns 0 * when there's an exact match. We're looking for a parameter * named "buzz" here. */ if (strcmp(name, "buzz") == 0) { /* use the STRing TO Unsigned Long function to turn the string * version of the delay number into our integer buzzDelay * variable */ buzzDelay = strtoul(value, NULL, 10); } /* handle led */ else if(strcmp(name, "red_led") == 0) { int16_t state = strtoul(value, NULL, 10); boolean pin_status = (state == 1) ? HIGH : LOW; digitalWrite(RED_LED, pin_status); Serial.println("red button\n"); Serial.println(value); } } while (repeat); // after procesing the POST data, tell the web browser to reload // the page using a GET method. server.httpSeeOther(PREFIX); return; } /* for a GET or HEAD, send the standard "it's all OK headers" */ server.httpSuccess(); /* we don't output the body for a HEAD request */ if (type == WebServer::GET) { /* store the HTML in program memory using the P macro */ P(message) = "" "CC3200 LaunchPad " "" "" "" "" "" "" "" "" "Control the Device on LaunchPad:
" "" "0
" "Red Led" "" ""; /* send the html back to the browser */ server.printP(message); } } void setup() { Serial.begin(9600); // set the PWM output for the buzzer to out pinMode(BUZZER_PIN, OUTPUT); pinMode(RED_LED, OUTPUT); // setup the Ehternet library to talk to the Wiznet board Serial.print("Attempting to connect to Network:"); Serial.print(ssid); WiFi.begin(ssid, password); while(WiFi.status() != WL_CONNECTED) { Serial.print("."); delay(300); } Serial.println("\nYou're connected to the network"); Serial.println("Waiting for an ip address"); while (WiFi.localIP() == INADDR_NONE) { // print dots while we wait for an ip addresss Serial.print("."); delay(300); } // you're connected now, so print out the status printWifiStatus(); /* register our default command (activated with the request of * http://x.x.x.x/buzz */ webserver.setDefaultCommand(&buzzCmd); /* start the server to wait for connections */ webserver.begin(); } void loop() { // process incoming connections one at a time forever webserver.processConnection(); /* every other time through the loop, turn on and off the speaker if * our delay isn't set to 0. */ if ((++toggle & 1) && (buzzDelay > 0)) { digitalWrite(BUZZER_PIN, HIGH); delayMicroseconds(buzzDelay); digitalWrite(BUZZER_PIN, LOW); } } void printWifiStatus() { // print the SSID of the network you're attached to: Serial.print("Network Name: "); Serial.println(WiFi.SSID()); // print your WiFi shield's IP address: IPAddress ip = WiFi.localIP(); Serial.print("IP Address: "); Serial.println(ip); // print the received signal strength: long rssi = WiFi.RSSI(); Serial.print("signal strength (RSSI):"); Serial.print(rssi); Serial.println(" dBm"); }